How to organize taking the Attendance?
In this section I am going to explain my attendance practice with Microsoft Teams and SharePoint.
For the first place, I am using the Microsoft meeting attendance available after classes. Taking this service, one must be very careful. It is important not to allow students to pass by the lobby. This option is activated through the settings of scheduled meetings. In general, only a teacher must initiate the class meetings. Nothing bad for attendance information happens if some students initiate the meeting through the calendar, since they be only allowed to wait in the lobby.
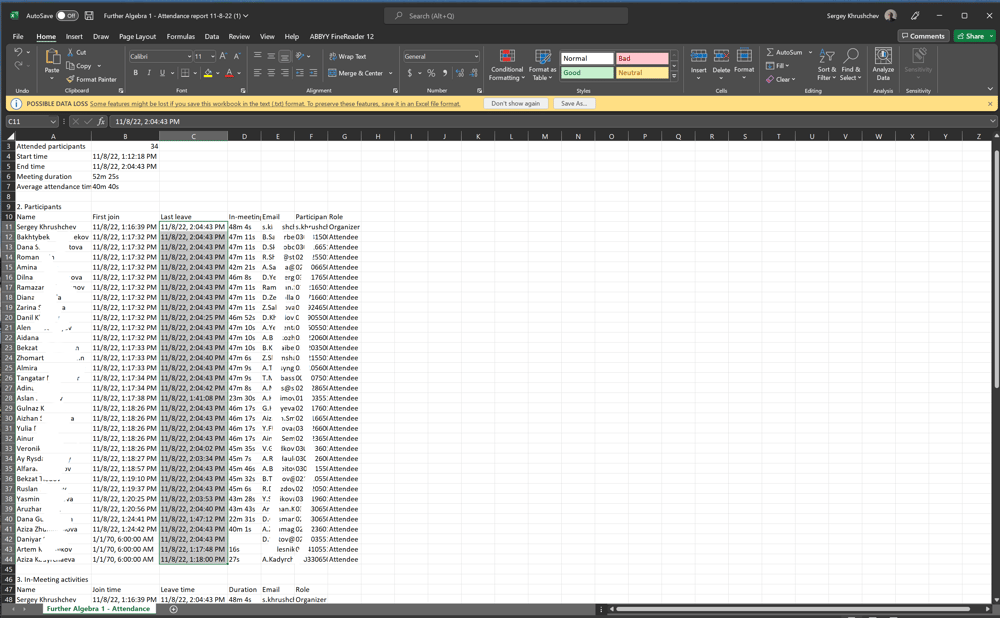
The second rule is to download the attendance csv file, see pic. 3, after every meeting immediately. It can be found through the ellipsis at the right corner of the meeting report in the publication tab of the class team, see pic. 2. This Excel file gives a teacher a complete list of those students who formally participated in the meeting.
However, it is not right to consider them as attendee of the class for this particular academic hour. They could only enter the meeting in time and do something else. Some teachers require that every student must turn on the camera. In big classes it is difficult to control this. There may also be complains from students' side that the internet is slow.
To solve this problem, I created an automatic flow, see the page of this site on attendance taken at random. This flow automatically sends students at randomly chosen moment of the class hour a link to the attendance page created through Excel Online (Business). Students have not more than 2-3 minutes to mark this attendance.
These two different ways allow me to select later only those students who are in my class during the lecture and also follow me. To save time, it is important to analyze information obtained efficiently. I consider two cases. The first case is the case of a lecture for the whole team, and the second one is the case of a class group for practice.
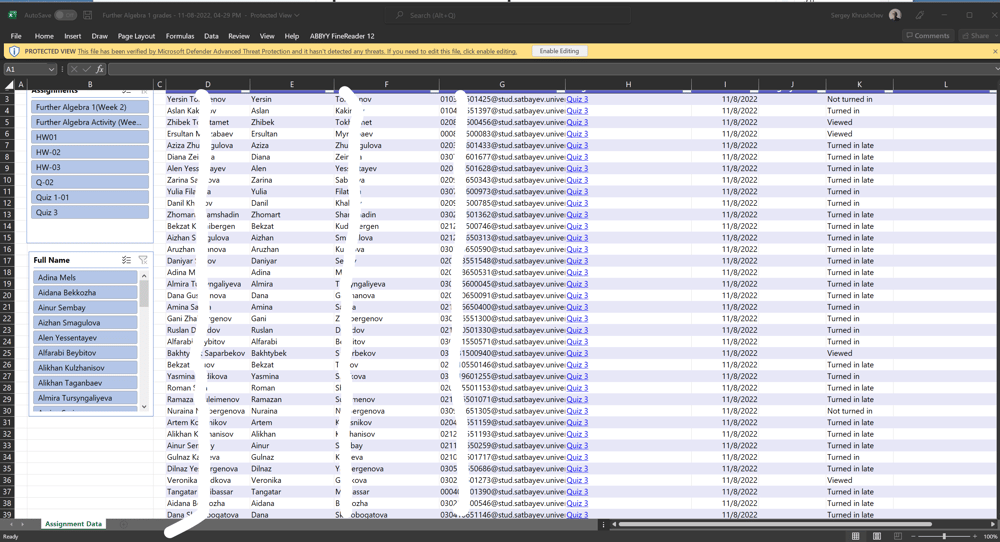
Pic. 1
To make the class roaster, I apply a simple method explained here. This gives me the Excel table shown on pic. 1. Column D contains all students names arranged in the same order as in Attendance app. I follow Microsoft instructions to force all students to enter the class meetings through the lobby. The only organizer in the meetings settings is me.

Pic. 2
I record all my regular meetings. The system creates an information panel as soon as the meeting is finished, see pic. 2. To open the attendee list, I click the ellipse shown on pic. 2 and save it to my PC, see pic. 3.
Pic. 3
Column A includes the names of all students participated in the meeting with more details specified in other columns of this table.
Pic. 4
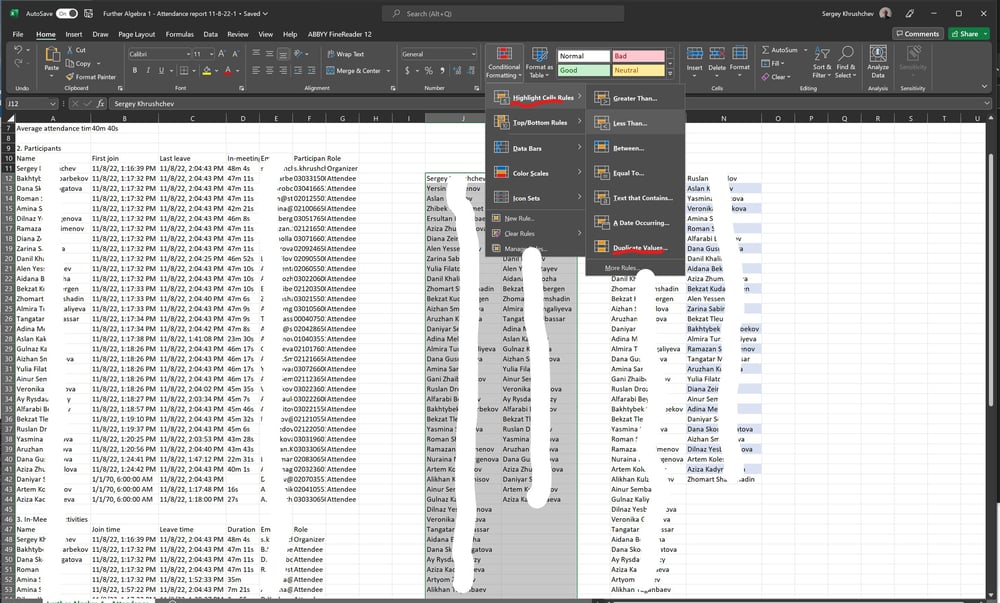
I copy Column D, see pic. 1, and paste it in Columns J and M, see pic. 4. I paste Column A of the table above to Column K. The column of the "true attendance" is pasted to Column N, see pic. 4. I select both lists in J and K. Then I click the "Conditional Formatting" icon and select "Highlight Cells Rules" followed by selection of "Duplicate Values."
Pic. 5
I confirm the red color for the first pair of compared columns and green for the second one. The selected students in Column J are those who didn't attend the meeting, whereas the selected students in Column M are those who didn't follow the lecture. At the beginning of every semester, I create the Attendance list using the same flow, which I use for Grade Book creation. The difference is that instead of assignments columns I create 15 weeks columns. I increase the number of missed classes using the Excel table shown on pic. 5.
Pic. 6
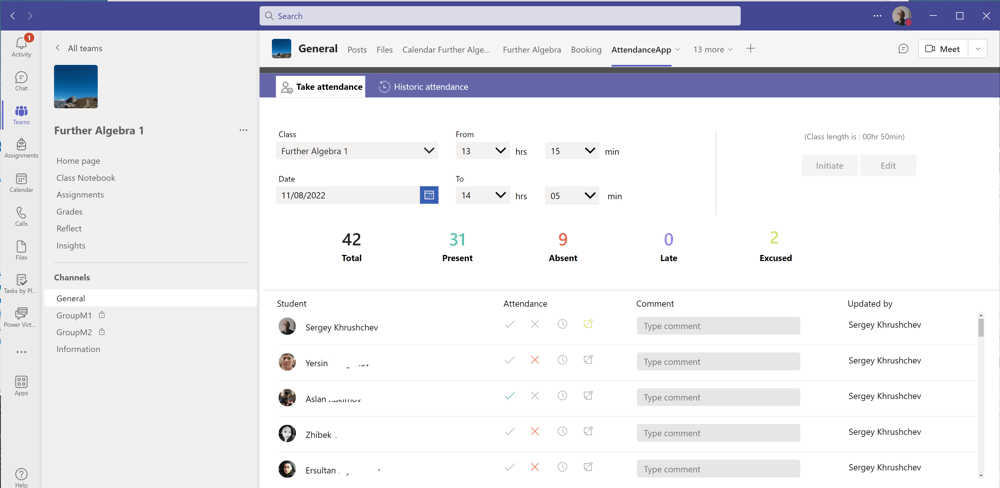
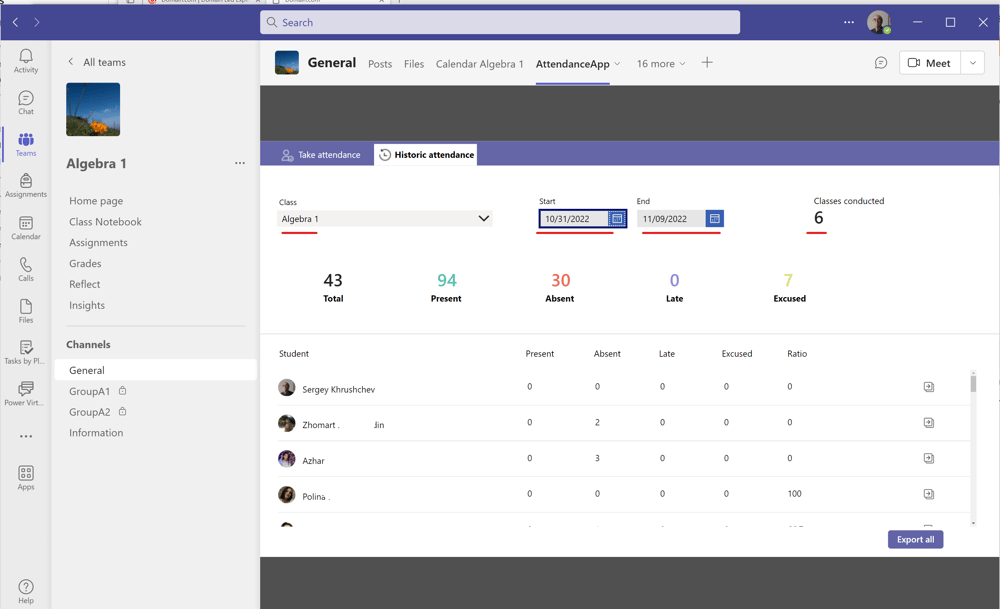
For the purpose of further statistical analysis, I also mark all absent students for a given class in the Attendance app, see pic. 6 and 8. Since both the grades export and this application use the same source of data in the class team, the students' orders are the same. The simplifies marking a lot. After marking the absent students all others can be considered as present.
Pic. 7
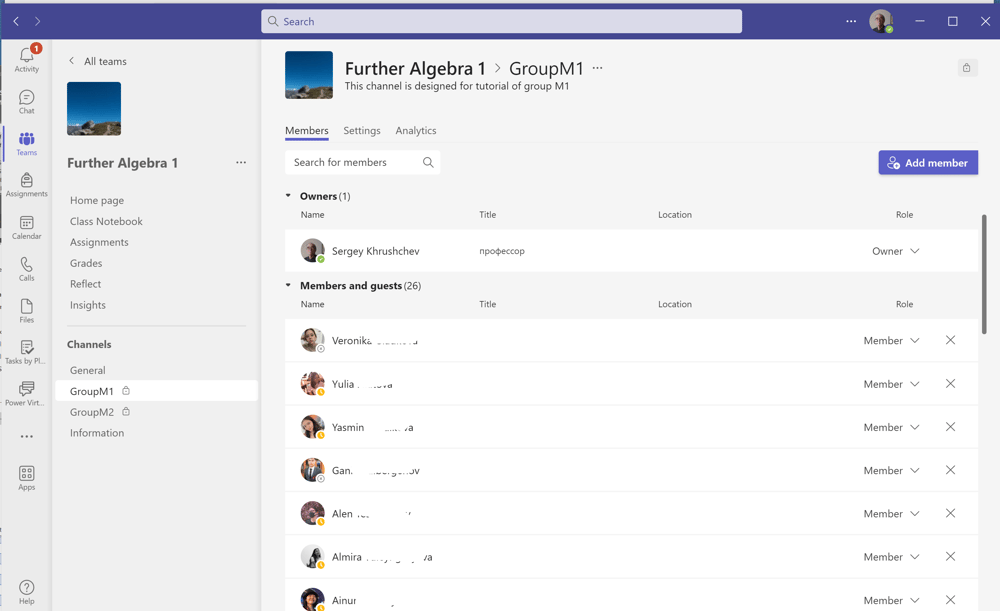
To mark attendance in groups for practice, I usually arrange private channels, for students could easily determine if they attend a right class. They cannot enter the group if they are not in the list. Although it is formally possible to arrange scheduled meetings in private channels, I do not recommend doing this, since in fact these meetings run in the general channel of the team. Using Teams Power Shell, one can get a csv file listing all students of the class. It is also possible to get this list as it is indicated on this page. After that students can be distributed in groups in one Excel table, which must be saved for future use. One can upload students to private channels as it is shown in section 29 of my recent textbook available for reading on the home page of this site. One can also get it by email. If by some reasons you didn't keep these records, you can just copy the list on pic. 7 and paste it to a word page. You edit the column obtained by removing the empty spaces between the students' names and the words "Member." Then the column obtained can be pasted into a fresh Excel file.
Pic. 8