A mobile PowerApps application replacing the Kaizala Pro Attendance Card

Attendance Mobile
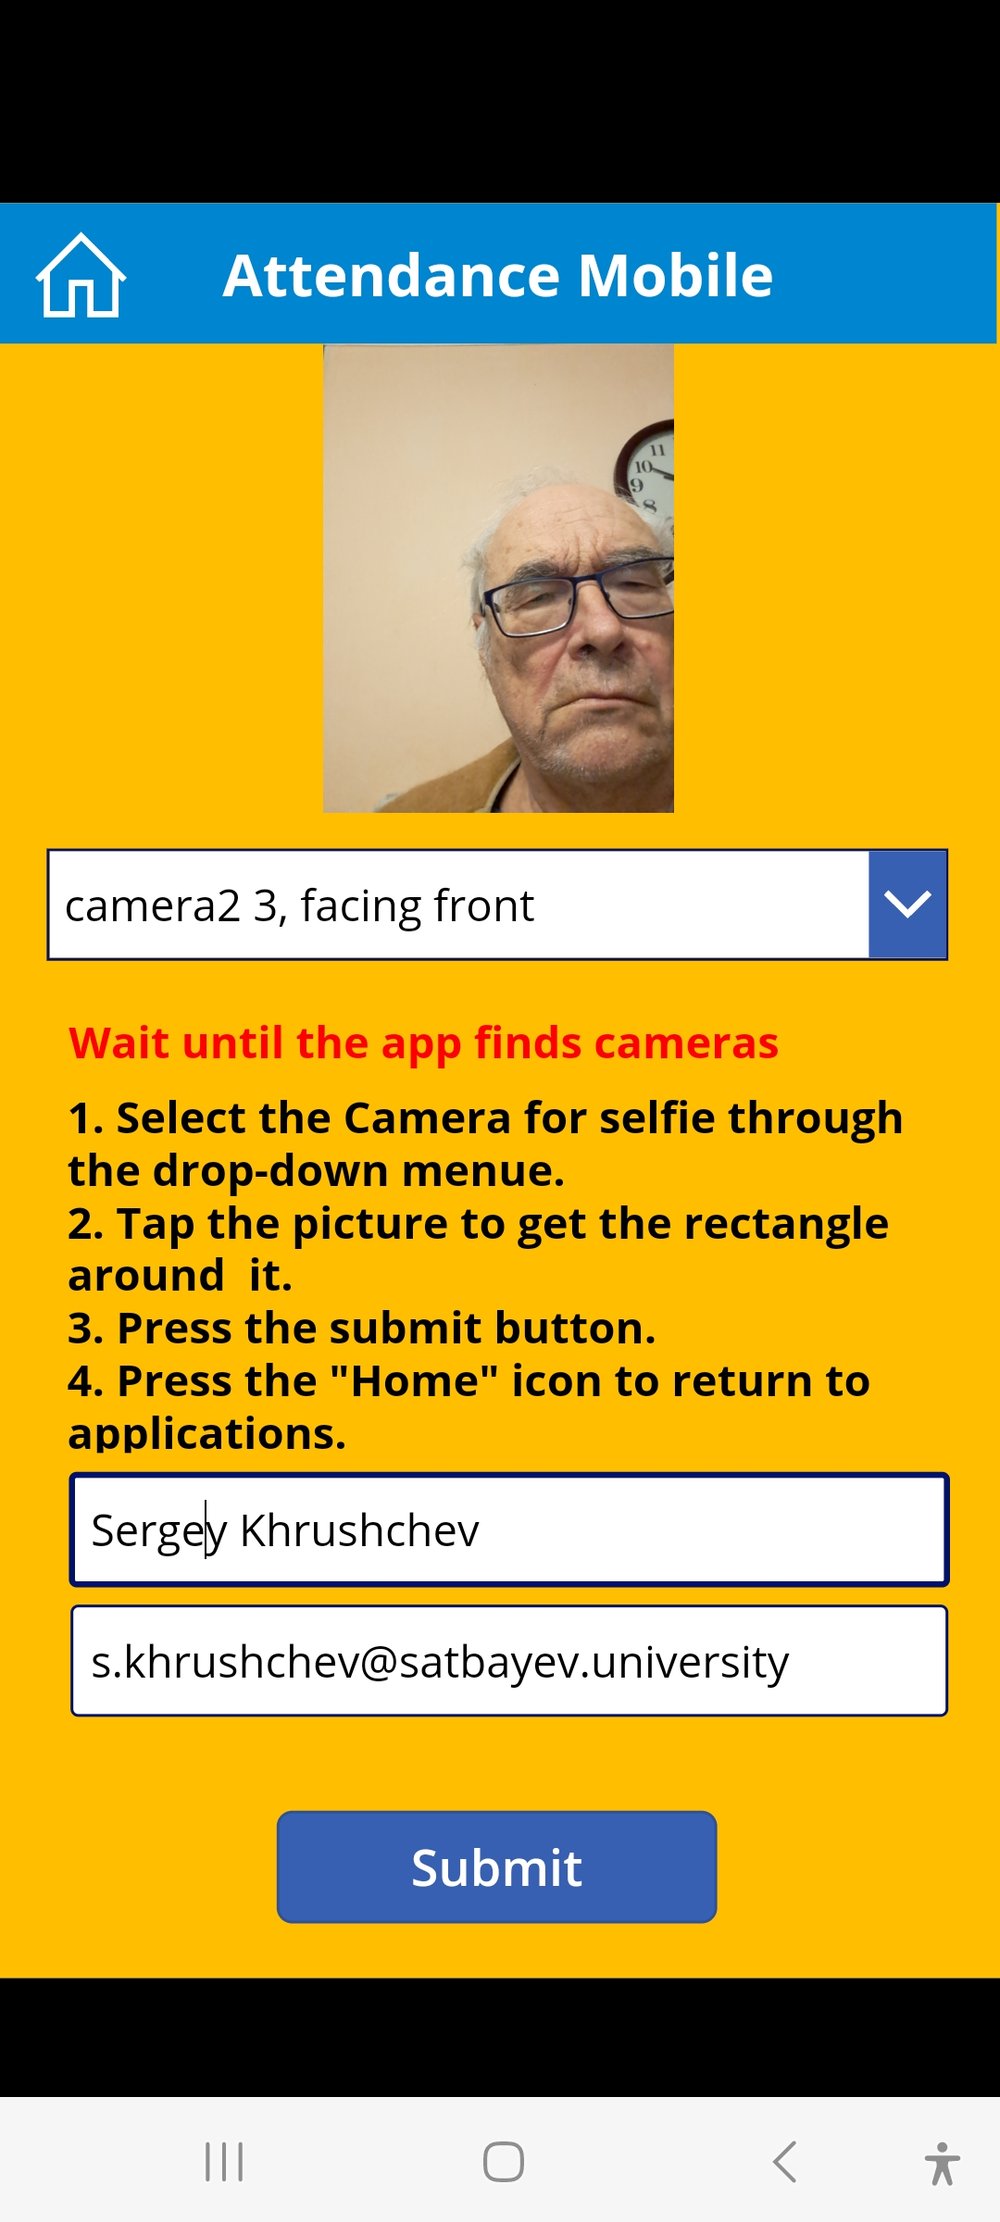
From the students' side this application looks like it is shown on the picture. The drop-down menu controls the switch between the back and front cameras. Two text input fields automatically display the Full name of and the email address in Outlook of a student. The instruction is shown in the simple text field. When a student taps the camera window, a black rectangle appears around it and at the same time the Full name field shows the date and time of the selfie. The student presses the "Submit" button and all requires data arrive to a new row in the corresponding Microsoft Lists list.
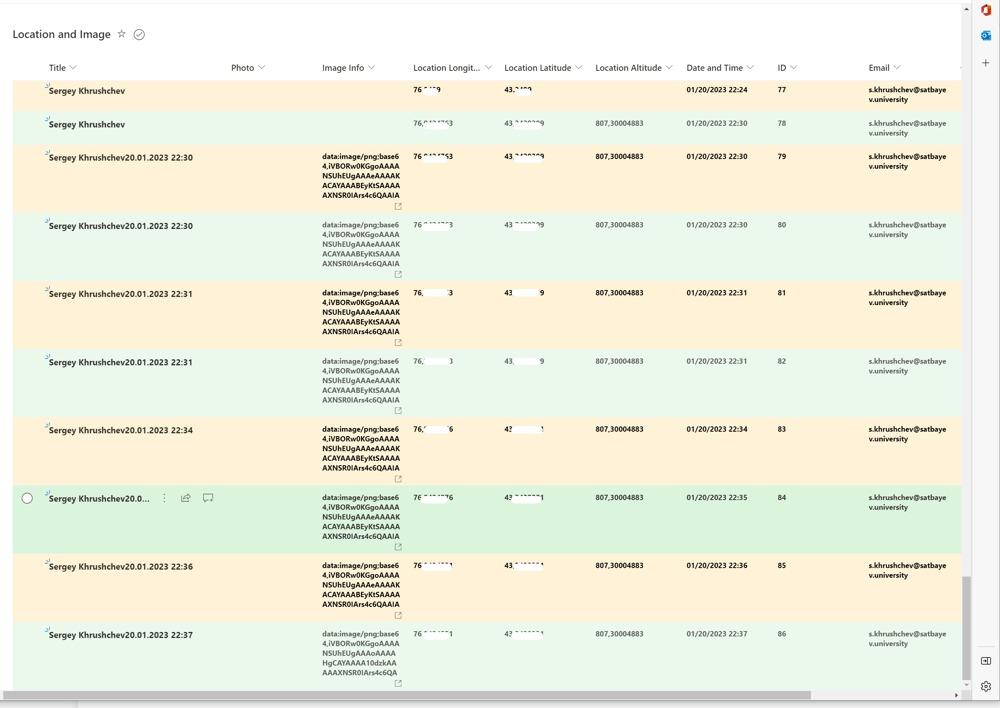
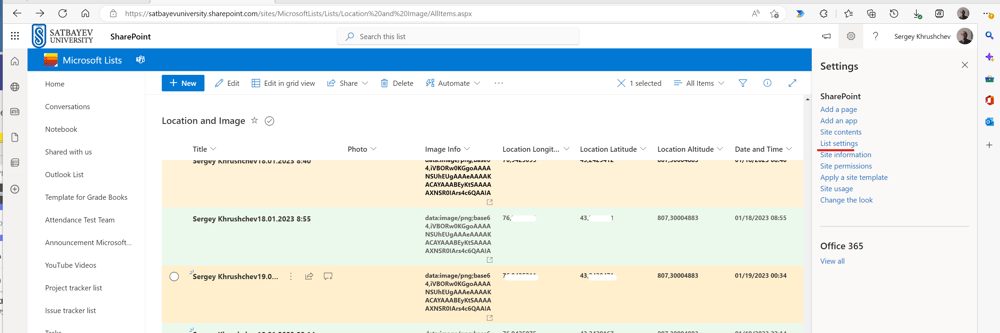
In the Title column the list shows student's Full Name and the date and time of the selfie. The "Photo" column is reserved for the teacher's application which shows the data of this list. The "Image info" column includes the selfies taken by the application. The "Longitude," "Latitude," and "Altitude" columns include three geo location coordinates at the moment of the selfie taken. The "Date and Time" column repeats the date and time of the selfie. The "ID" column is the standard column of every Microsoft Lists list. Finally, the "Email" column includes student's emails. If you compare this outcome with that of the Kaizala Pro attendance card, then you may notice that this list does not include the mobile number of the student. I do not think that it is possible to get it directly from the mobile phone in Power Apps. Notice. that in this application the teacher also gets the value of the Altitude. It is not the case with the Kaizala Attendance card.
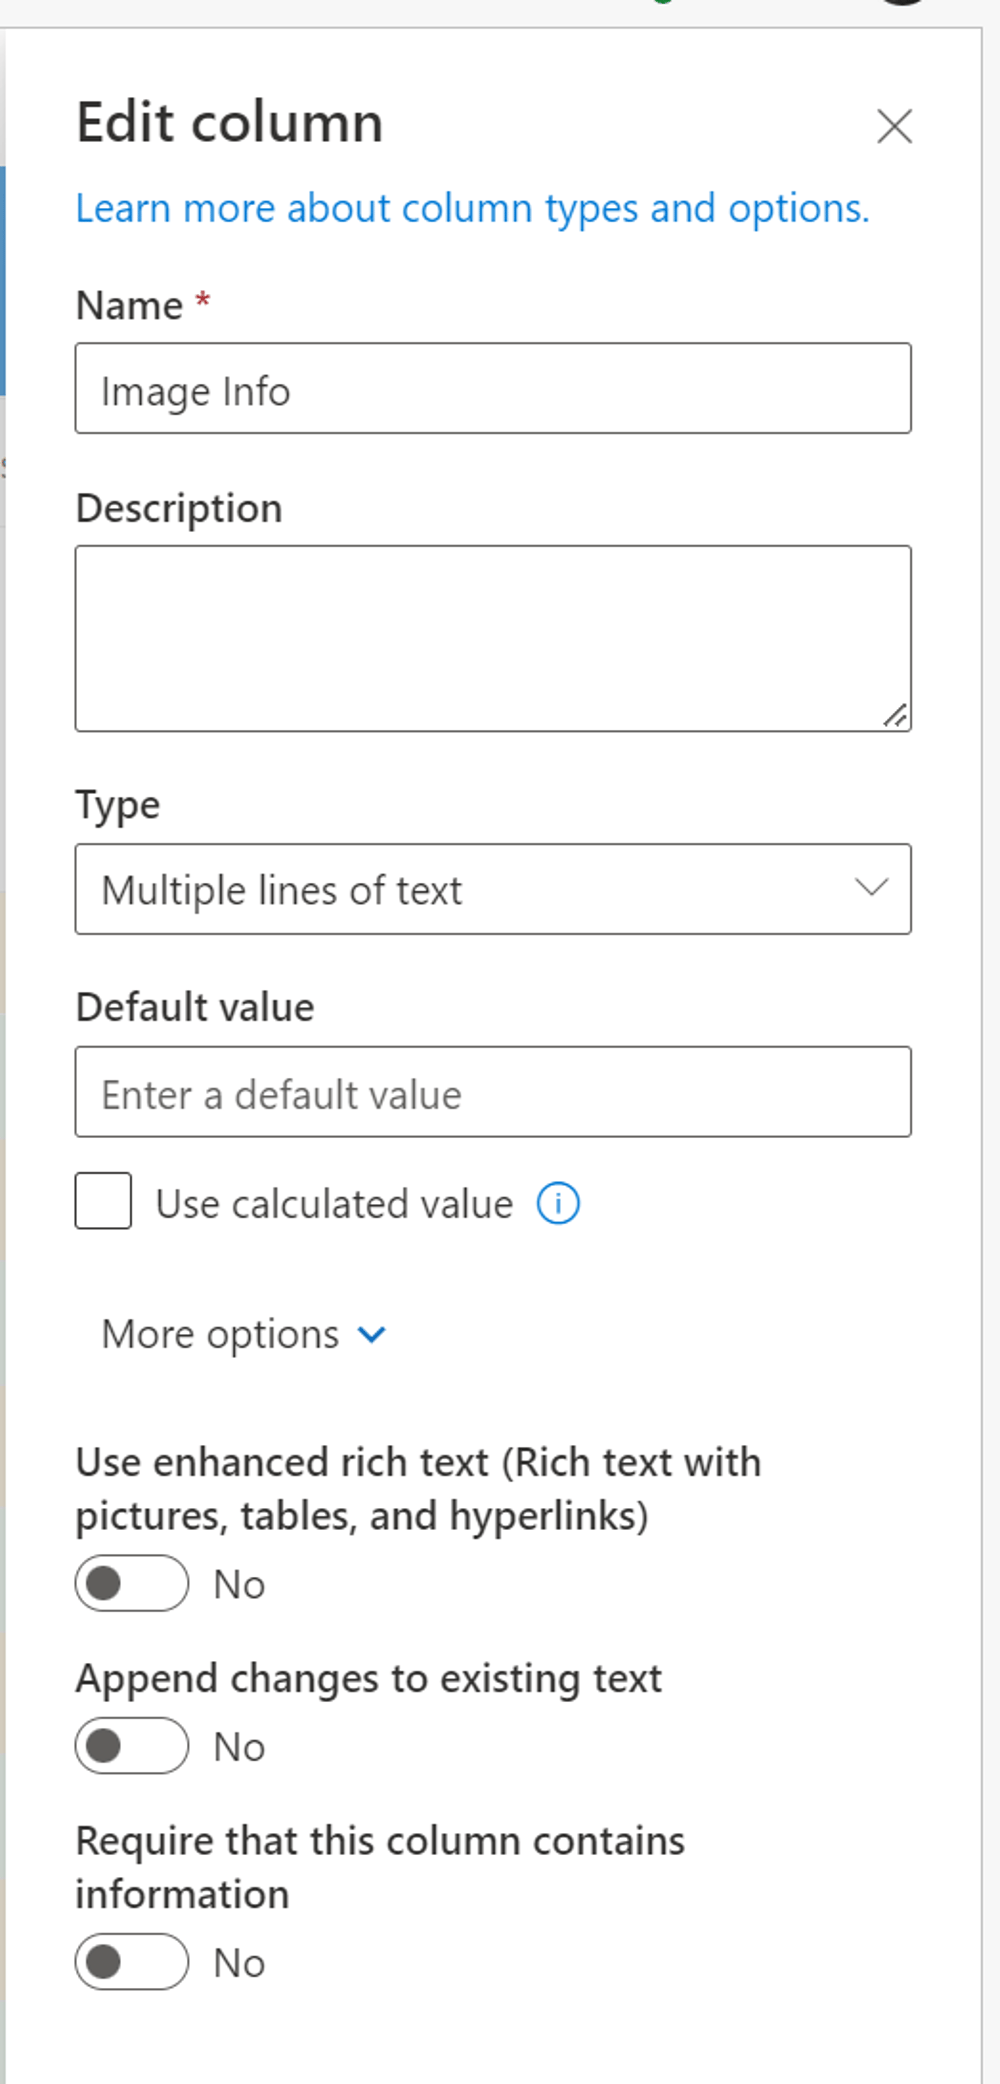
The properties of the "Image Info" column are shown on the right.
The properties of the "Photo" column are shown on the right.
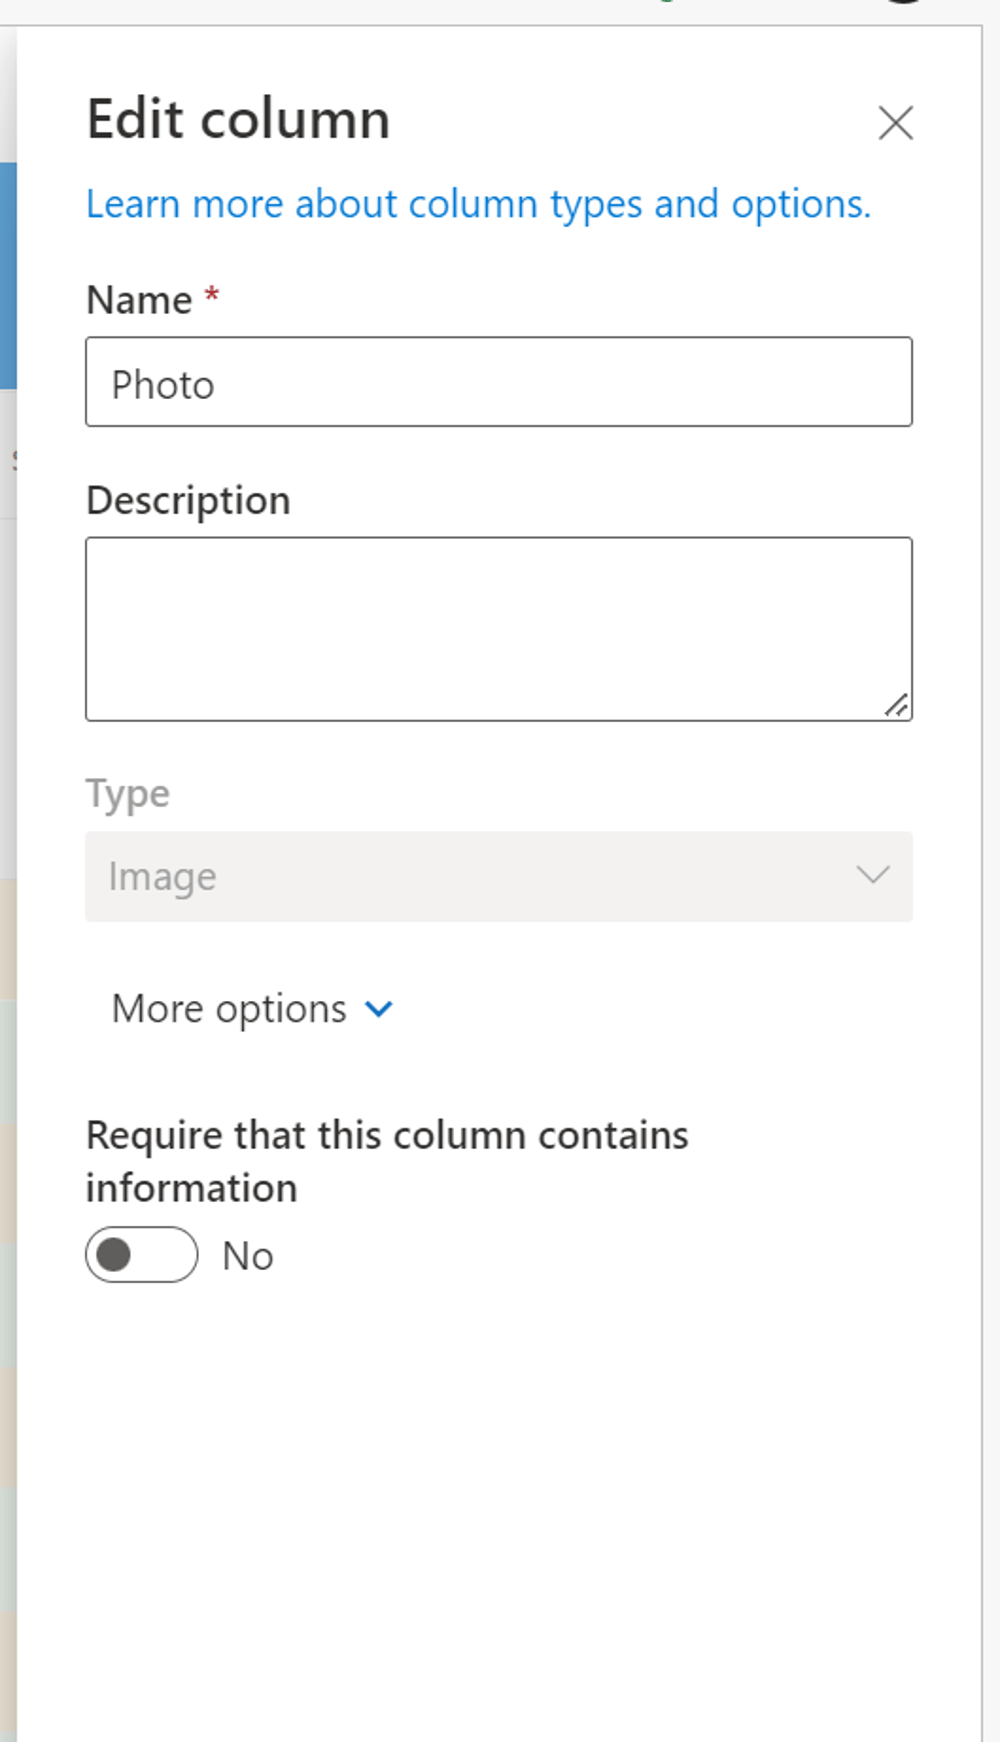
To collect image and location data, we create a list named “Location and image.” This list is created in the SharePoint of the class team by adding the columns of “Single line text” type with the names “Location Longitude,” “Location Latitude,” “Location Altitude,” “Email.” The column “Image info” must be of the “Multiline lines of text” type and it must have the switch “Use enhanced rich text” be set to the off position in the “More options” menu. The column “Photo” must be of the “Image” type and is included for further purposes. Finally, the column “Date and Time” must be of the “Date and Time” type. No additional options are required.
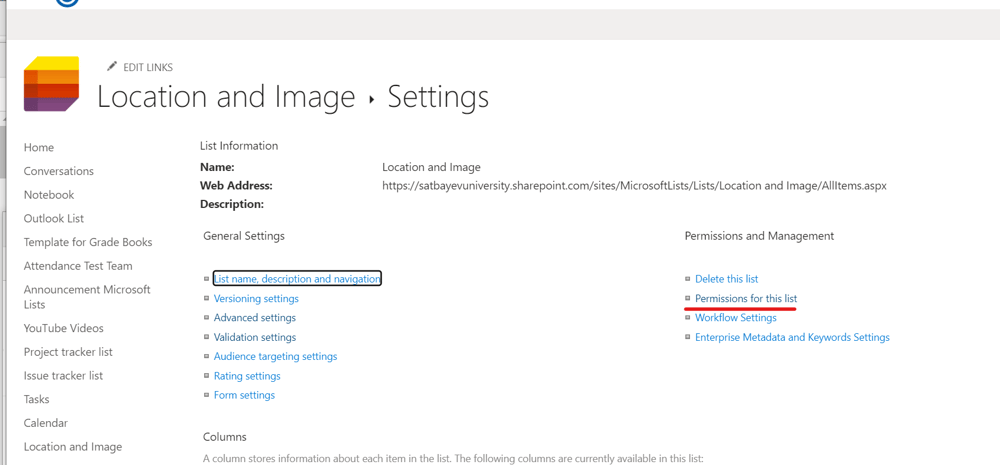
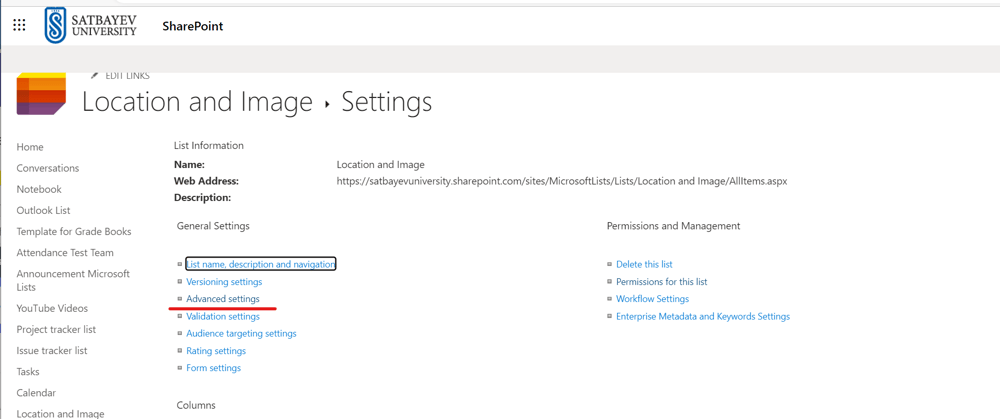
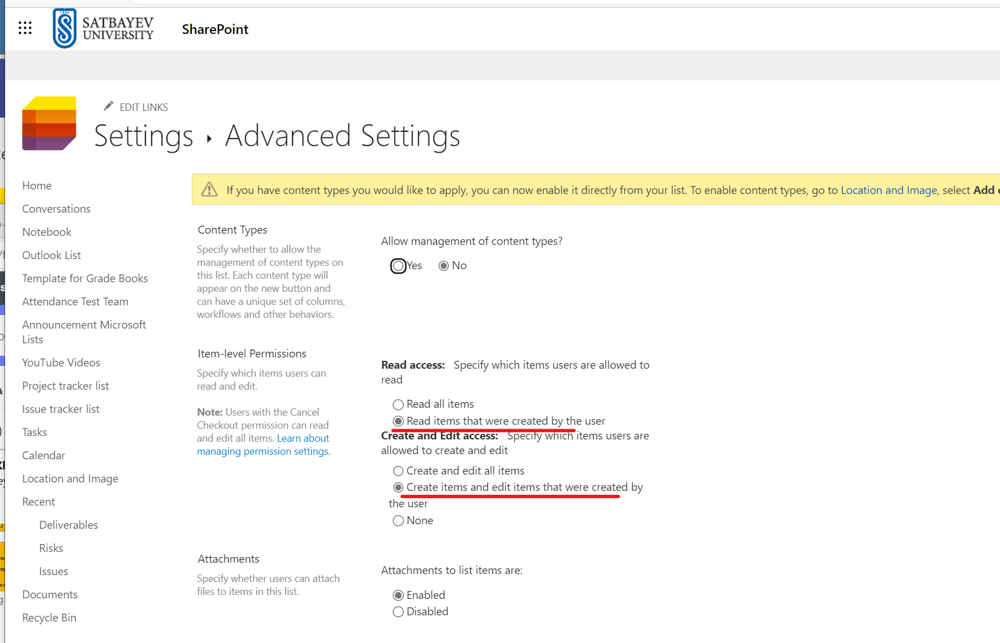
By default, every student in the class, as a member, is granted the rights to view and edit any SharePoint list. This, however, can be restricted by the teacher to view and edit only option in the list created by this very student. To do this the teacher opens the list and clicks the setting icon. This action opens the window with the option “List Settings.” A click onto the “Lists settings” option opens the window with this very list settings.
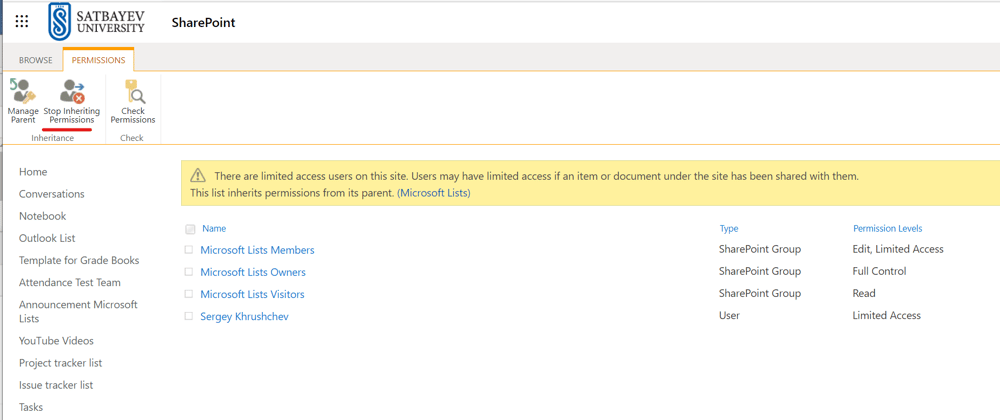
First, we click the “Permission for the list” option. This opens the interface to stop inheritance permissions sharing for this list.
To do this we press the “Grant Permissions” icon shown on the picture. The result of this action is shown on the picture below.
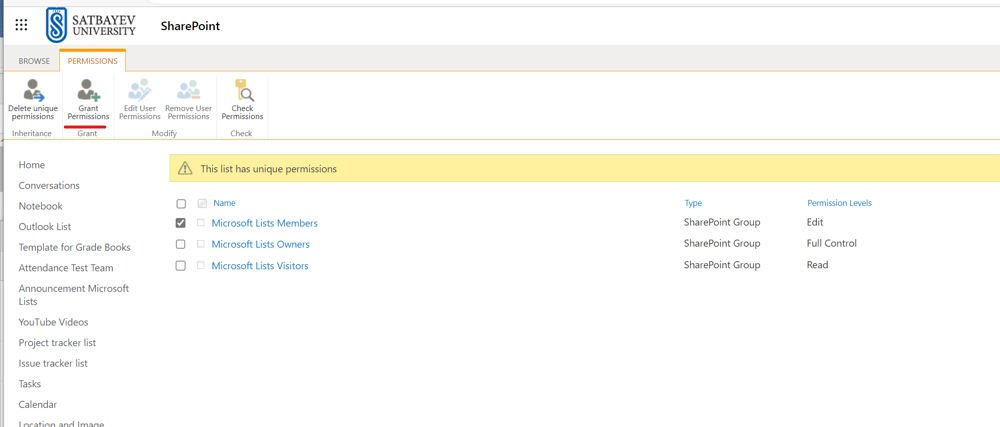
You can find a few switches in this window. We are interested in the “Read access section,” and mark the circles shown on the picture below.

I click the icon "Blank app" and the system leads me to the Studio.

I press the "Create" button.
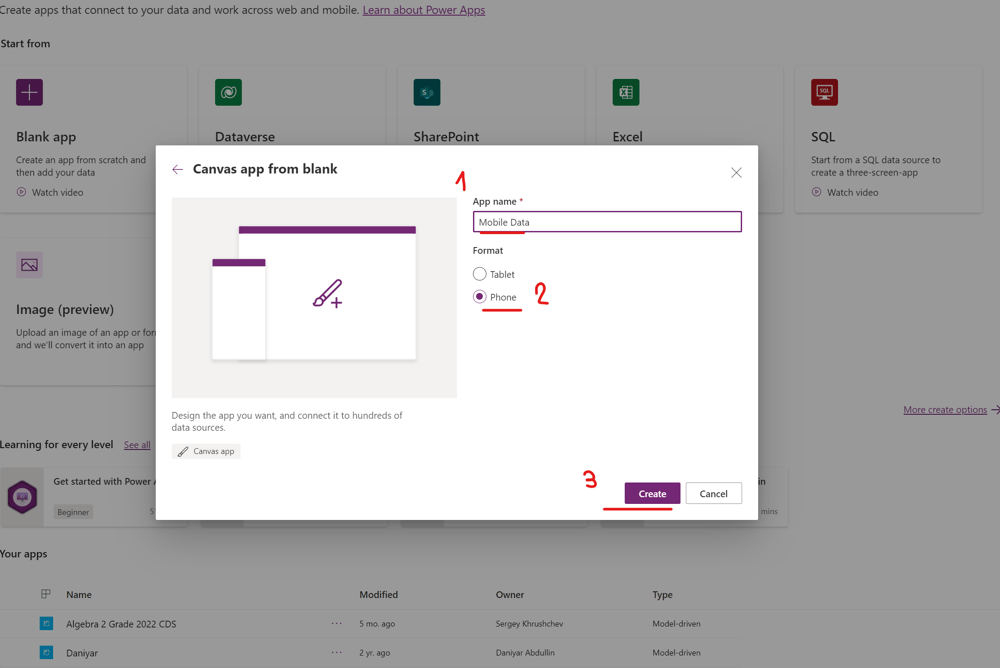
Do I give the name to my application, see 1, specify the phone format, see 2, and press the "Create" button, see 3.
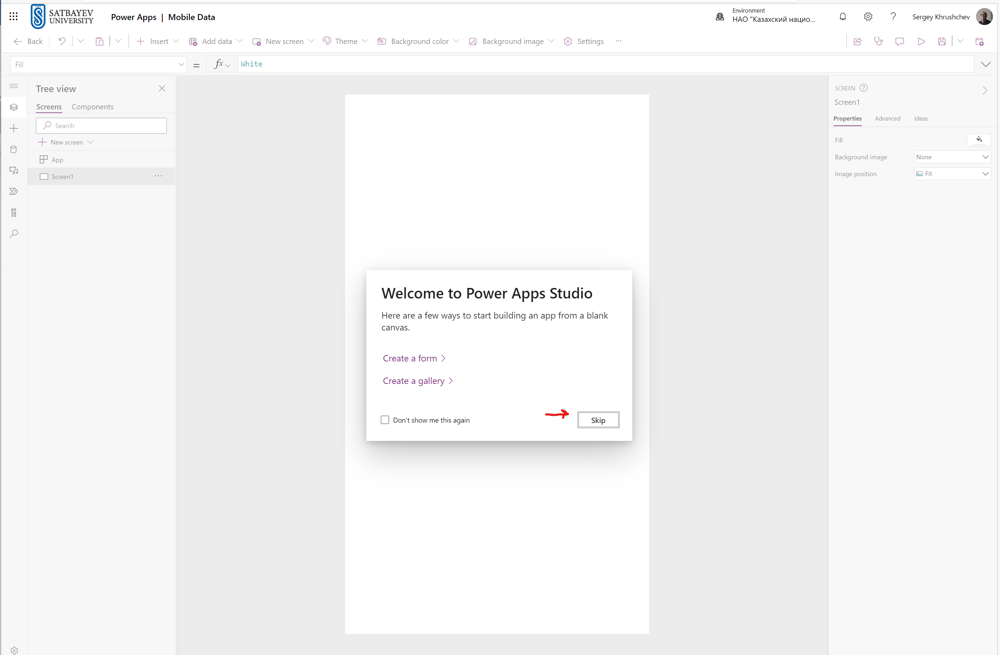
The system opens me the "Power Apps" Studio and I press the "Skip" button.
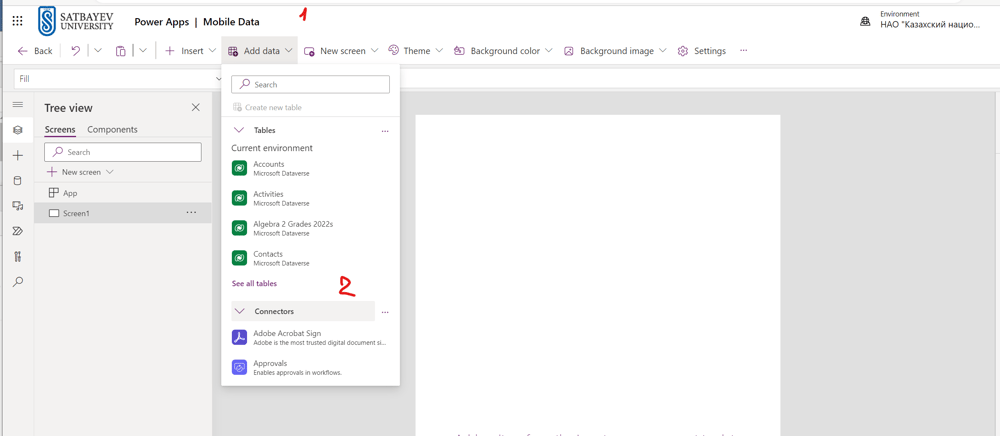
My application does not have Galleries or Forms. Therefore, I connect its empty screen to my Microsoft Lists list through the check mark "Add data," see 1. In the drop-down menu, I click the check mark "Connectors," see 2, and find the SharePoint connector, see the picture below.
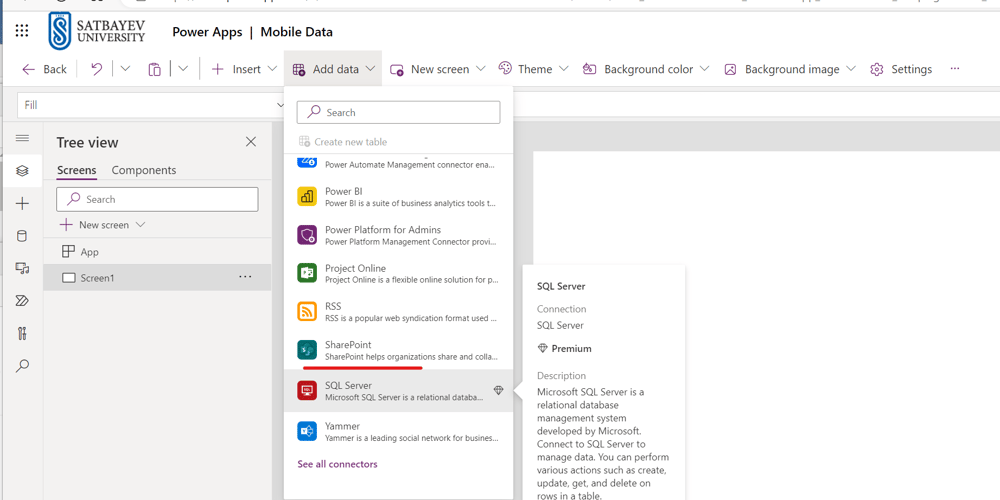
Do I click the "SharePoint" connector and click on the "SharePoint" icon. This action opens the list of available SharePoint sites.
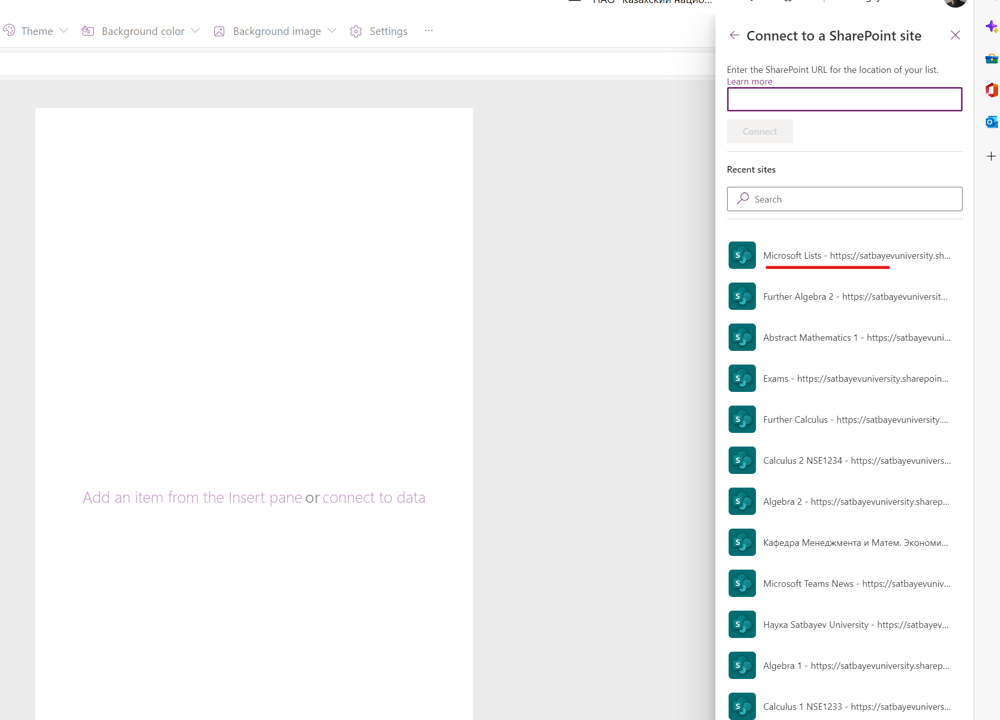
Do I click the icon of the site, where my SharePoint list is located.
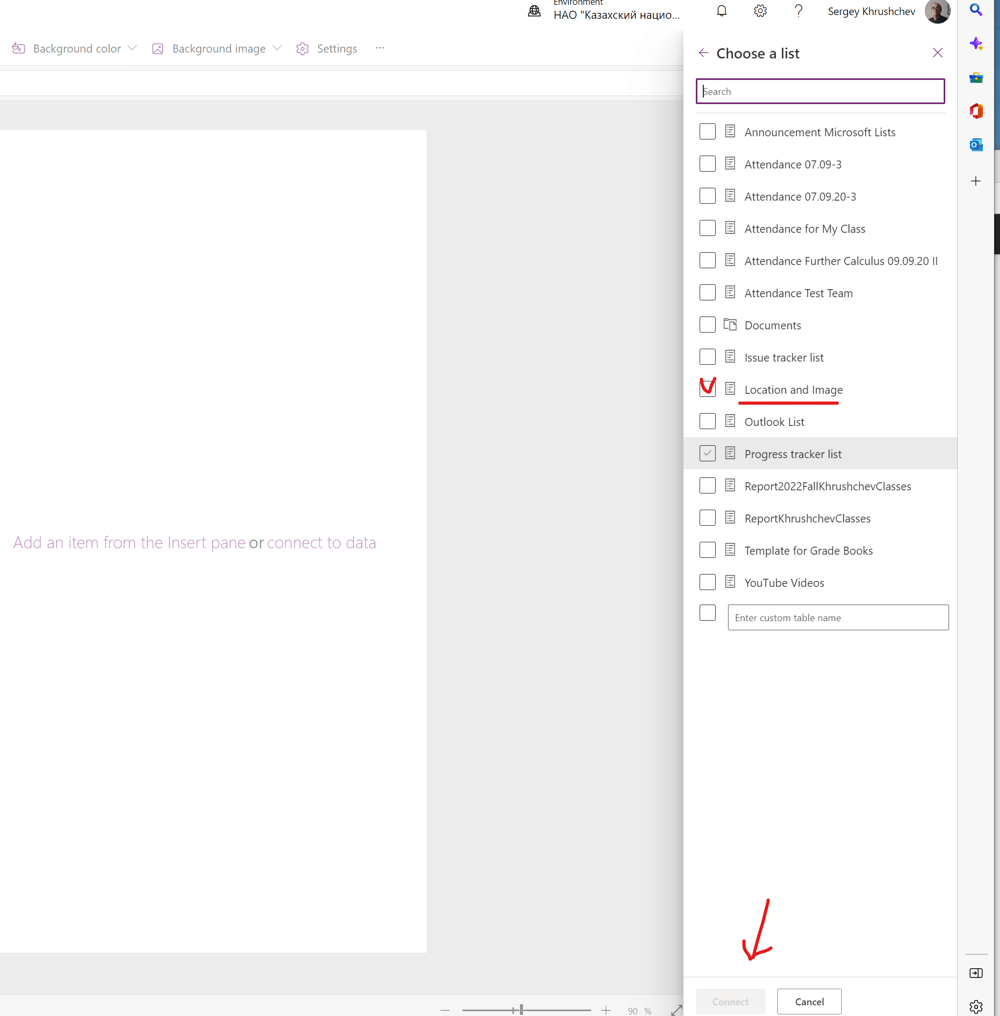
I checkmark the box on the left of the list name.
I press the "Connect" button to complete the process of connection "Screen1" to my Microsoft Lists list.
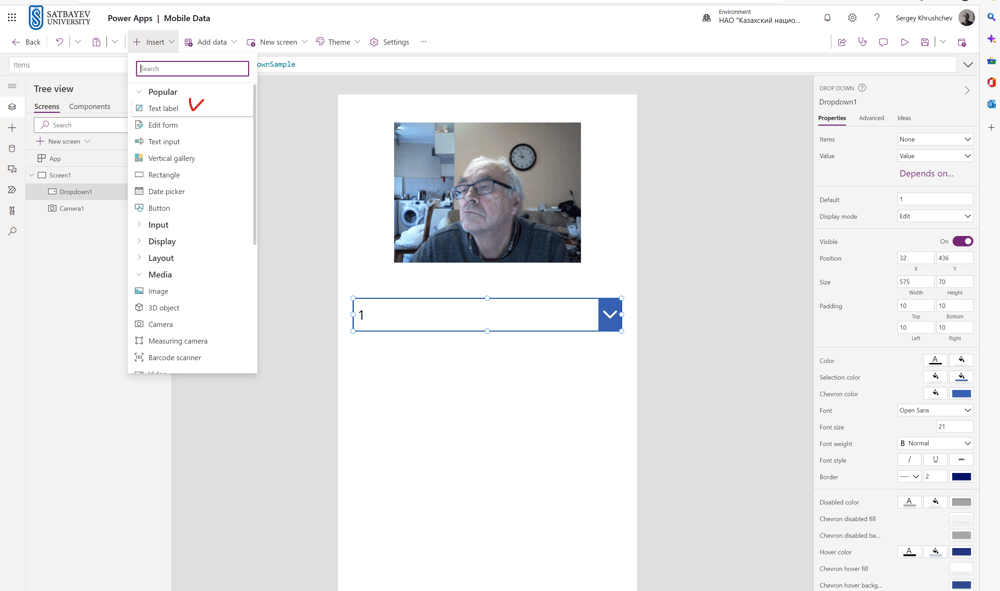
I open a few controls including the "Camera," "Drop down," "Text Input", "Text label," and "Button." To do this I click the check mark to the right of the "+ Insert" icon.
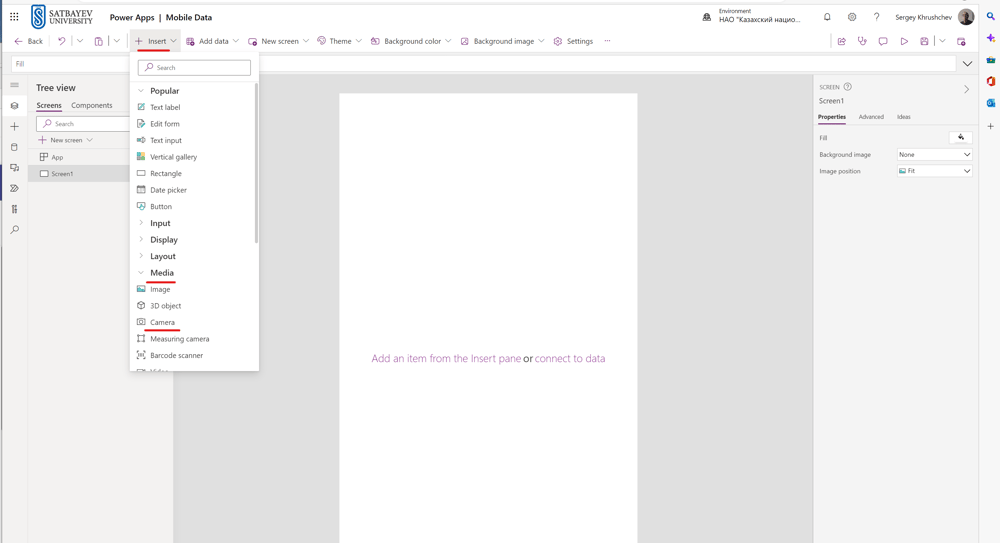
The sequence of actions "+ Insert --> Media --> Camera" inserts the camera window into the screen. Its position can be changed by the mouse capturing.
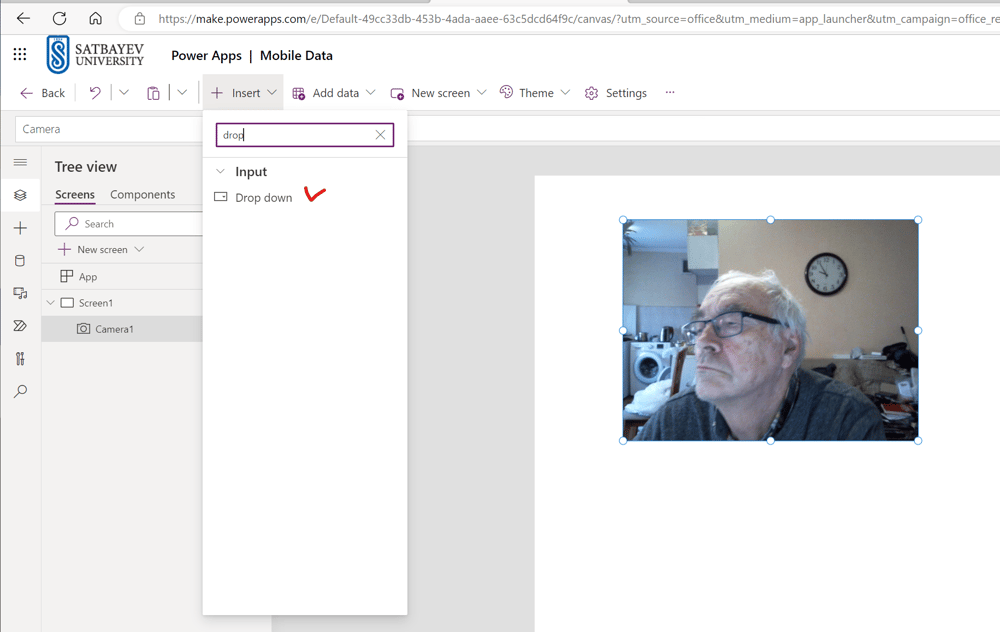
To open the drop-down menu, I type "drop" in the search box and click the "Drop down" icon. I drag the box inserted at the very top of the scrin below the Camera window, see the picture below.
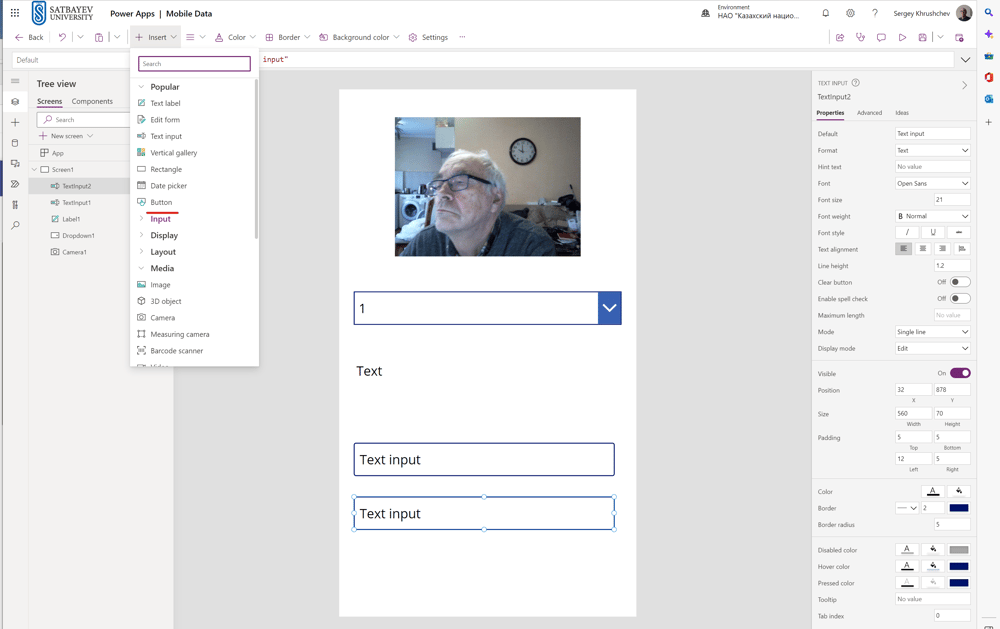
Next, I insert two "Text input" boxes.
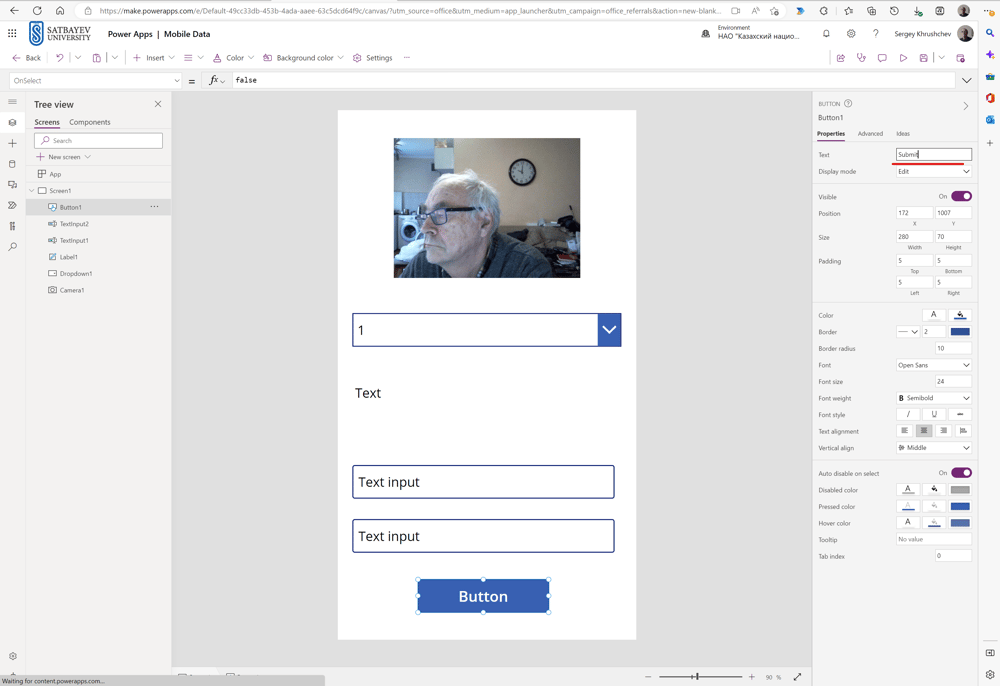
I insert the text label and the "Button."
I change the background to the orange. To do this I select "Screen1" label on the left pane and open the "Background color" menu.
Finally, I place the "Text label" at the top and using the mouse, fits the head label as shown on the picture. I change the name of the top label and fill it with blue using the right pane. This part was already explained on other pages on Power Apps.
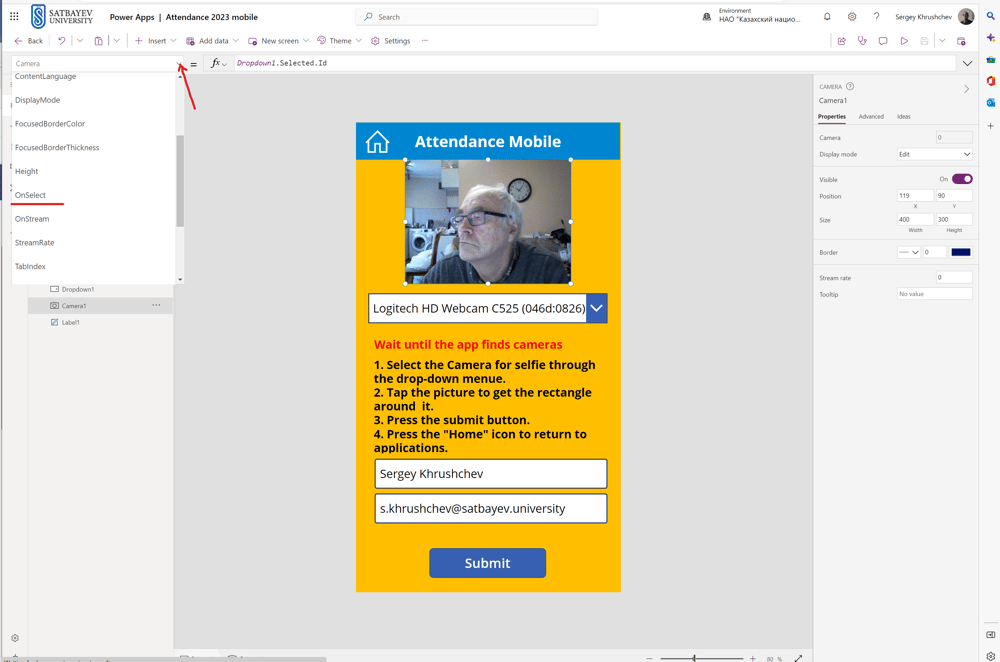
Final steps insert the control f_x formulas. I select the Camera window with mouse and select the "Camera" option on the left-hand side of the f_x formula. I type the formula:
Dropdown1.Selected.Id
This control allows students to switch between the front and the back cameras.
For the video window I should write another control for the "OnSelect" option, see the picture below.
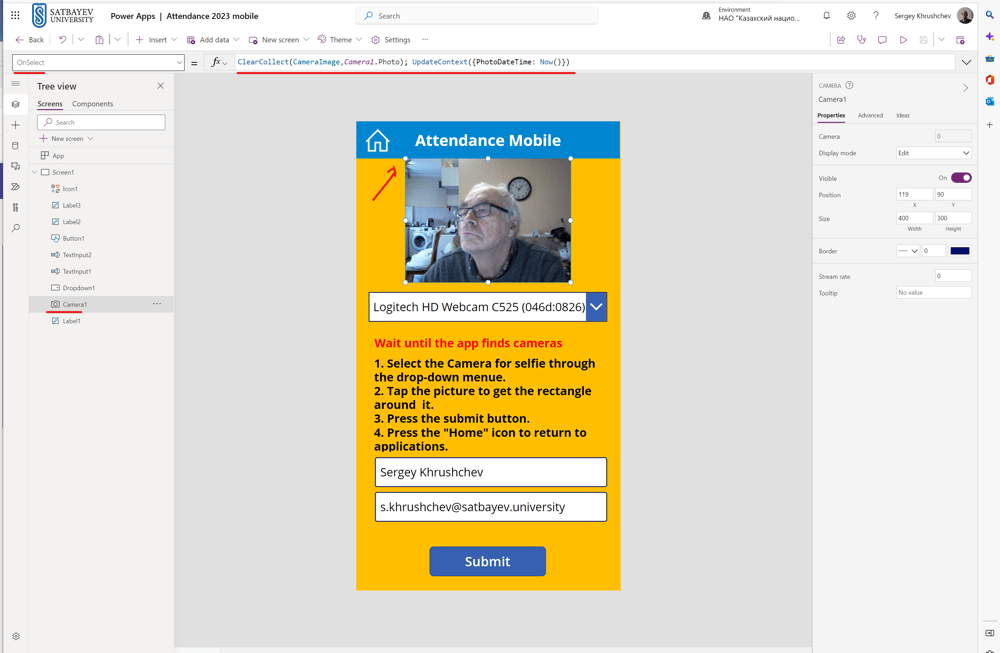
At the f_x formula I select "OnSelect" through the check mark and typeset the following formula underlined in red on the picture above:
ClearCollect(CameraImage,Camera1.Photo); UpdateContext({PhotoDateTime: Now()})
This formula selects the last photo taken and add the time when it was taken.

I select the drop-down menu and search for "Items" if necessary on the left hand side of the formula. Then I type
Camera1.AvailableDevices
This formula will select the back and front cameras for the selfie.
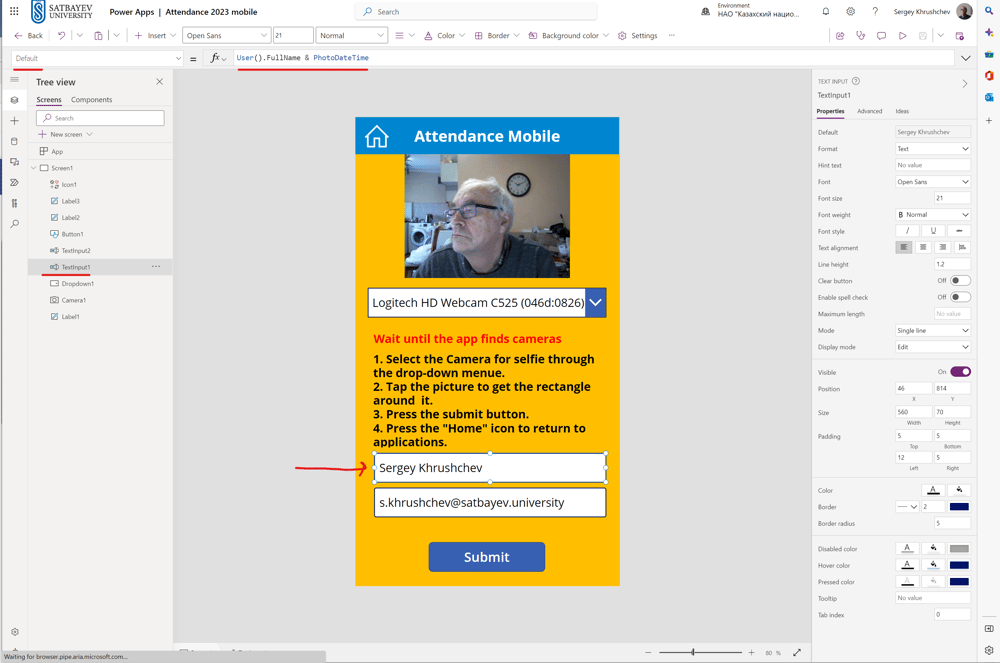
I select the first text input box, select "Default" on the left hand side if necessary, and write the formula on the right hand side
User().FullName & PhotoDateTime
This formula automatically inserts the user Full name in this box followed by the date and time as soon as the selfie was taken.
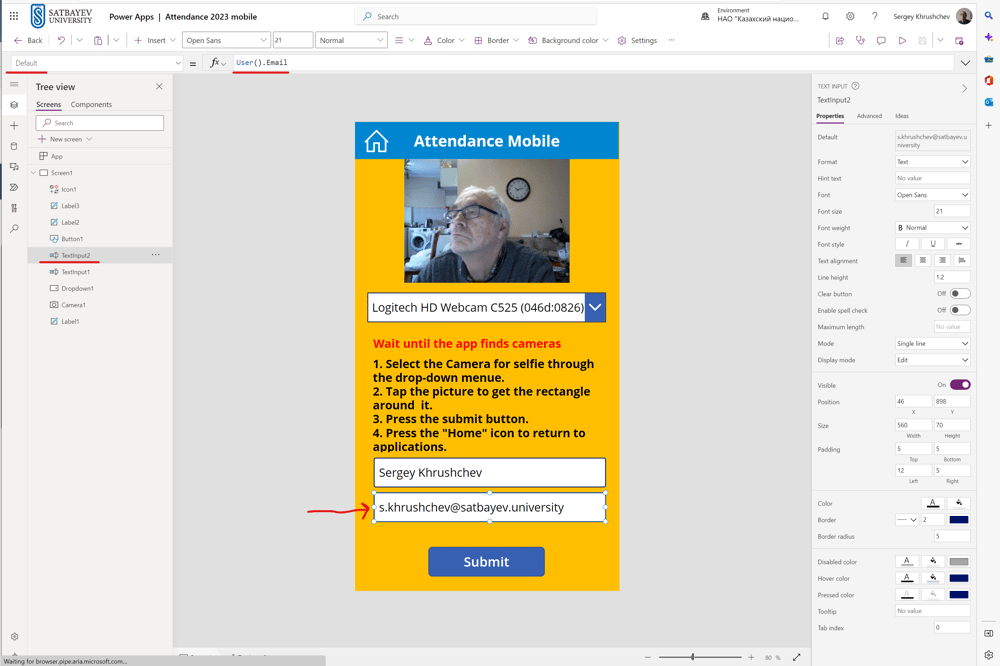
I repeat the same with the second text input box but write another formula:
User().Email
This formula displays automatically the email of the user.
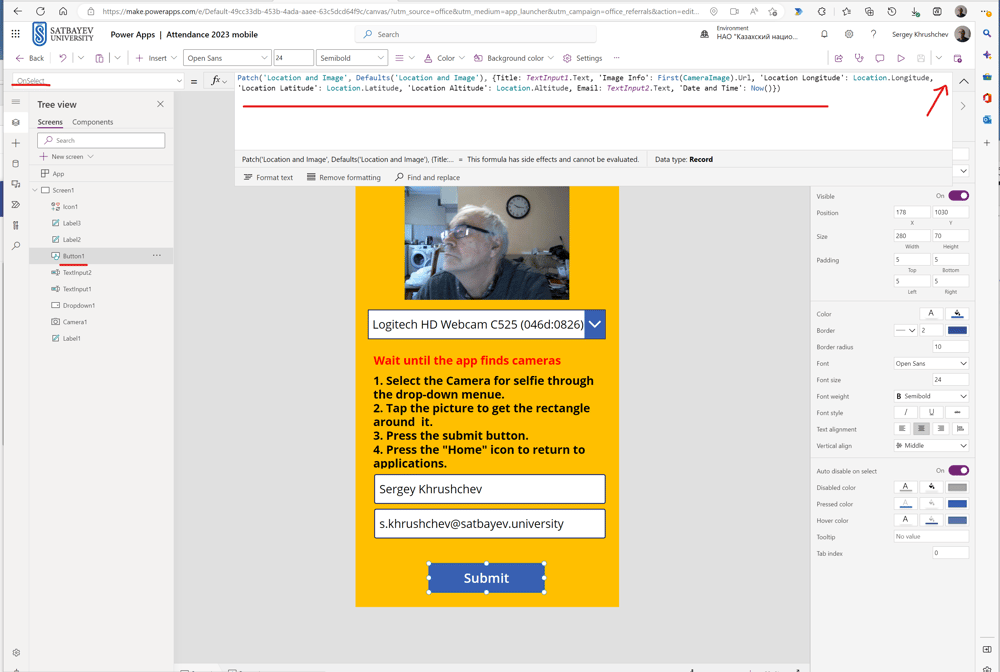
I select the button, change its name to "Submit" using the right pane of the Studio and type the Patch formula on the right with the "OnSelect" choice on the left part:
Patch('Location and Image', Defaults('Location and Image'), {Title: TextInput1.Text, 'Image Info': First(CameraImage).Url, 'Location Longitude': Location.Longitude, 'Location Latitude': Location.Latitude, 'Location Altitude': Location.Altitude, Email: TextInput2.Text, 'Date and Time': Now()})
The first argument 'Location and Image' in this formula is the name of my SharePoint list.
The second argument Defaults('Location and Image') says to the system that all data must be pasted to the list.
The commands in the braces {} are of the JSON type.
Title: Textinput1.Text says that the content of the first text input box must be in the Title column of the list. You can easily find TextInput1 if you place the mouse onto the first text input box. It is important to check everything again.
'Image Info': First(CameraImage).Url says that the column Image Info of the list must contain the URL of the selfie taken.
'Location Longitude': Location.Longitude says that the value of the Latitude of the place, where the selfie was taken, must be placed in the column Location Longitude of the list.
'Location Latitude': Location.Latitude says that the value of the Latitude of this place must be pasted to the column Location Latitude of the list.
'Location Altitude': Location.Altitude says that the value of the Altitude of the place must be pasted to the column Location Altitude.
Email: TextInput2.Text says that the email of the user must be in the column Email of the list.
'Date and Time': Now() says that the time of the selfie must be pasted to the column Date and Time of the list.
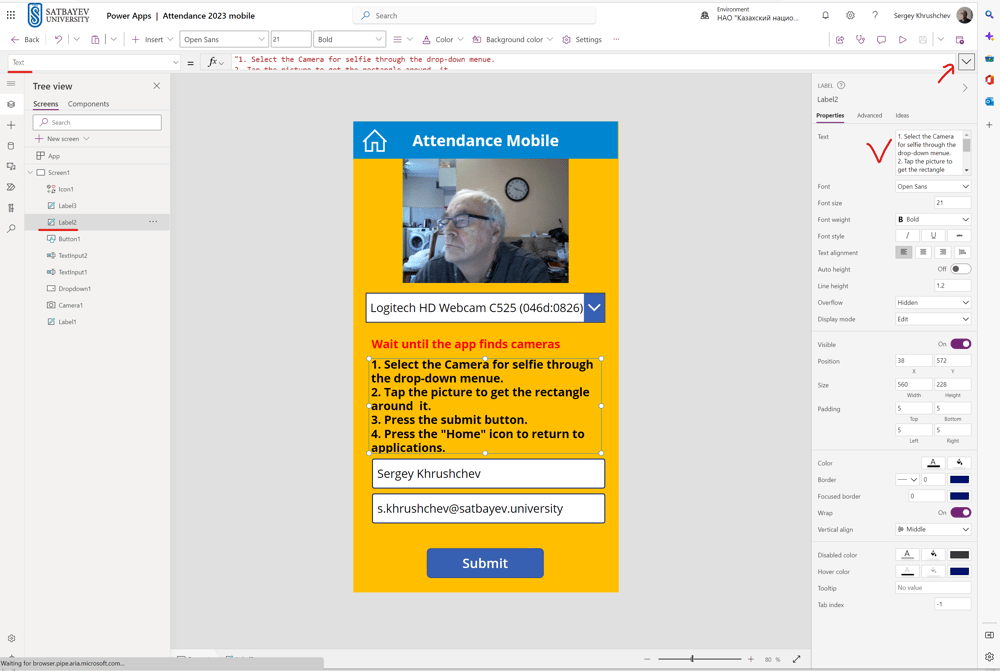
The text label with instructions is enlarged in its size with mouse whereas the text is inserted through the right pane as shown on the picture above. Similarly, the header can be also formatted. The blue background and the color of the text can be changed through the icons A and color symbol at the bottom of the right pane.
To insert the "Home" control, I open the "+ Insert" option and expand "Icons."
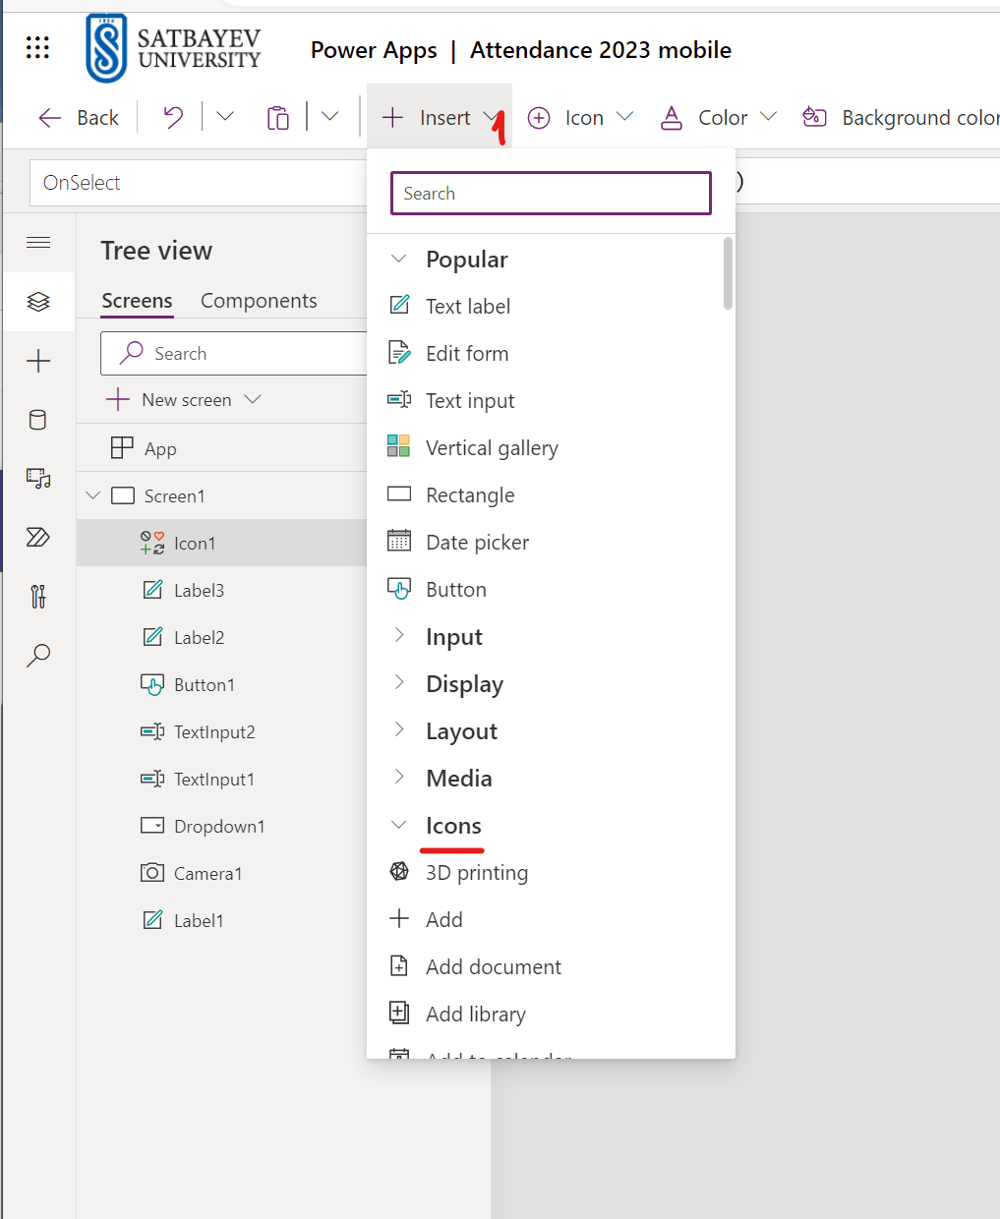
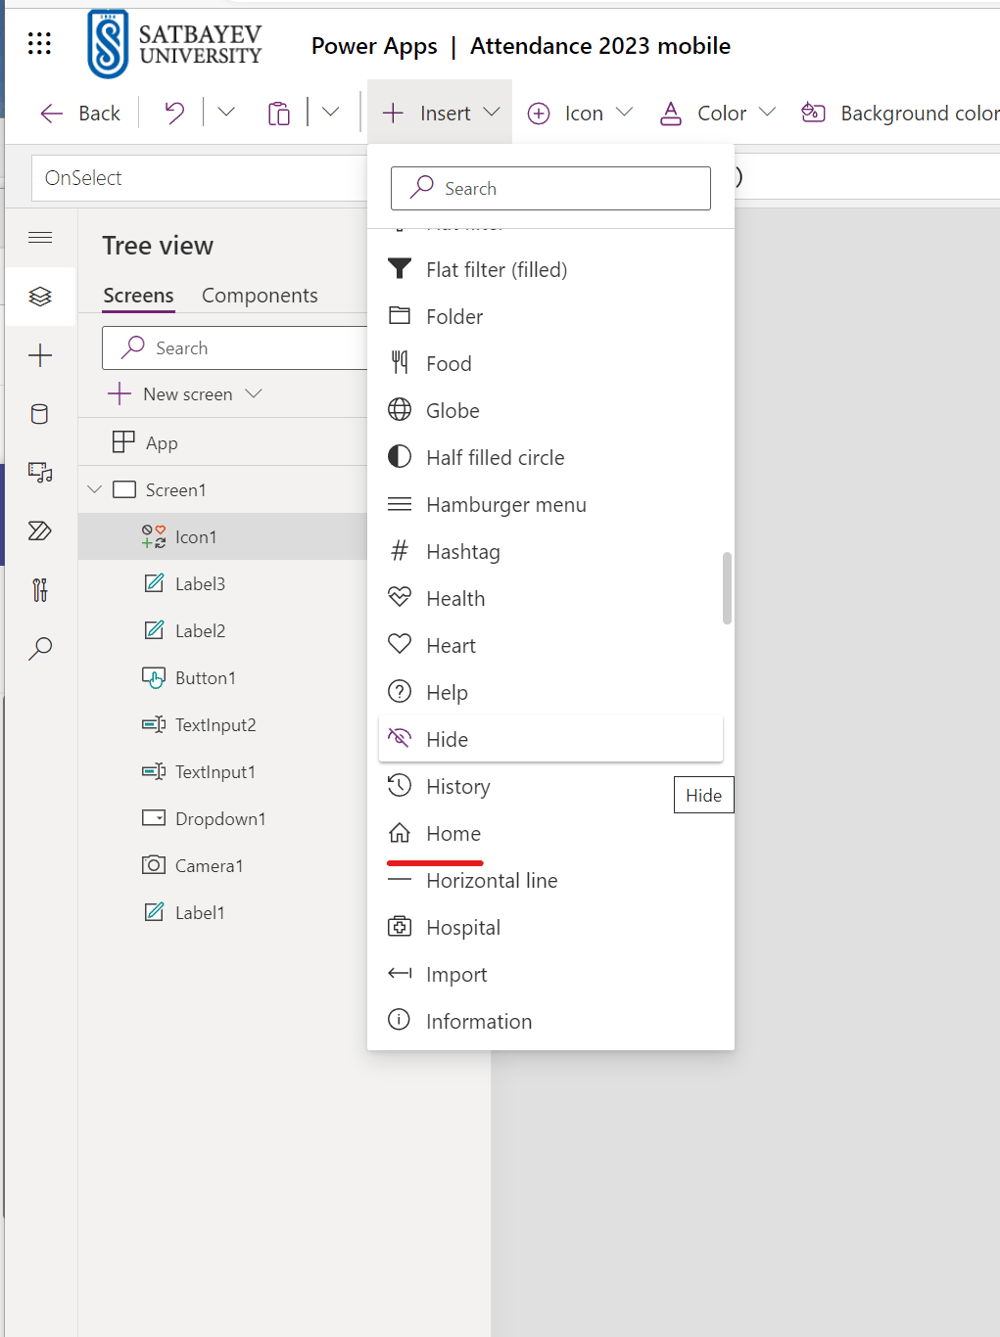
In the expanded list, I select the "Home" icon.

I fix the position of the "Home" icon and select it. At the very top I write the formula with OnSelect on the left hand side and Exit() on the right hand side.
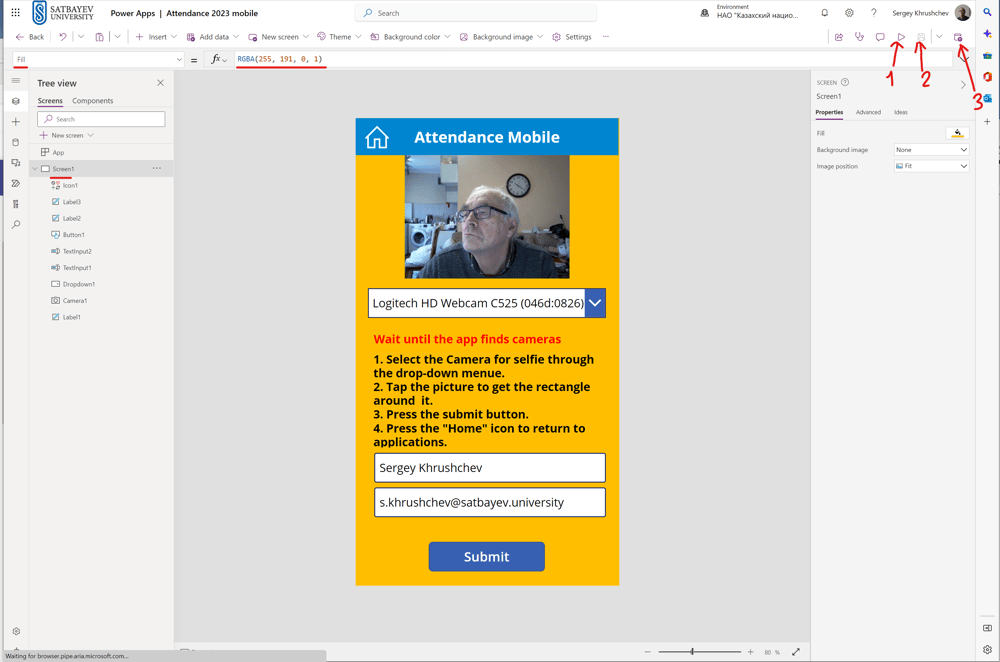
The application is finished. I select Screen1 on the left pane and press the save button, see 2. I can check if the application works by pressing the play icon, see 1. I publish this application by pressing the publish icon, see 3.
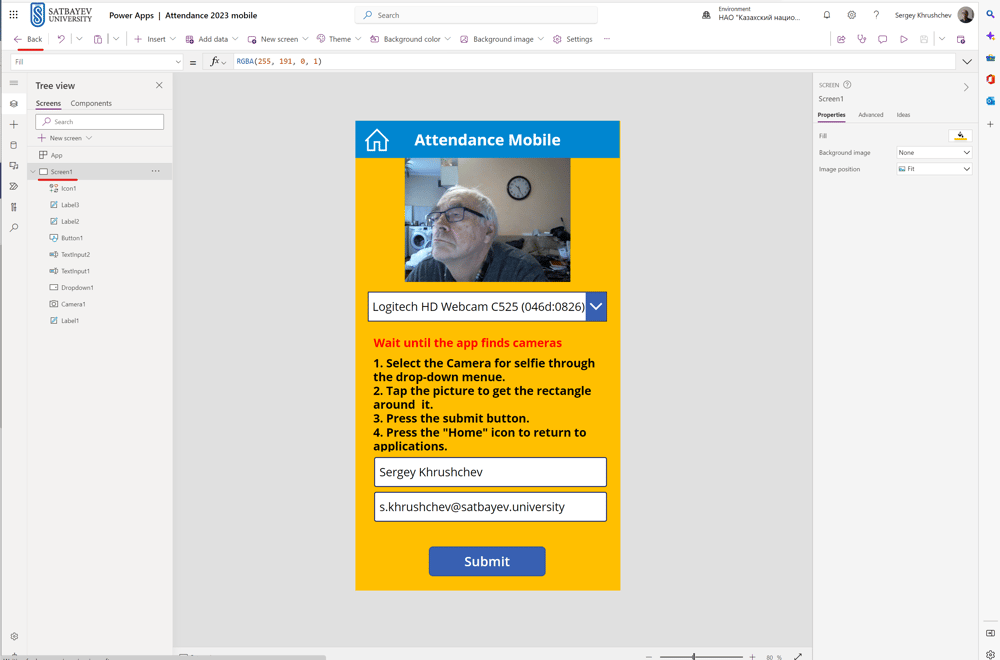
I return to the screen view on the right pane and click the left arrow at the left upper coner of the Studio, see the picture above.
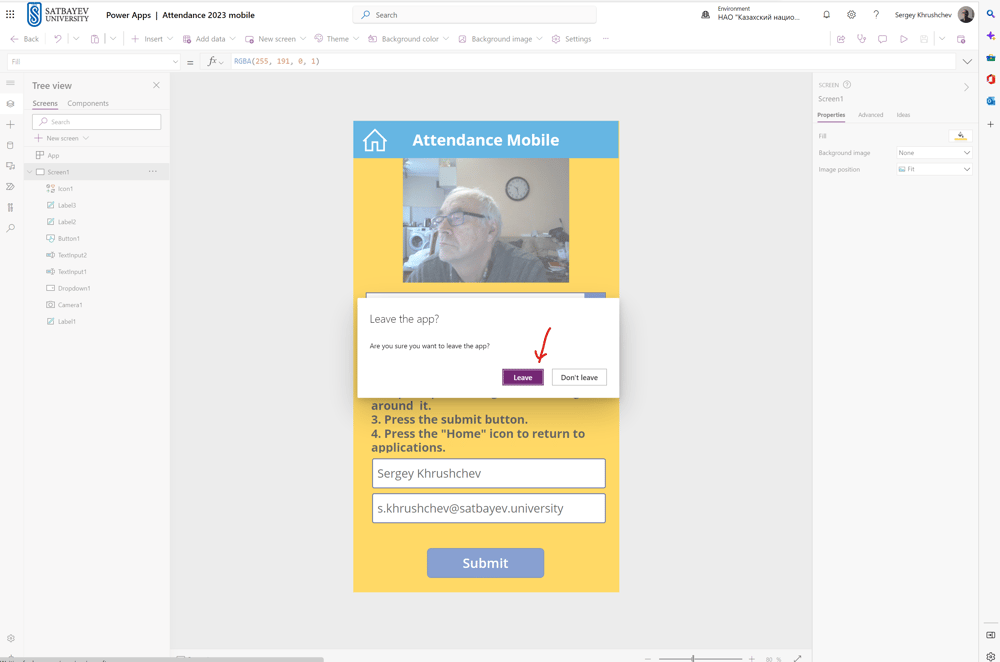
I confirm that I am leaving the Studio and return to the list of my applications.

I click the vertical ellipsis on the right of the application name and select "Share" option. This action opens the window for sharing, see the picture above. The emails of students are entered to the field 1. Field 2 is designed for the message which is sent by the system during the sharing process. To get access to the application students must open the link they got and enter their credentials. The button 3 must be pressed when all students are shared with this application. It is possible to create a Power Automate flow to share the application with students, but the teacher must get an access to the Azure AD connector. I hope to return to this flow soon.