A Power Automate takes attendance at random
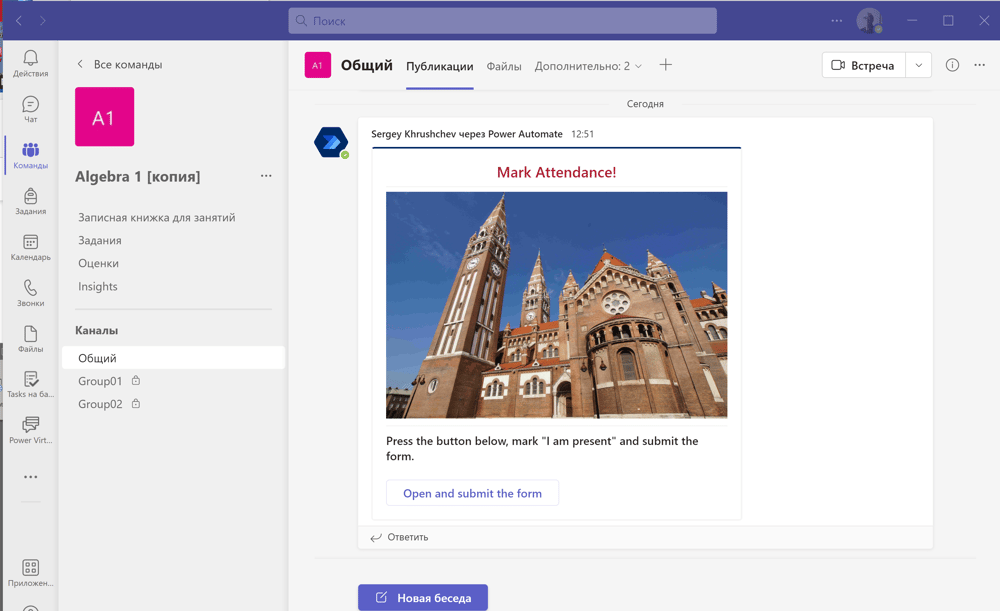
The flow, which I am going to construct, sends the adaptive card shown above to the team of my class. Students click on the button "Open and submit the form," and mark their presence in the class in it.
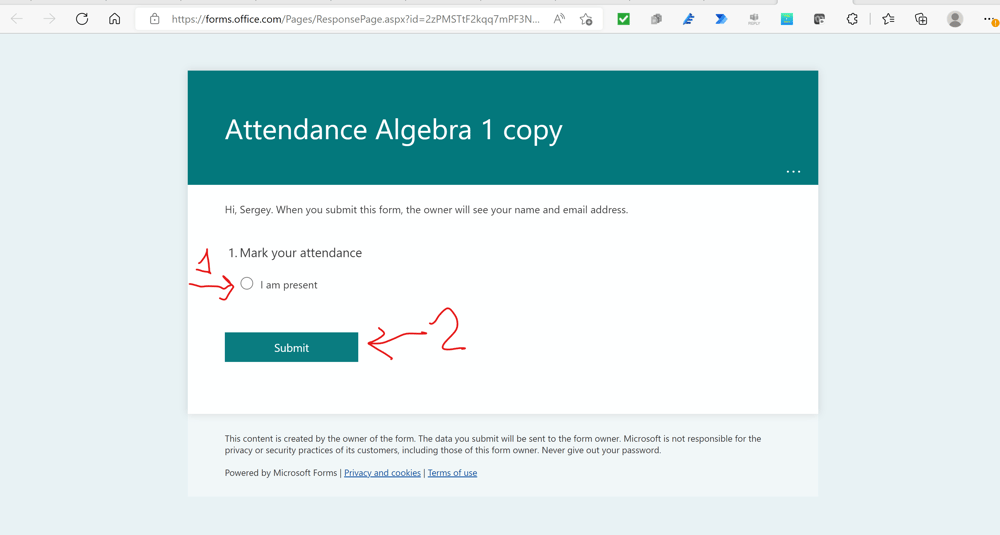
Namely, they mark the circle in front of the "I am present" field and click on the "Submit" button.
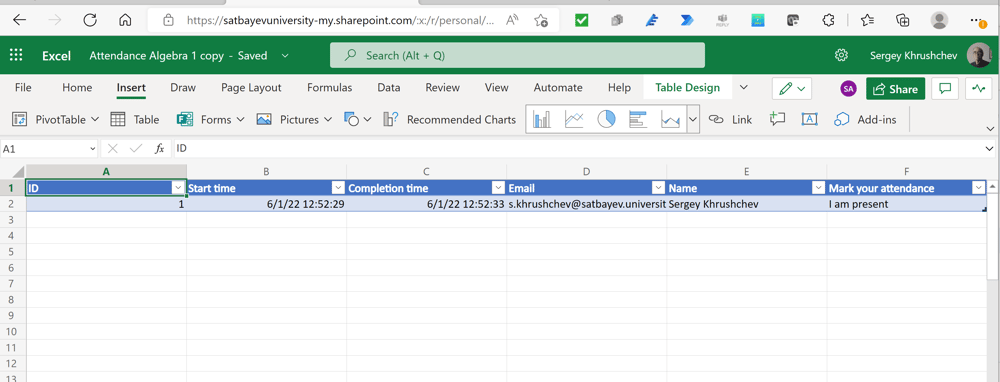
Since the above Microsoft Form was created through the Excel Online (Business) table, its submission results in a row in this table with all data required. After the class, I copy from the column of names only its part corresponding to the time of appearance of the Adaptive Card in the team (see the "Completion time" column above) with possible delay up to five minutes. I have a column of all my students extracted from the system. I paste the data obtained in column B and select columns A and B with the mouse. Then conditional formatting in the Excel table shows me clearly those students who didn't mark their attendance.
The advantage of this flow is that the teacher may forget about this important task during the lecture and investigate the results after the class.

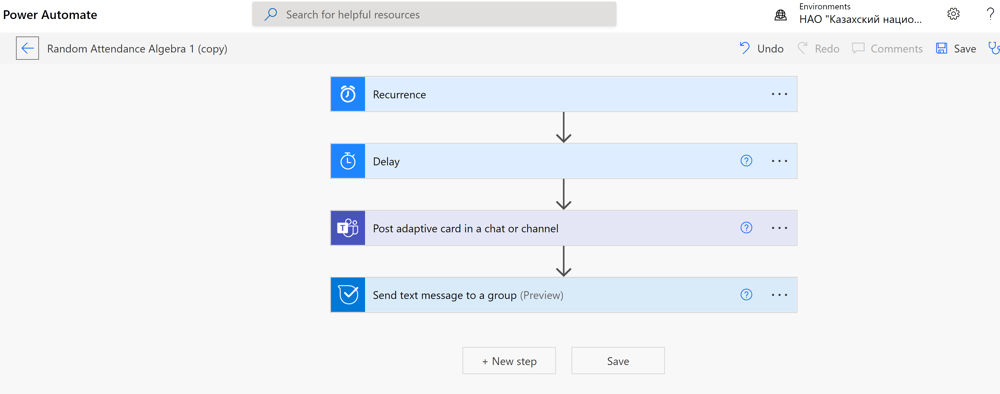
I open https://office.com and click the icon "Power Automate" to create a scheduled cloud flow, see the picture above. My goal to create the Power Automate shown on the picture below.
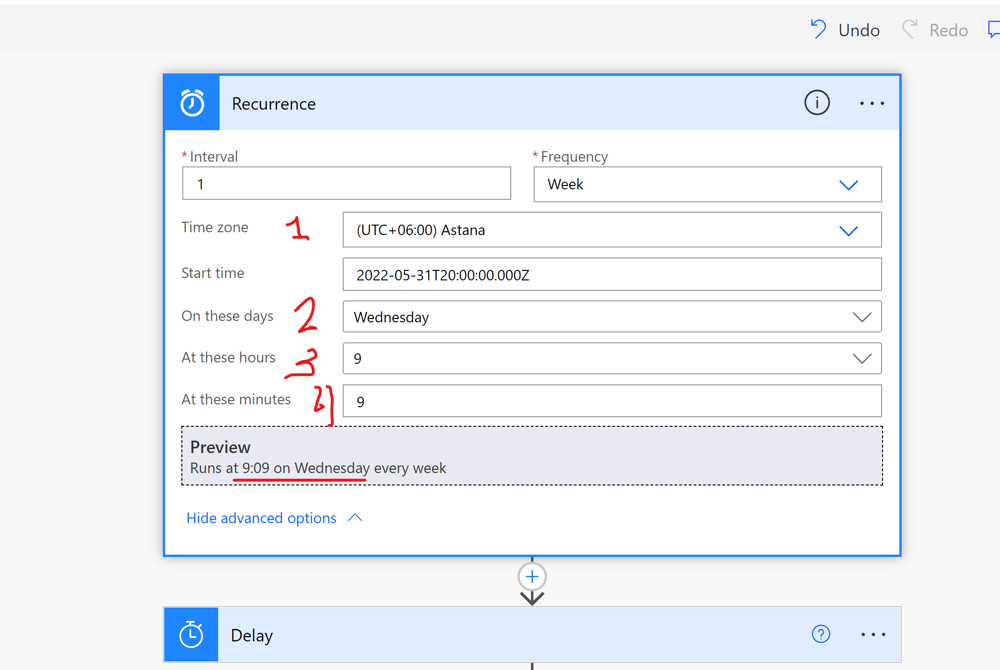
The first box is filled as shown above. The last two fields indicate that the class begins at 9:00 AM and that the attendance will be taken 9 minutes later or more.
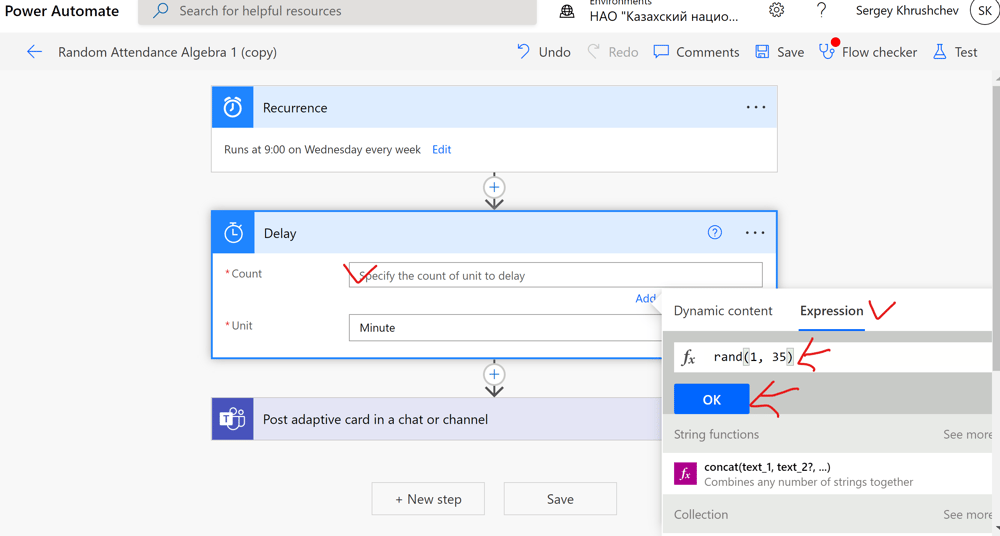
In the count field, I insert the expression "rand(1, 35)," which gives integer minutes between 1 and 35. Therefore, the time of the attendance form is distributed randomly between 9:10 and 9:45.
I add the action "Adaptive card" and select in the menu of Power Automate "Post adaptive card in a chat or channel." I fill the first four fields as shown above. I paste the JSON code to the last field. The code is obtained in the designer studio for adaptive cards. One can open it following the link https://adaptivecards.io/designer/ , see the picture below.
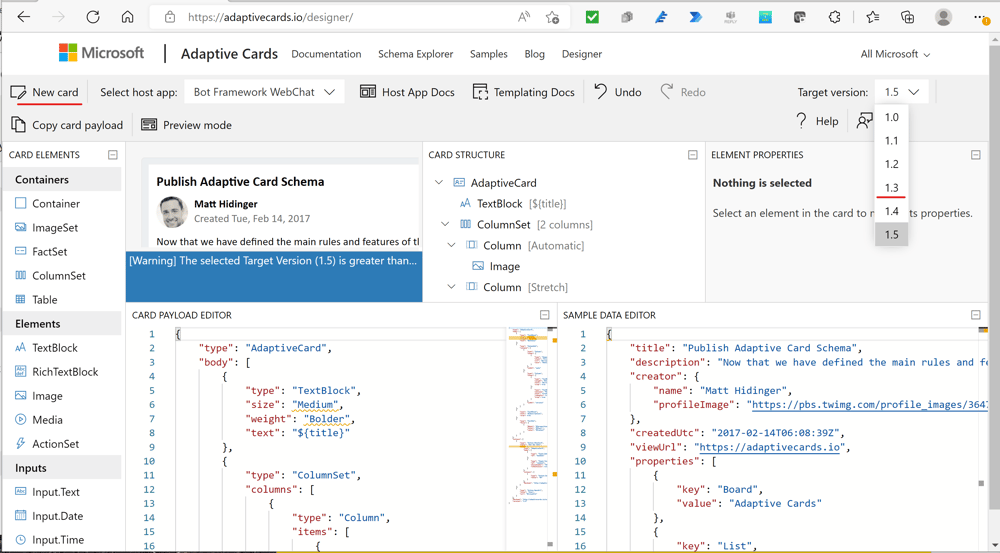
I press "Target version" and select version 1.3. Next, I press "New card."

To create a new adaptive card, I press the "Blank Card."
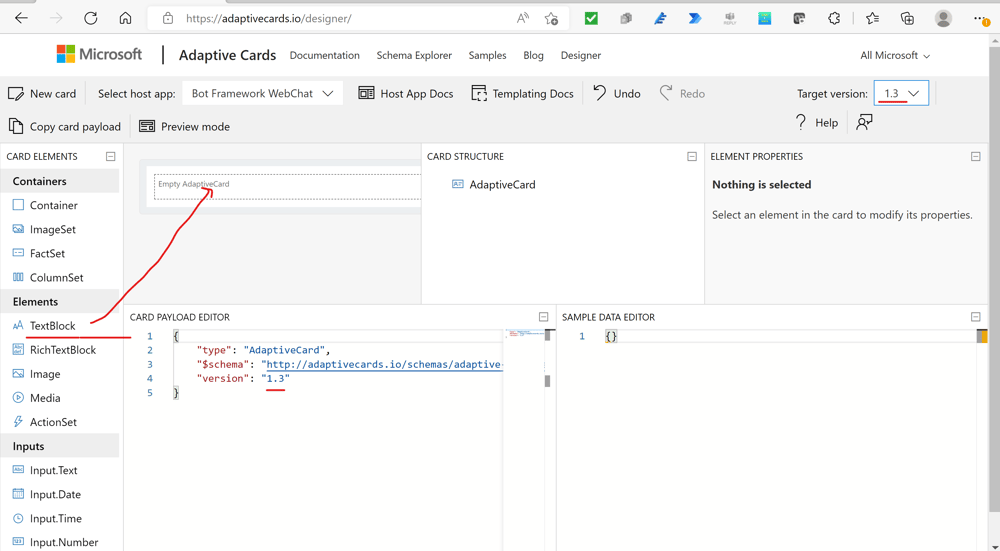
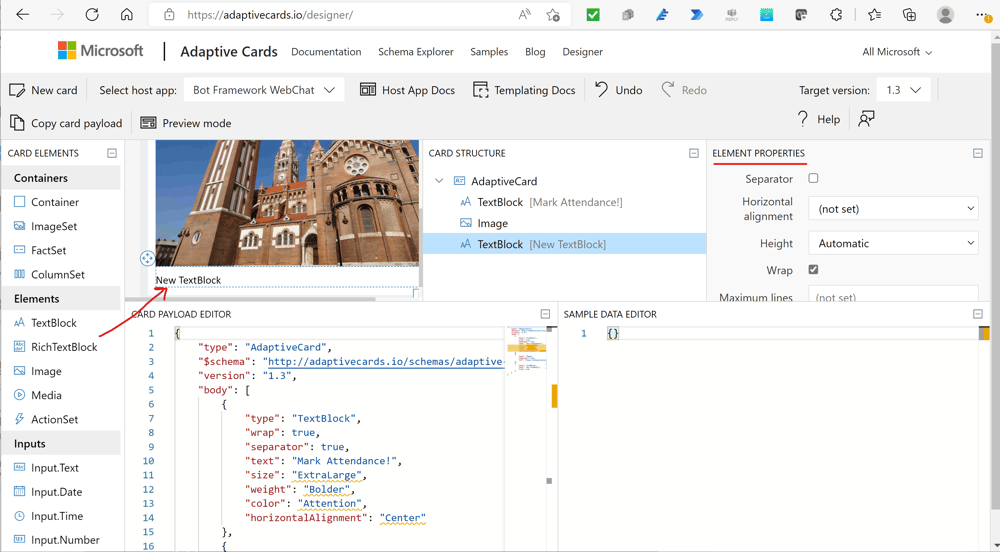
This action creates in the window of "CARD PAYLOAD EDITOR" a JSON code. Since I selected version 1.3 in the Target version window, this version is present in the JSON code. This system works as follows. I select required elements from the "Elements" pane and move them with the mouse to the active field of the adaptive card to be created. The card structure will be indicated on the middle card at the top. I select the required properties of elements through the third card "ELEMENT PROPERTIES."
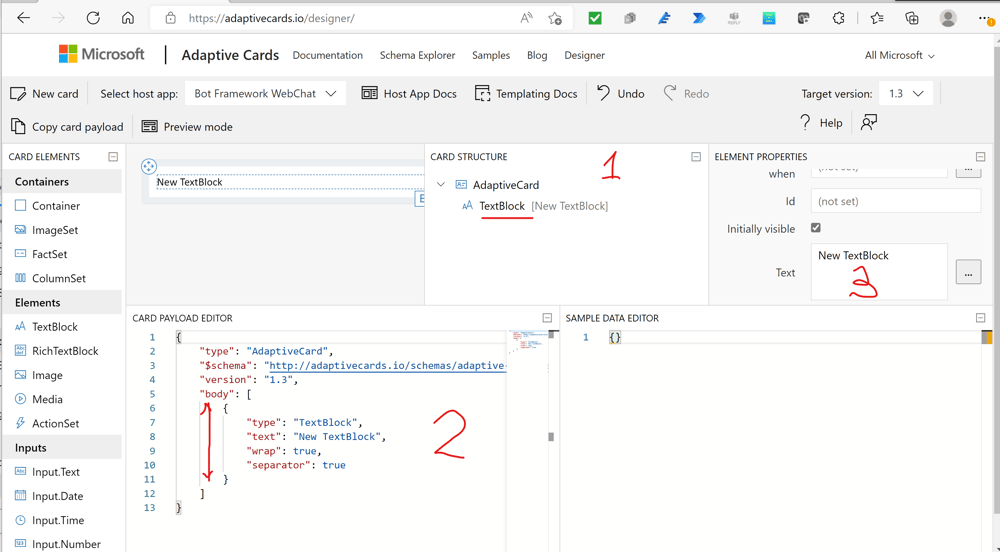
The above picture shows that after adding the text element to the card a new JSON code appeared in "CARD PAYLOAD EDITOR," see 2. The name of the element appeared in the "CARD STRUCTURE" window. Finally, the parameters of the element can be changed in window 3.
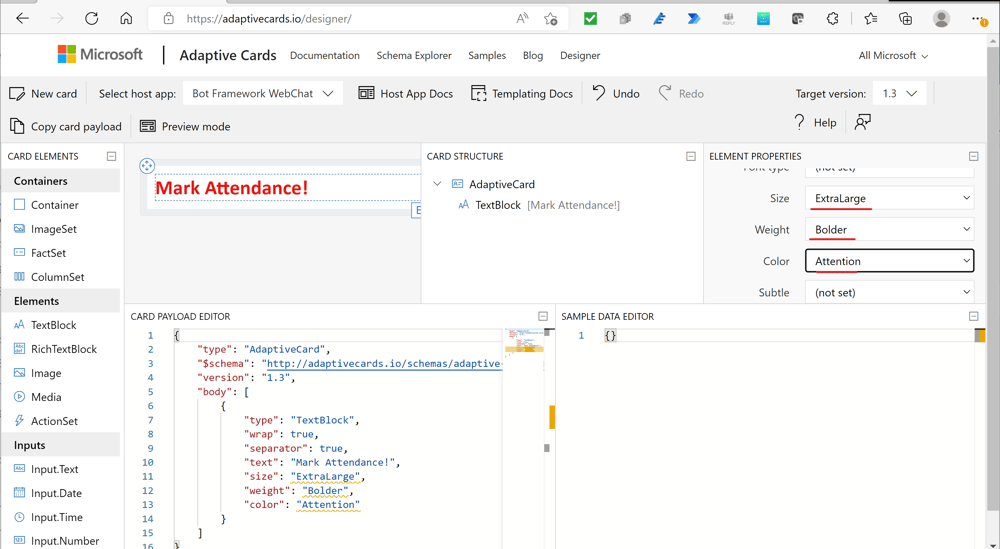
In the "ELEMENT PROPERTIES" window, I change the text, its size, weight and color, as it is shown on the picture above. These changes are reflected in the JSON code in the bottom window.
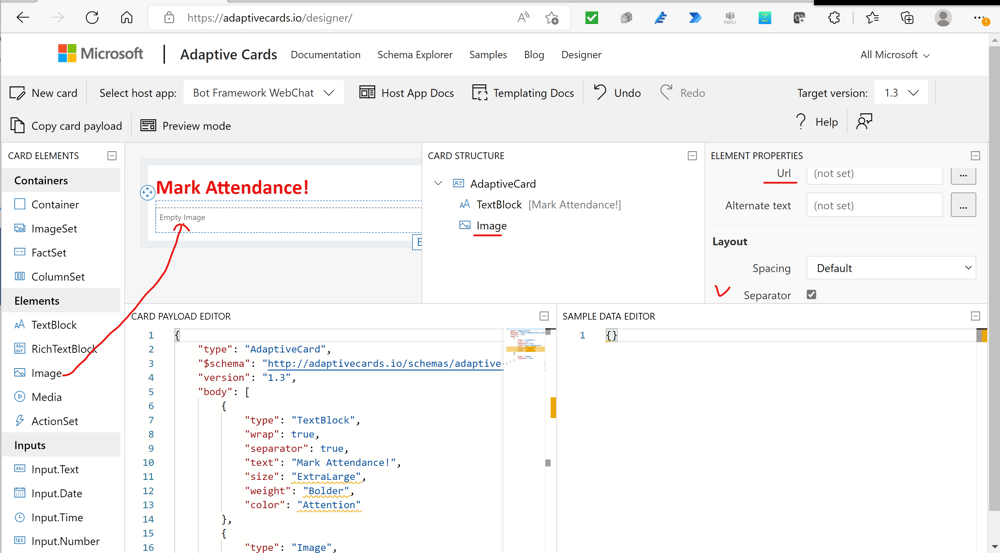
I drag the image element to the card, put the check mark in "Separate" to get space between the elements in the card, and insert the URL of the image. To avoid permissions problems, I drag the image I prepared to "Class material" in the SharePoint of my team. This solves two problems. Students can see this image but cannot delete. The second advantage is that this file has the URL. It is important to compress this image to make its weight below 600 Kb. I usually do this with the help of the site
https://www.img2go.com/compress-image
The position of the image file is shown on the picture below.
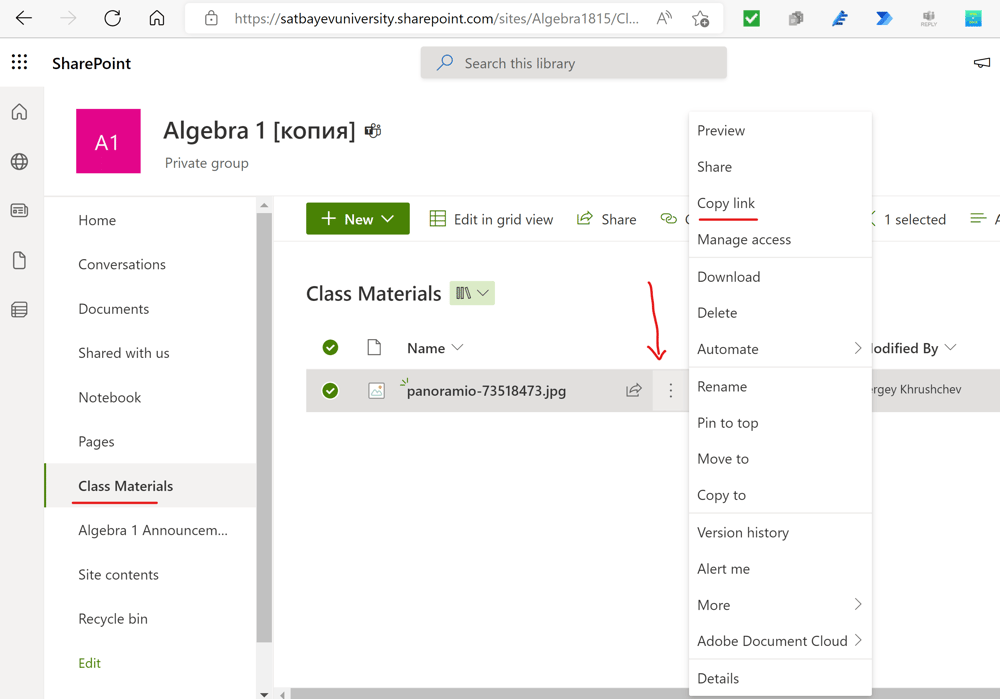
I insert the link obtained to the URL field shown on the previous picture.
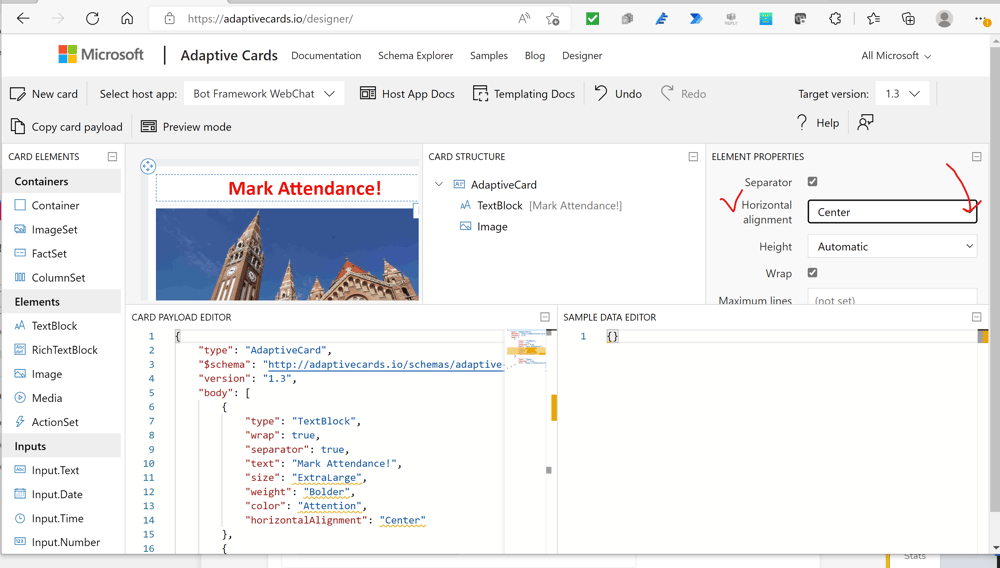
The picture is inserted into the adaptive card. I return to the first text element to center it. I click on it with the mouse and correct settings as shown below.
Using the slider on the right, I move to the bottom of the adaptive card and drag the second text element below the picture. In the "ELEMENT Properties" window, I type the text "Press the button below, mark "I am present" and submit the form." After that, I change the default style.
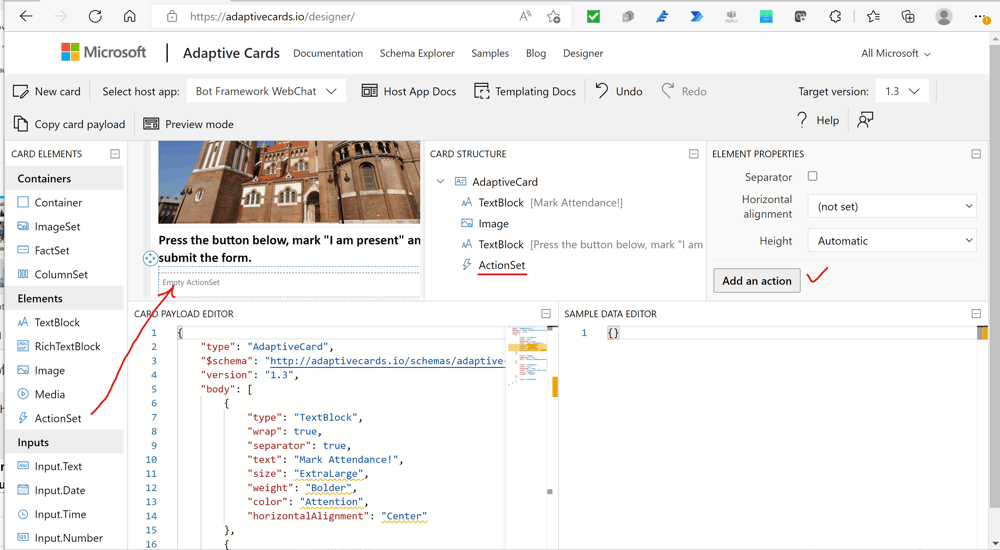
To complete my Adaptive Card, I drag the "ActionSet" element below the announcement. I must have the URL of the attendance form. On the page "Attendance with Excel Online (Business)," I explain an algorithm of Microsoft Forms creation through Excel Online (Business) forms option.
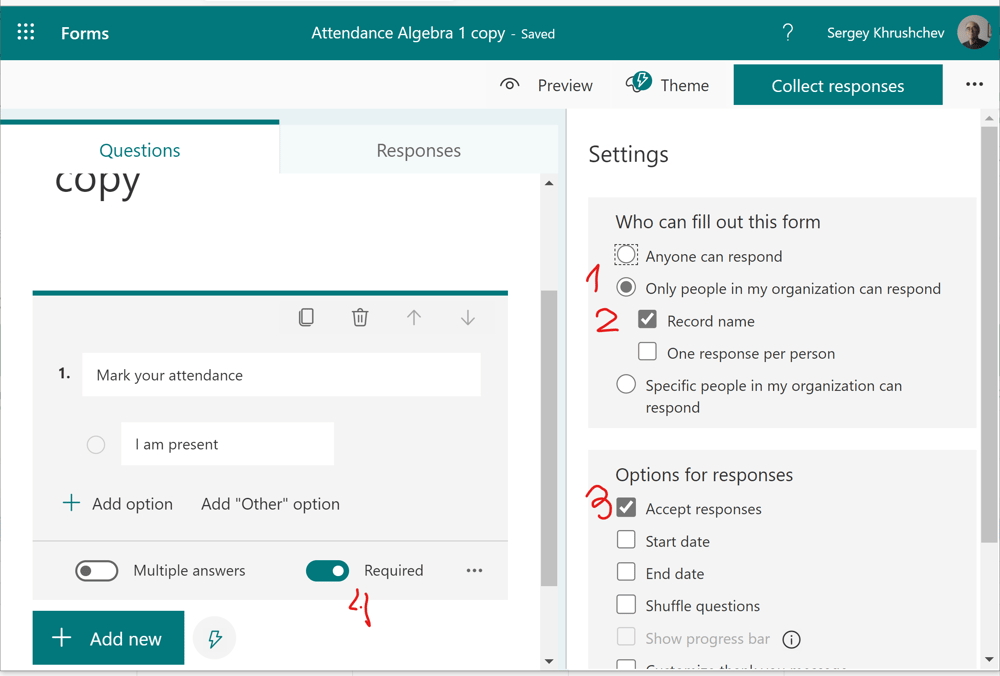
The settings in the form must be as shown on the picture above.
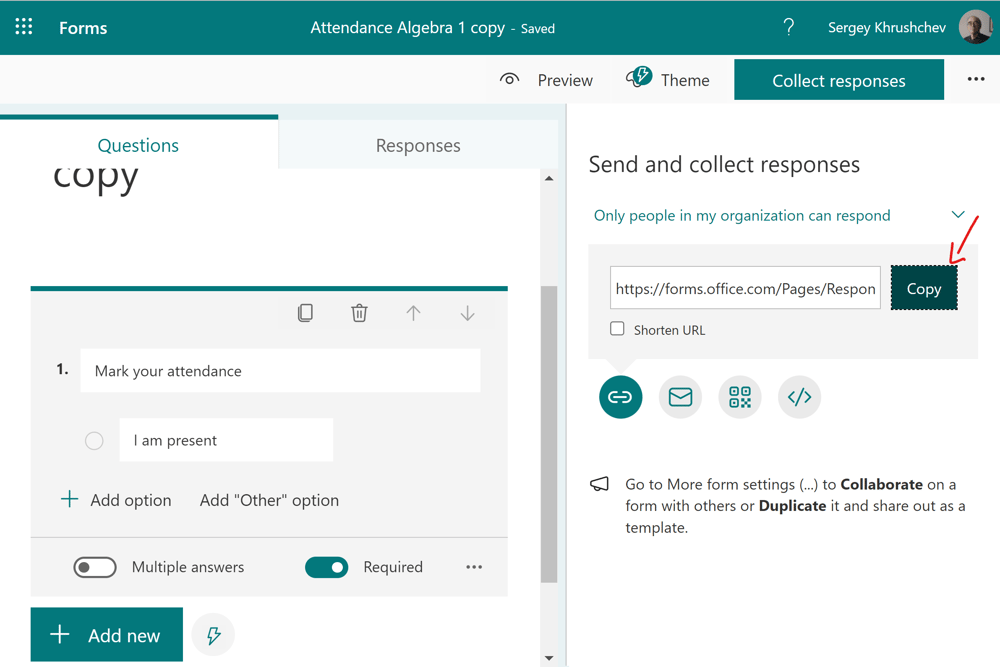
I copy to the buffer the link to this form.
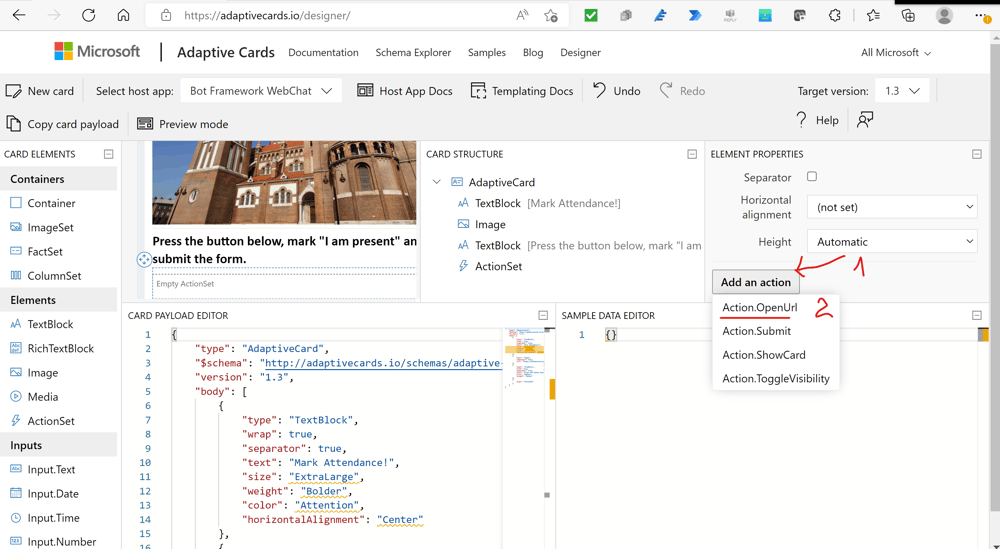
I press "Add an action," select "ActionOpenUrl," and make corrections as it is shown below.
The adaptive card is ready. To copy the JSON code I can either copy it from the JSON window or click on the "Copy card payload" at the left top of the visual studio. Then I return to the Power Automate and paste the JSON code into the window of the flow card. Creation of Adaptive Cards is a good option to learn JSON! I save my flow and test it.
If the random delay time is greater then 10, then most likely the flow will report a run time error. Do not panic! It is a bag. Microsoft reports it on the documentation site Limits and configuration - Power Automate | Microsoft Docs
Following these recommendations, I click "Run history"
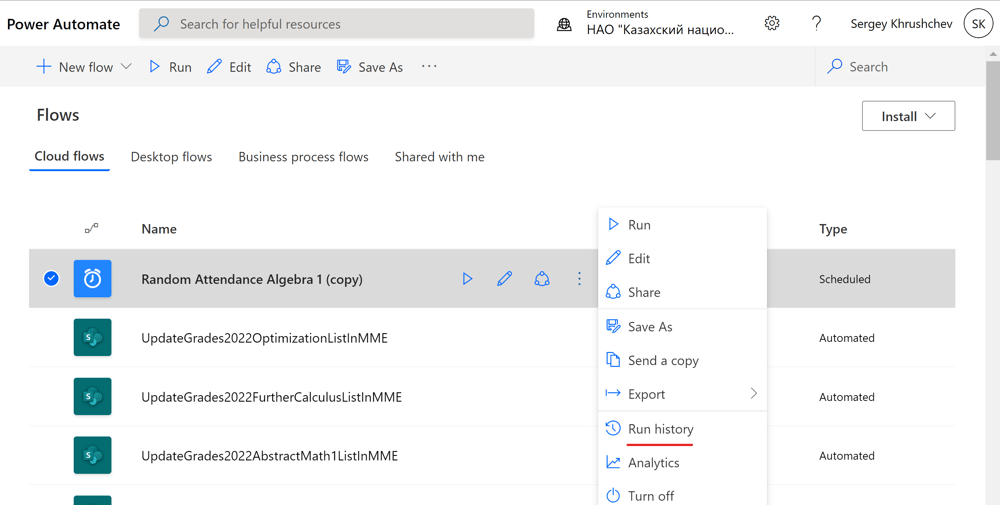
and view the history report:
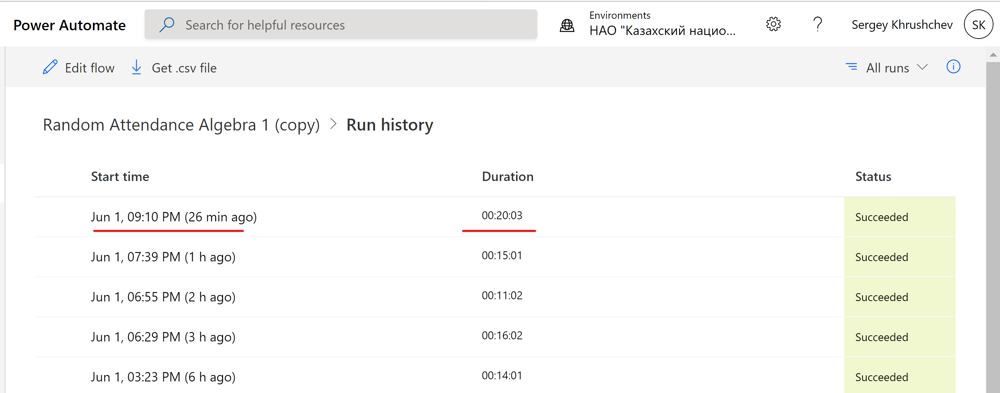
Since I didn't stop my flow manually, it succeeded in all attempts.
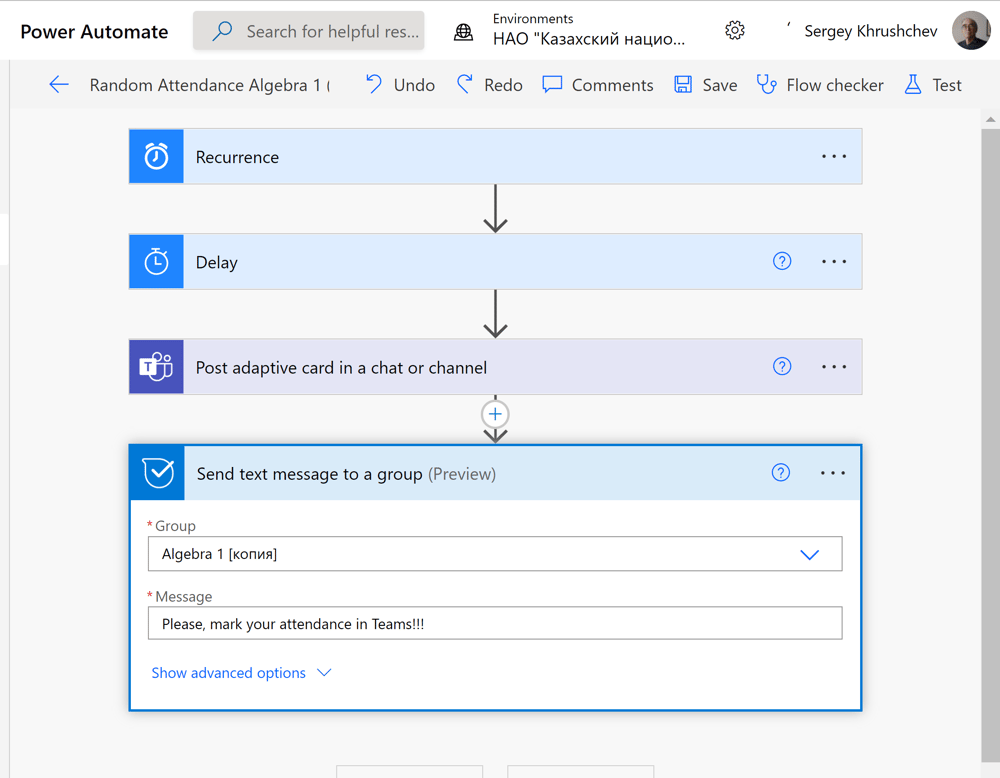
The system delivers adaptive cards silently. To turn students attention, I add the "Send text message to a group" card to Kaizala messenger. It arrives to students mobiles with a sound.
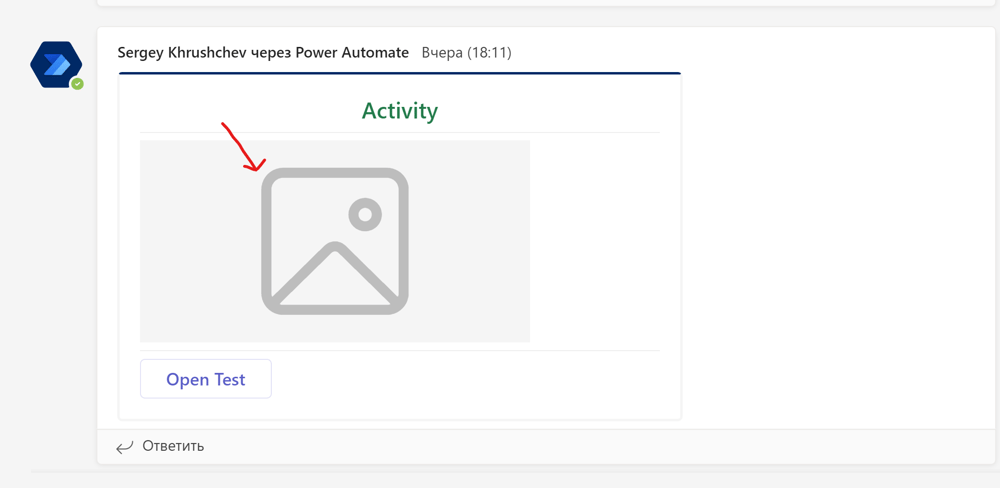
Although the URL for a picture saved in Class Materials in the SharePoint of a team may deliver this picture to the designer and even to the publications' tab in the team, later the picture may disappear and what is worse new adaptive cards may look like the one shown above. The simplest way to resolve this issue is to use public URLs instead. For instance, one can just use pictures from my Gallery.
How to inform students that their attendances were recorded?
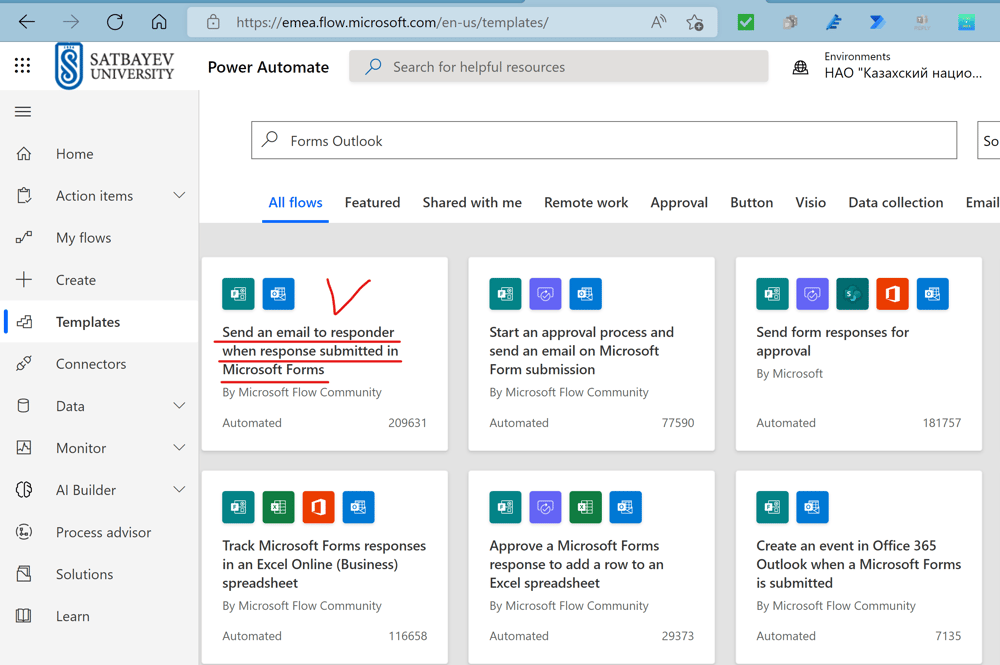
There are several ways to inform students on successful attendance record in the Microsoft Form. It is important to distribute the corresponding messages between students. If we use for this purpose Microsoft team of the class, then these messages will consume space. There is a ready template shown on the picture above. This flow sends messages to Outlook boxes of students.
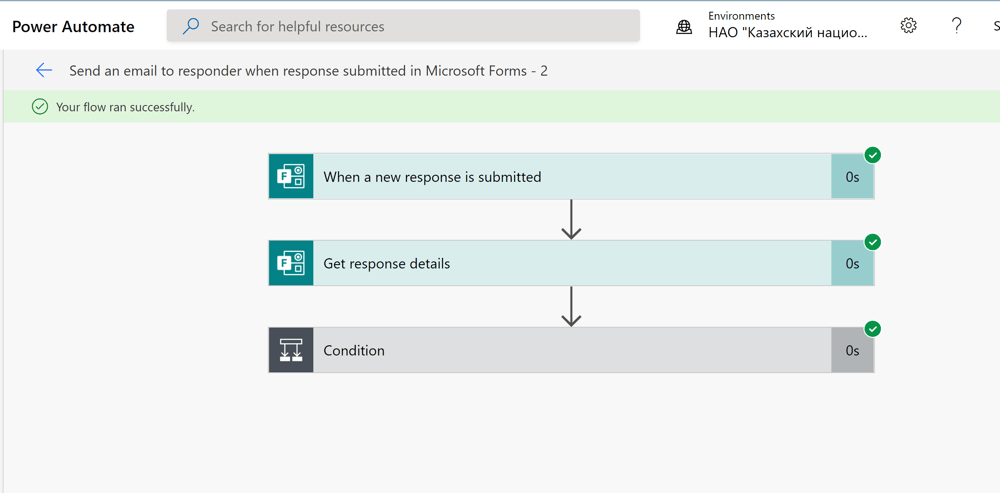
If you install and configure this template, then its test shows three standard blocks. The detailed structure is shown below.
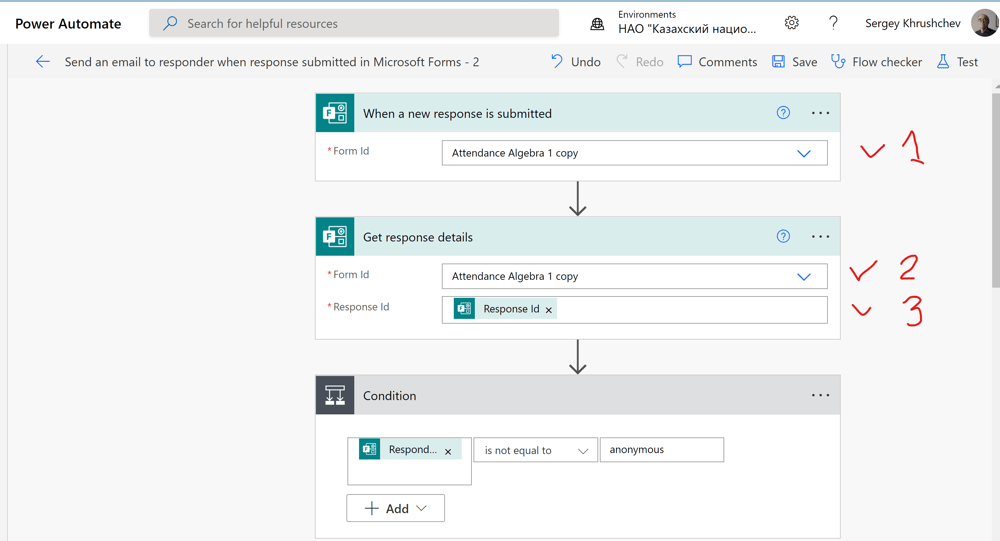
The first three fields are filled with dynamical icons (see 1, 2, 3).
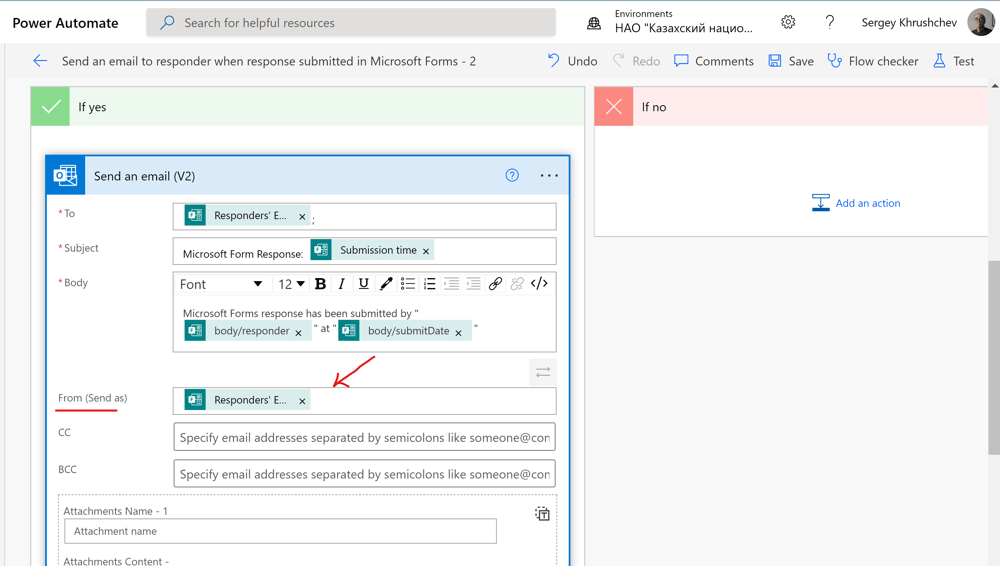
All dynamical icons are already present in the final section of this template. The only exception is the icon indicated by the red arrow above. It assigns the email address of the student who submitted his presence to the form.
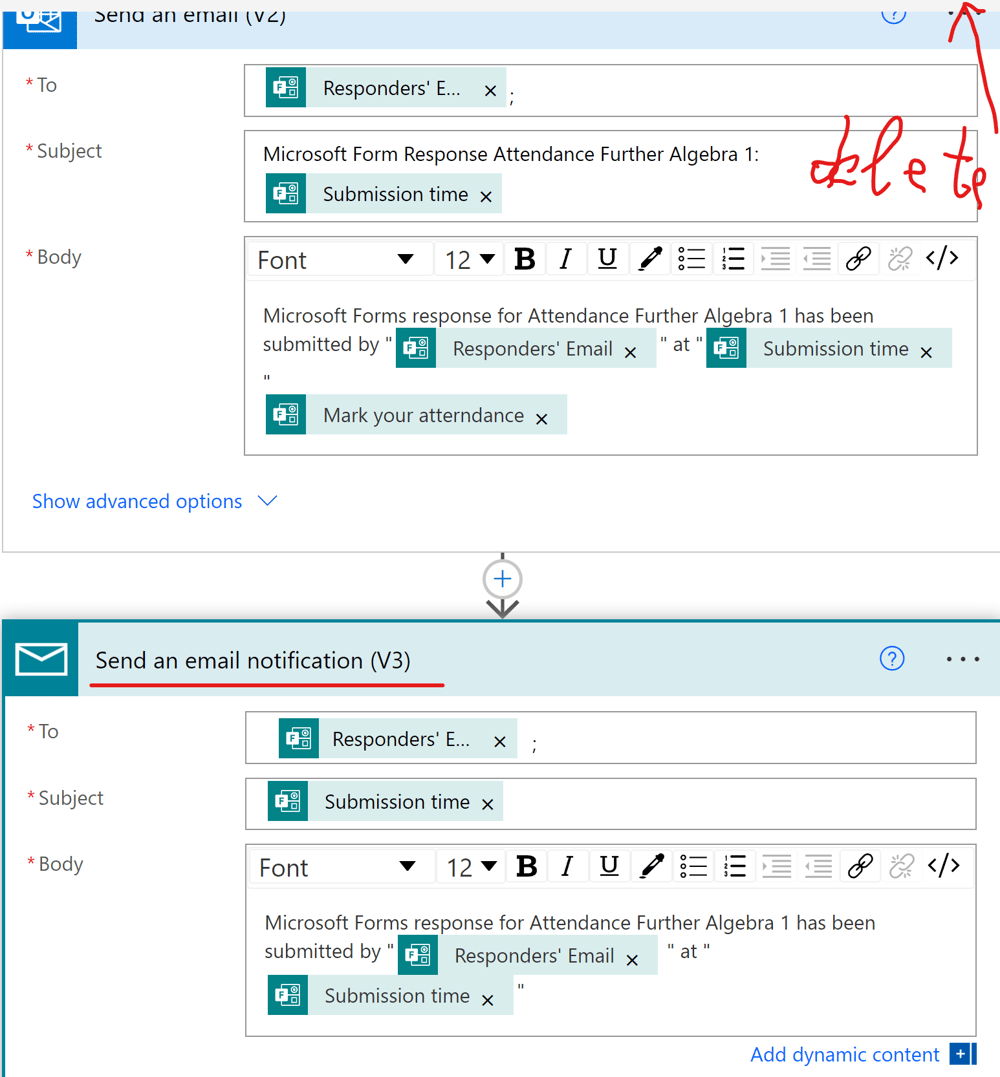
If you insert the email of the responder, then the flow fails. The reason is that the form responder has no right on the Power Automate. It is not a good idea to insert here your email. In this case, your sent folder will be filled with messages. To avoid this, I replace the action with email notification. I add a new action and search for "Send an email notification (V3)." I fill all fields following the example shown above. When everything is finished, I delete the action "Send an email (V2)" by a click onto the ellipsis at the right upper corner of the action and selecting the delete option.
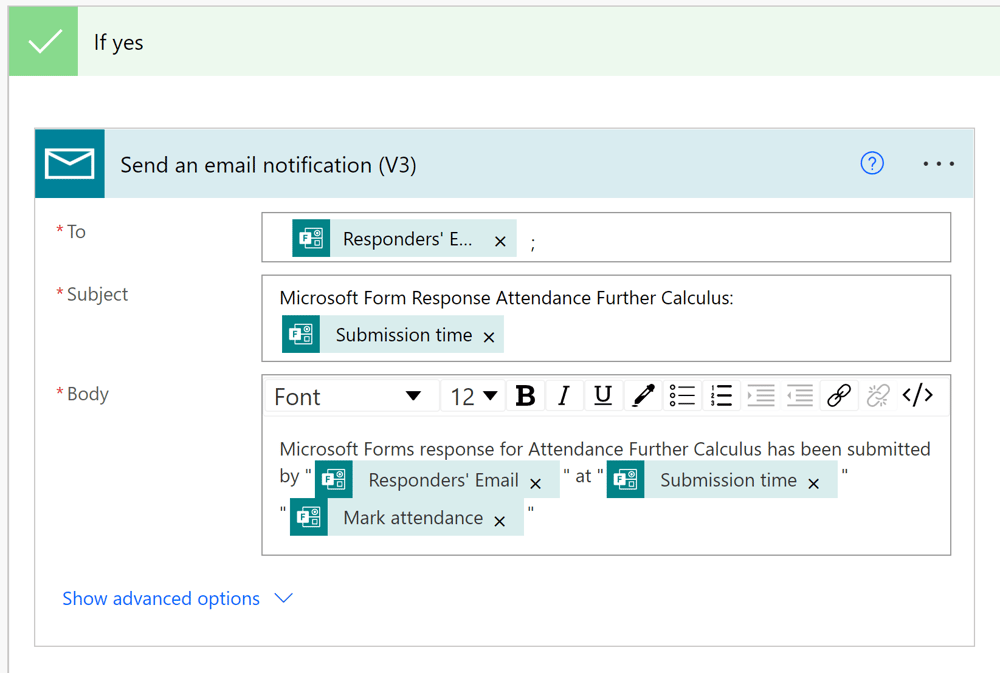
Only "Send an email notification (V3)" action is left in the "Yes" branch. I save the flow and run the test.

The confirmation from Power Automate arrives to the mailbox.
Give students Attendance access via Kaizala

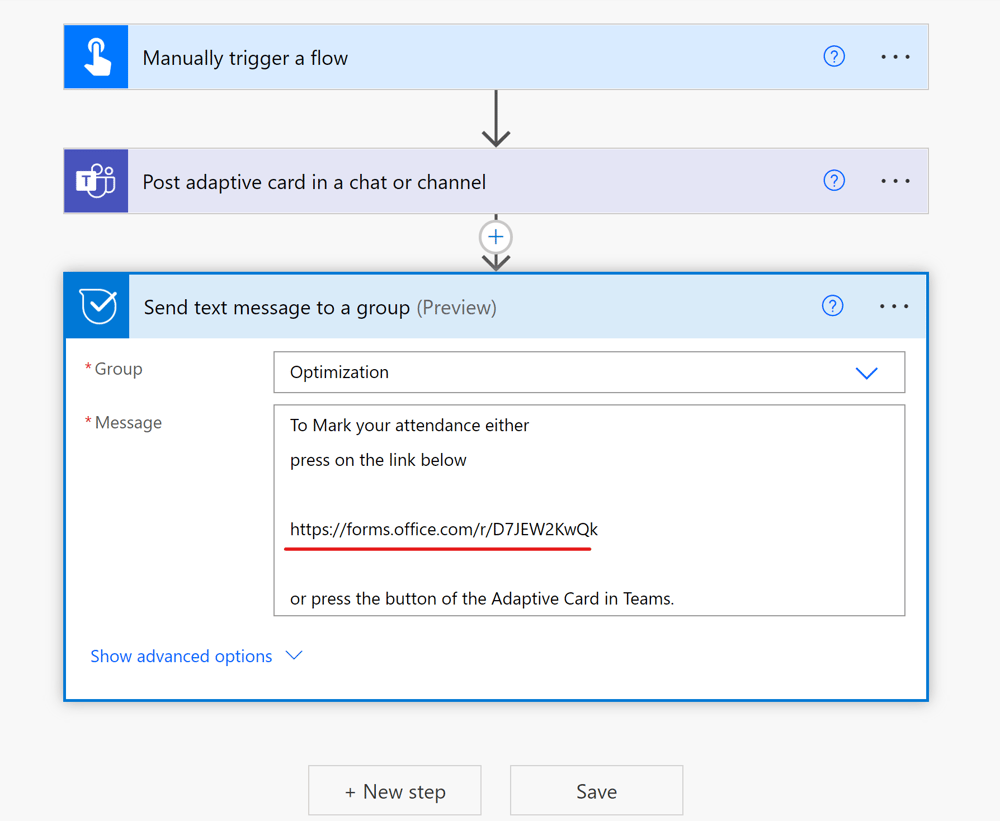
The flow shown above sends a message to the Kaizala group of the team. If the underlined link is pressed by a student, then this student opens the attendance form. The mobile phone with Kaizala installed notifies the student with a sound on arrival of this message. The student can mark attendance either through the adaptive card or through the messenger.
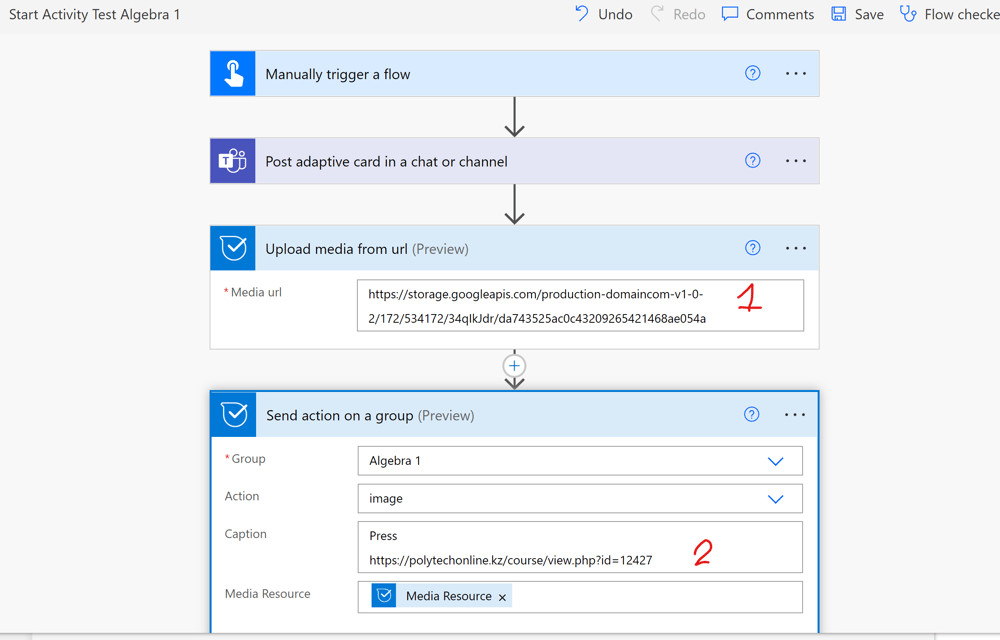
This flow shows in Kaizala the same picture as in the adaptive card, see 1, and provides the same link in the messenger, see 2.
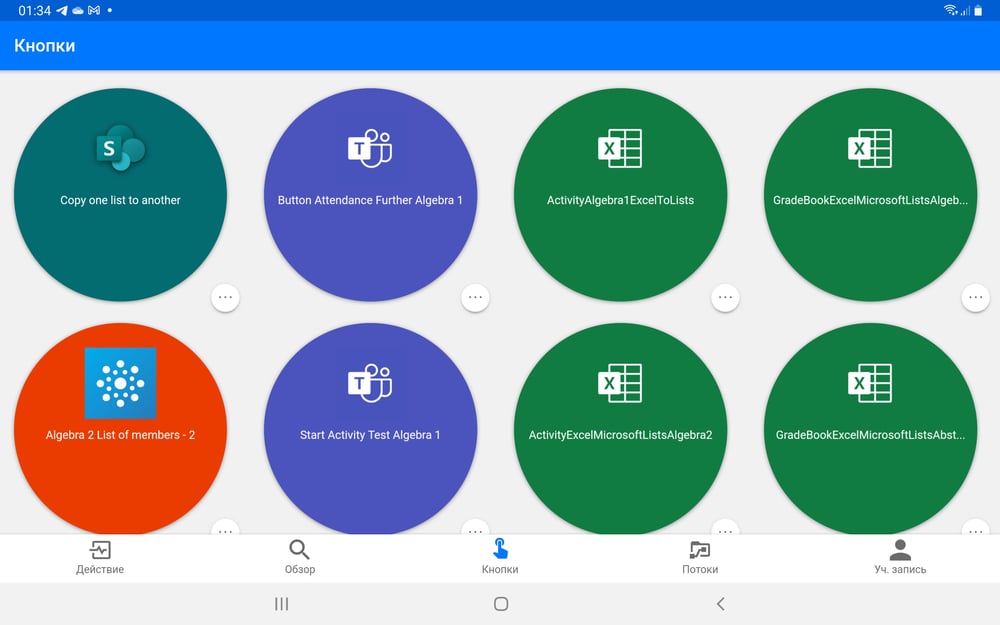
I usually create an instant flow for attendance. Power Automate has versions both for mobiles and tablets. To toggle between the standard and button modes, one can press the small blue icon at the bottom of the screen. If I tap the tablet button, say, "Button Attendance Further Algebra 1," then this activates the corresponding flow. This is useful if, for instance, the random automatic flow starts too early.