Welcome to Azure Virtual Machines
Azure account
Microsoft provides all university teachers and students with 25 free services without restrictions and a $ 200 irrevocable credit within a month from the date of registration for all available services (I will show the list below). To sign up for this plan, you need to log into the Azure Portal with your university account.
Azure account
To create an azure account, you press the "Start" button on the card "Start with an Azure trial."
Azure account
This form must be filled. The system asks for your mobile phone. It sends you a digital code and after your confirmation opens a window with the fields for your credit card. This card will not be charged until you exhaust your Microsoft gift amounting $200.
Azure account
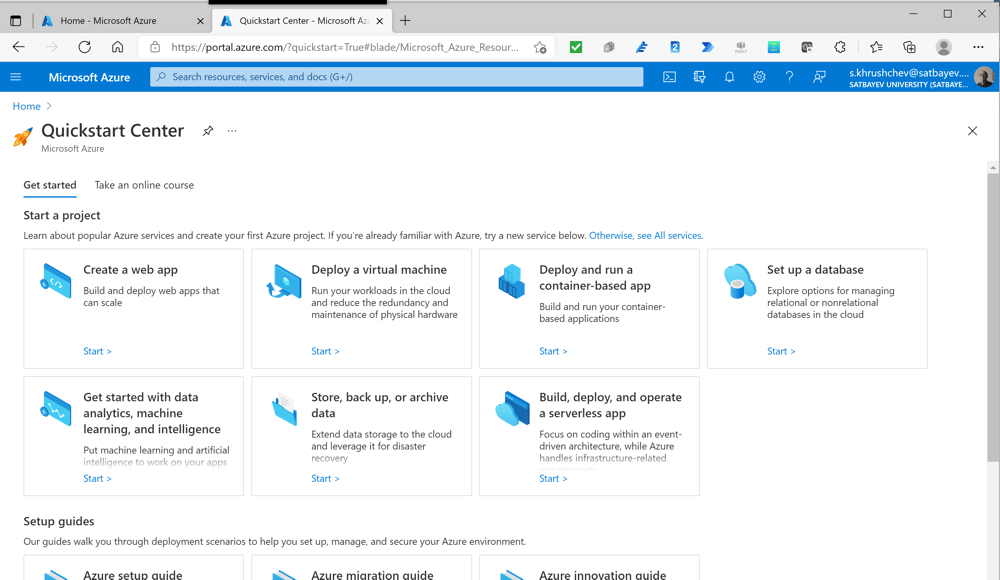
After the confirmation of the credit card validation, you open the "Quickstart Center." You may either press the start button on the card "Deploy a virtual machine" or press the text in blue "Otherwise, see all services." It is useful to see what is available.
Azure services
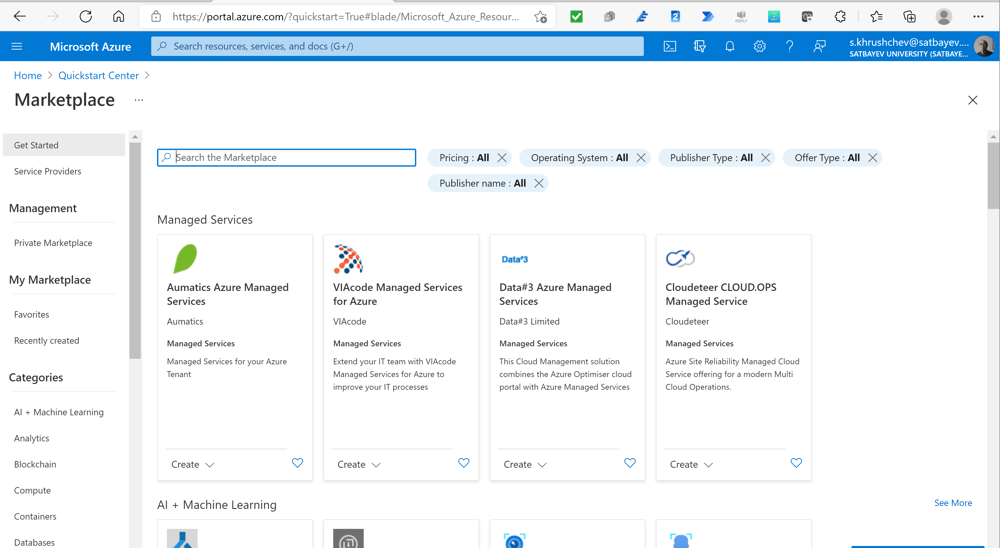
It is the first page.
Azure services
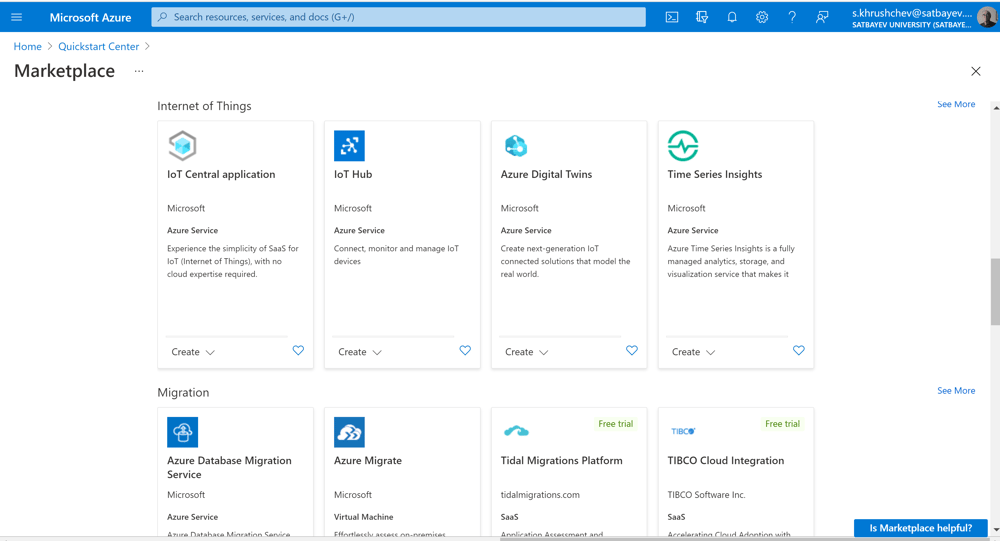
It is the second page.
Azure services
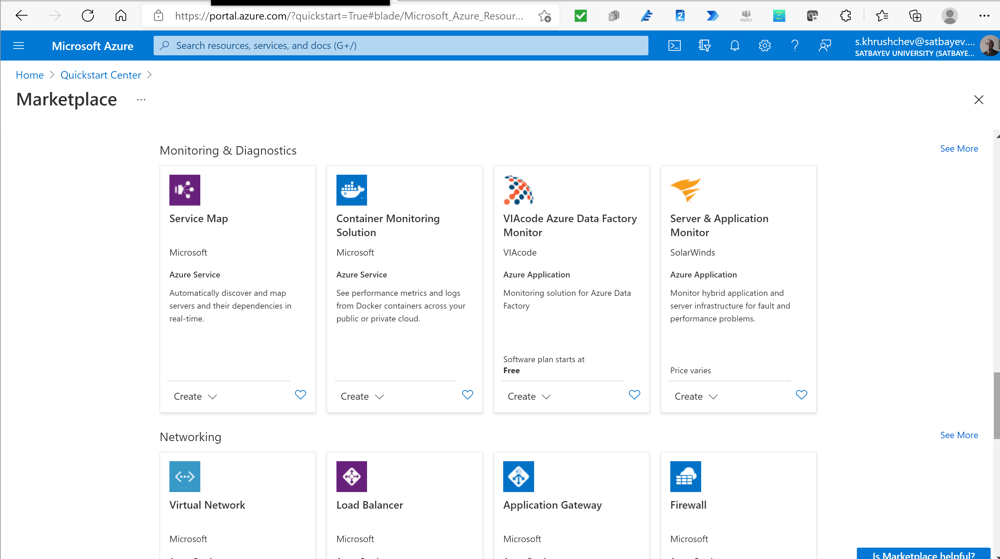
It is the third page.
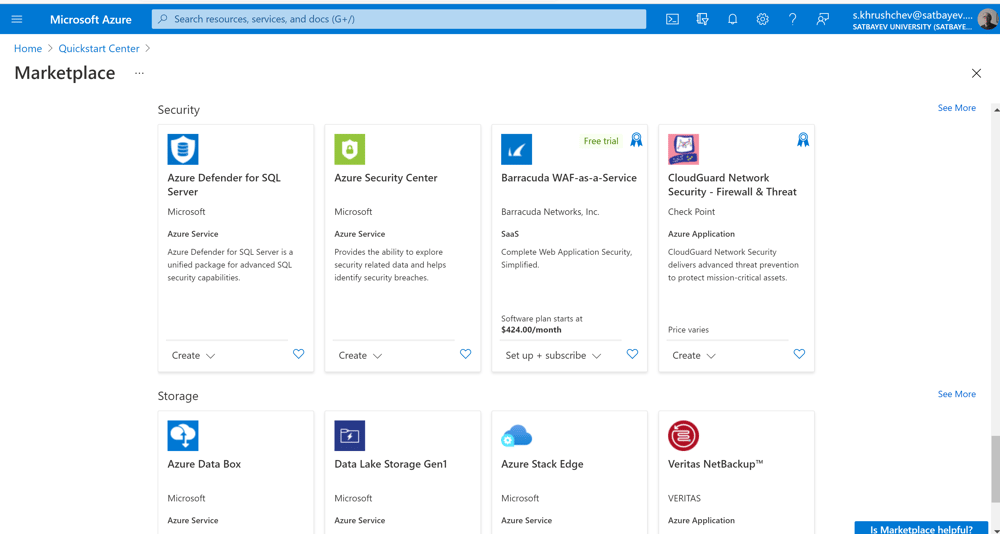
Azure services
It is the forth page.
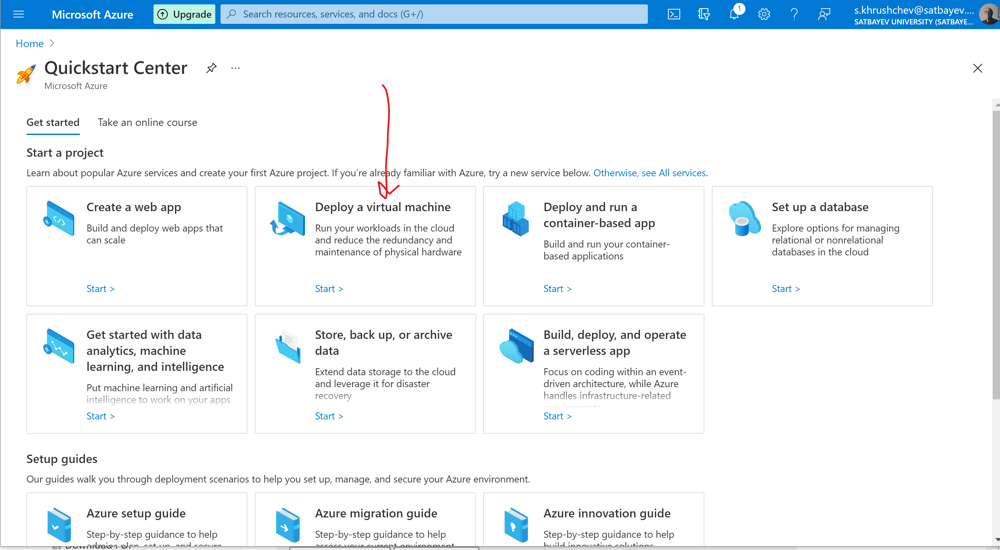
Azure Virtual Machine
We return back to the Quickstart Center and press the start button of the "Deploy a virtual machine" card.
Azure Virtual Machines
In the card "Create a Windows virtual machine," I press the "Create" button.
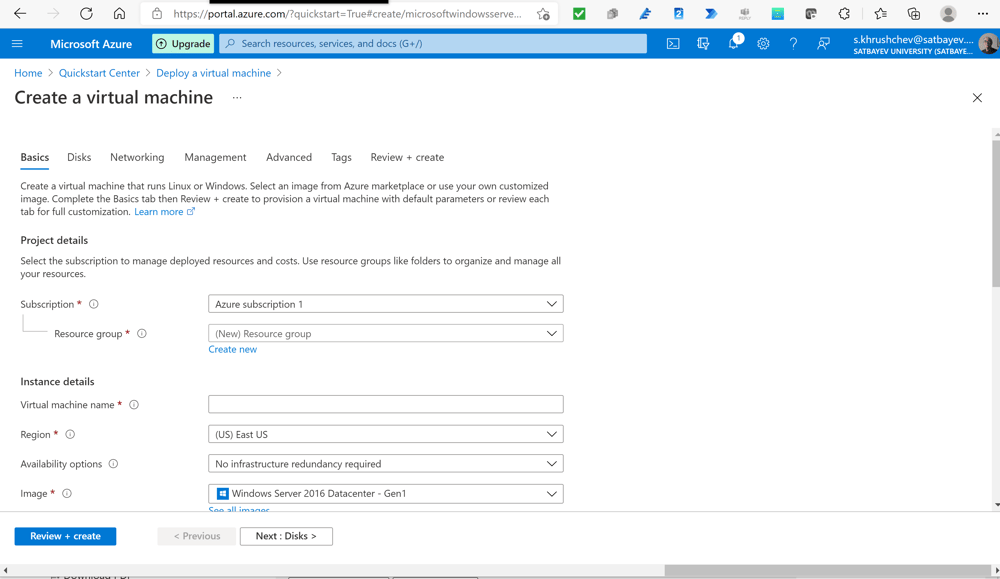
Azure Virtual Machines
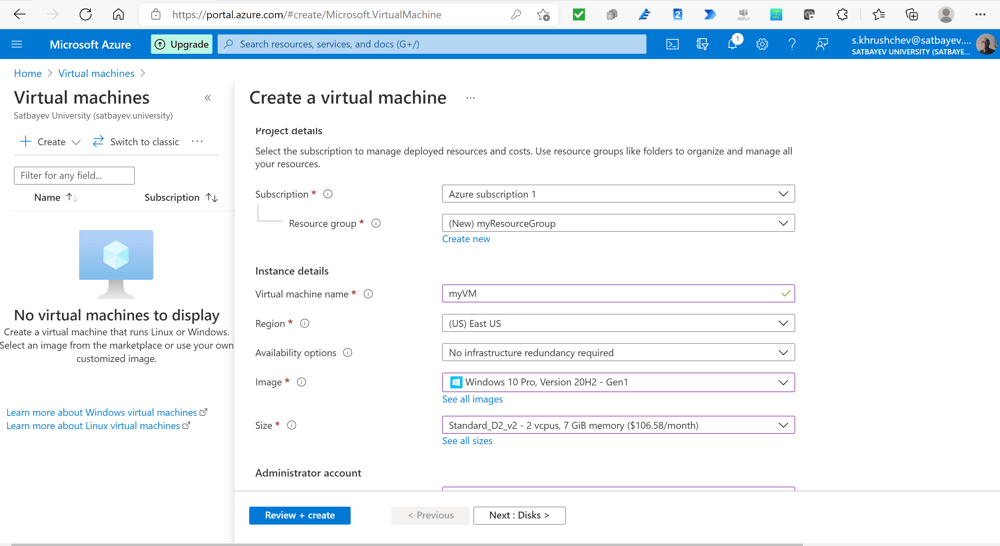
The subscription field "Azure subscription 1" connects the virtual machine constructed to your irrevocable credit from Microsoft or to your credit card if the credit is finished. The field "Resource group" includes the group of services included in your VM. In this case I press "Create new" below the field and enter "myResourceGroup." Then the field will have "(New) myResourceGroup" in it. I give the name "myVM" to this machine. I leave the region unchanged. To choose the image of the system, I press the check mark in the image field.
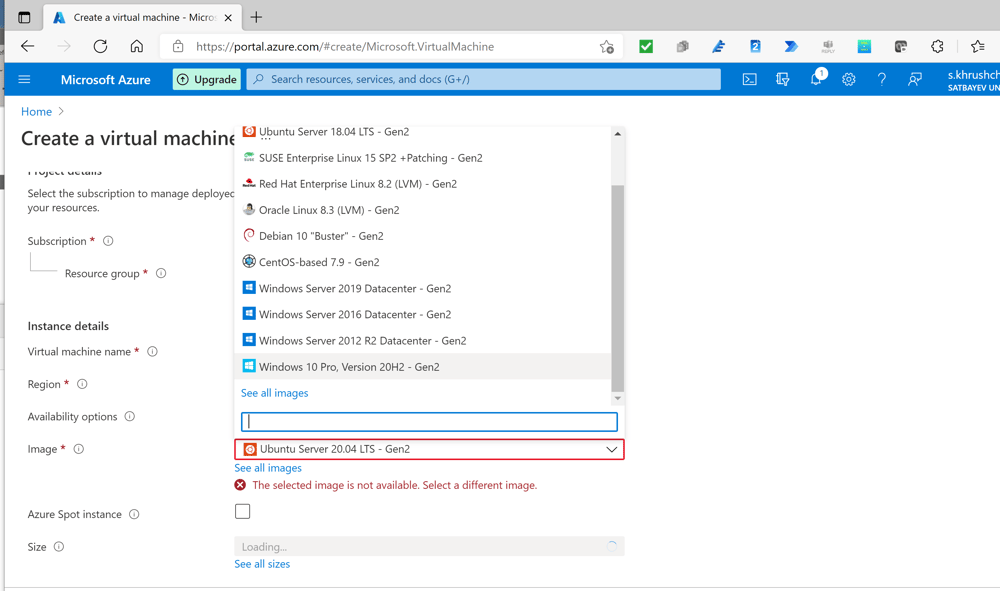
Azure Virtual Machines
A suitable choice is "Windows 10 Pro, Version 20H2 - Gen2"
Azure Virtual Machines
Similarly, I chose the hardware of my VM through the check mark of the field "Size." In this case it is the machine "Standard_D2_v2 vcpus, 7 GB memory, Intel Xenon, 2.4 GHz.
Azure Virtual Machine
This part includes the Username to login to this VM as well as a password. It must be at least 12 symbols long, includes capital and low case letters, some special symbols and numbers. I mark the circle to the left of "Allow select ports." Using the check mark in the field "Select inbound ports" I choose HTTP (80), RDP (3389). If you scroll this band down, then you find a box which I checked since I have an A3/A5 license and therefore I have five licenses for Windows 10 Pro. There is also another option here, which automatically shut downs the machine at specified time. It is good to use this since in this case your VM is automatically deallocated at the specified time. You can also add to your machine extra disk if it is needed.
I press "Review and create." The system starts the process of creation of the VM.
Azure Virtual Machines
I press "Go to resource."
Azure Virtual Machine
Add This table provides a compete information about my VM. In particular, it shows that myVM is running in the East US data center. To connect my computer to this VM, I press "Connect."
Azure Virtual Machine
I press "RDP" to download the virtual connector to my VM.
Azure Virtual Machine
I press the button "Download RDP File." Then I press this file, confirm the permission and get the logon window.
Azure Virtual Machine.
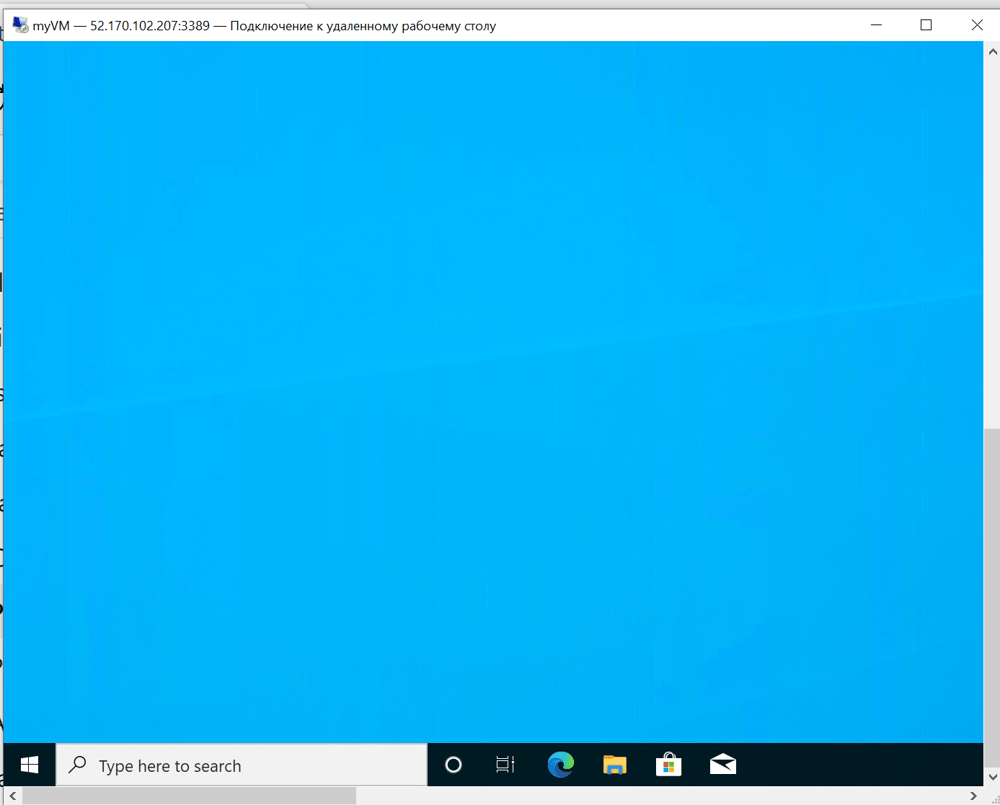
I enter the Username and password prepared in one of the previous steps and press "OK." It takes some time to open this VM and as it usually happens after a fresh windows installation I just confirm default settings.
Azure Virtual Machine
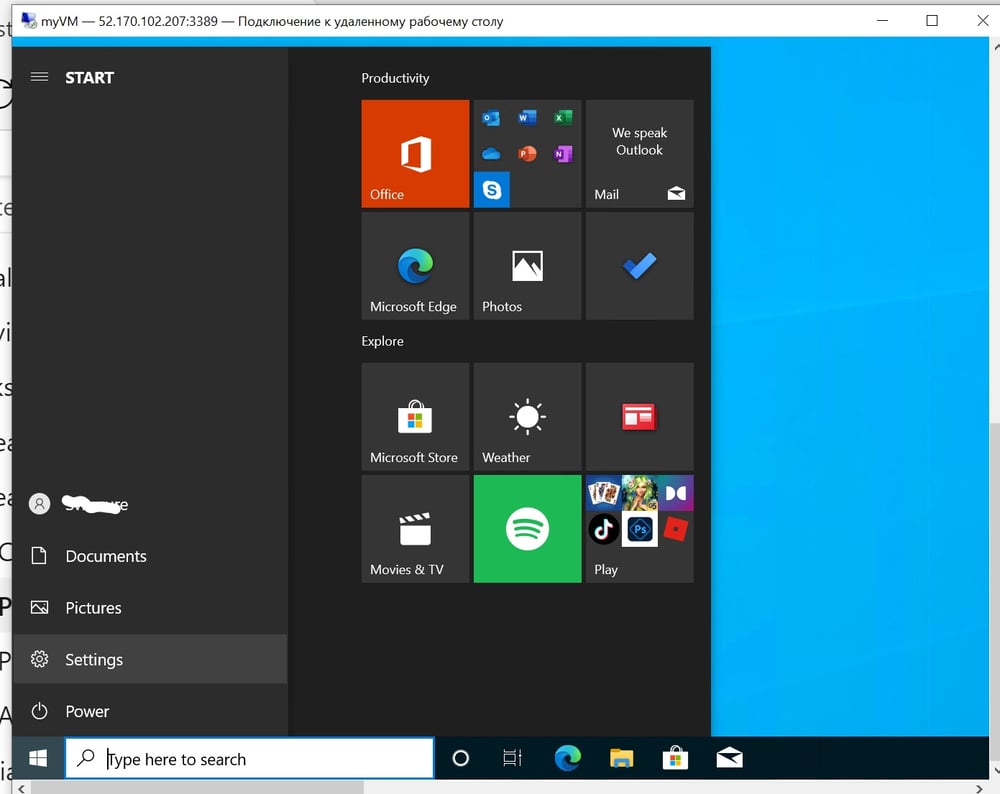
The upper left corner indicates the name of this VM as well as the ip address. I press the windows symbol on the bottom pane and open settings:
Azure Virtual Machines
I press settings.

Azure Virtual Machine
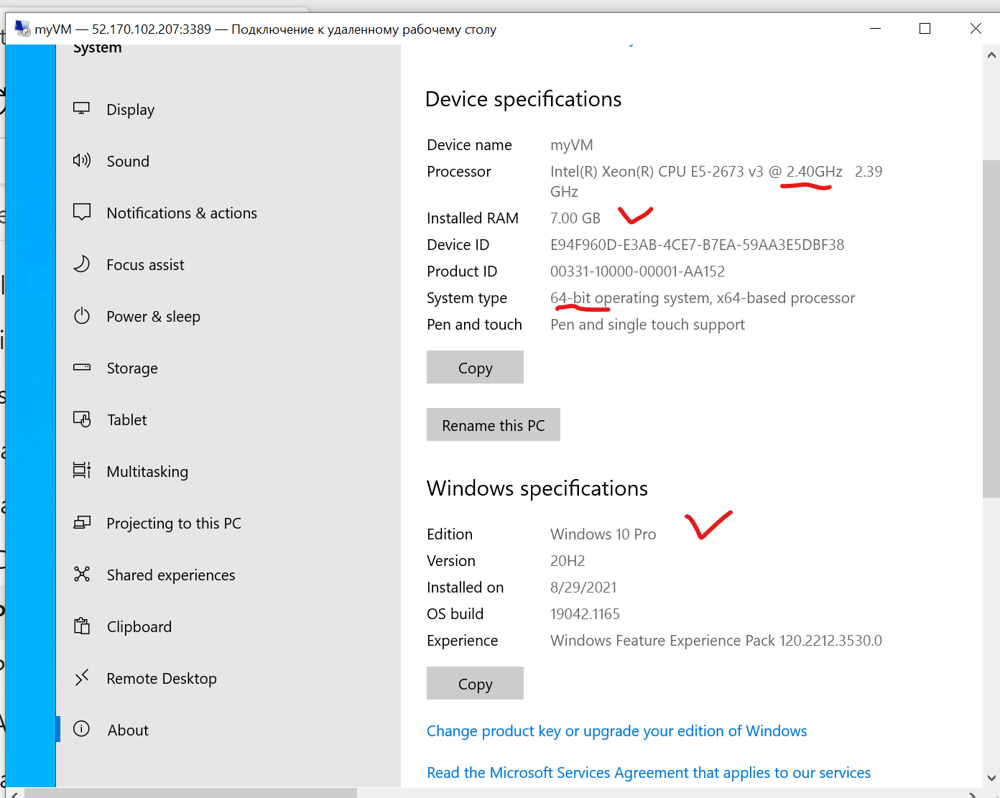
I press the icon "System."
Azure Virtual Machine
This window shows the specification of the virtual machine.

Azure Virtual Machine
I upgrade the internet Explorer to Edge, and enter Office 365 with my corporative login. It takes seconds to install the Office to this VM. I open Teams.
Azure Virtual Machine
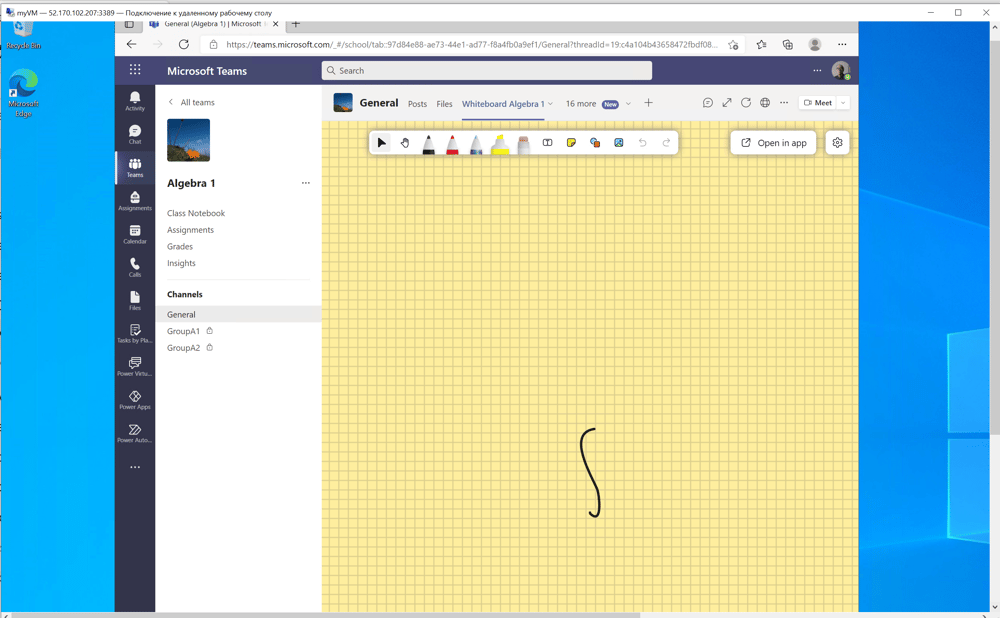
This window demonstrates Microsoft Whiteboard opened in Teams.
Azure Virtual Machine
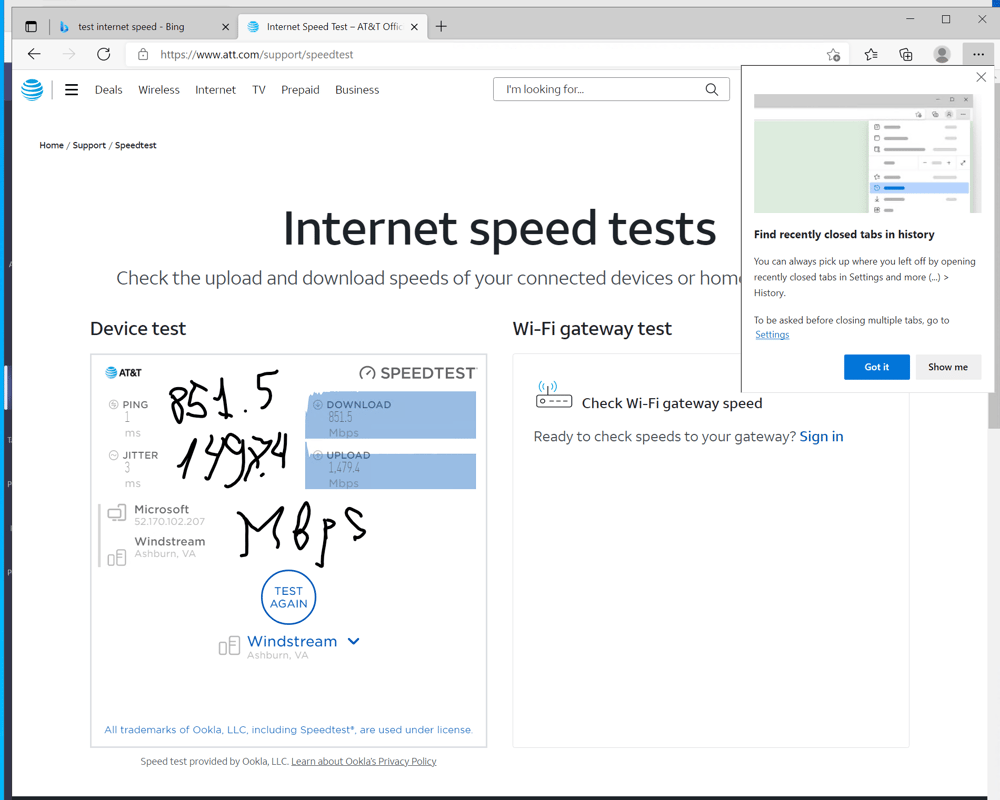
This test shows a very high speed of the internet for this VM.
Azure Virtual Machine
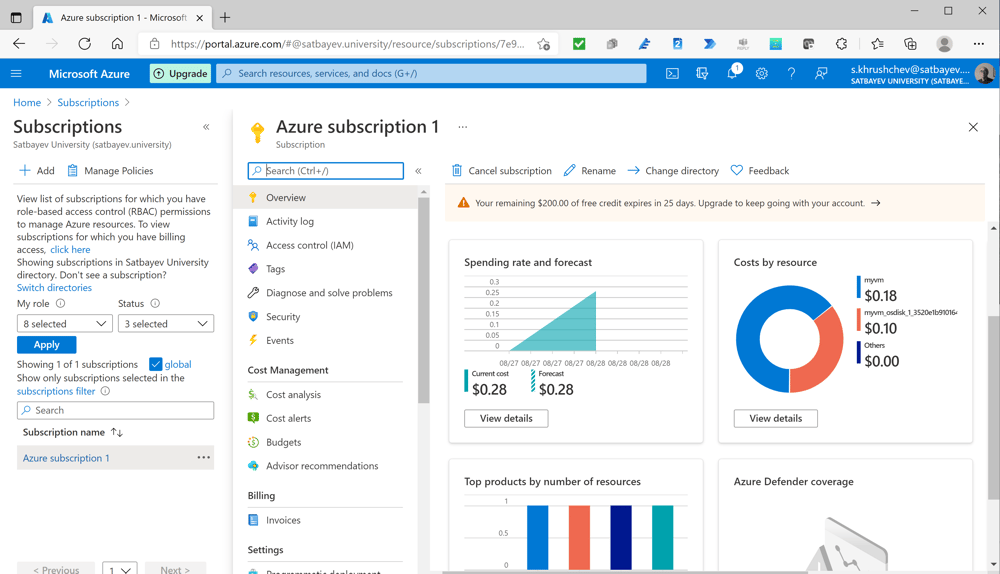
The system shutdowns the VM at 21:00. I enter "Subscriptions" and press "Azure subscription 1."
Azure Virtual Machine
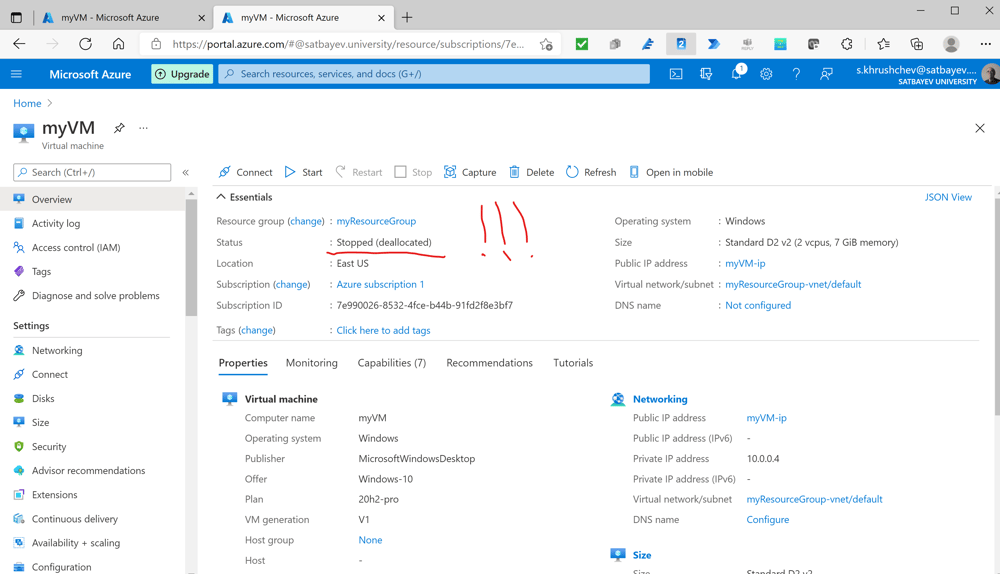
This table shows the status of my VM is "Stopped (deallocated)."
Azure Virtual Machine
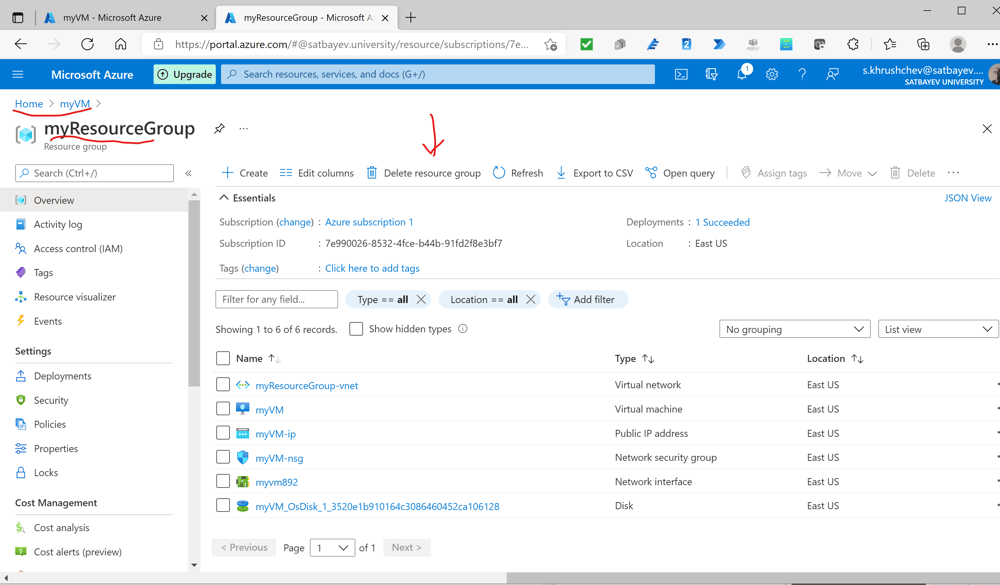
To completely delete this VM from the system one should press "Delete resource group."
Azure Virtual Machine
This card shows the structure of expenses for this VM in about 12 hours after the shutdown which moved the VM into the state "Stopped (deallocated)." One should keep in mind an important issue. If you shutdown the VM directly in its window, then the state of the machine is stopped. This means that the charges for calculation will be continued. If you stop your VM in the Azure interface, then no calculation charges will be included in the bill. In any case the charge for allocation of the system disc and additional discs if included will be taken in any case. But these charges are small.
Azure Virtual Machine
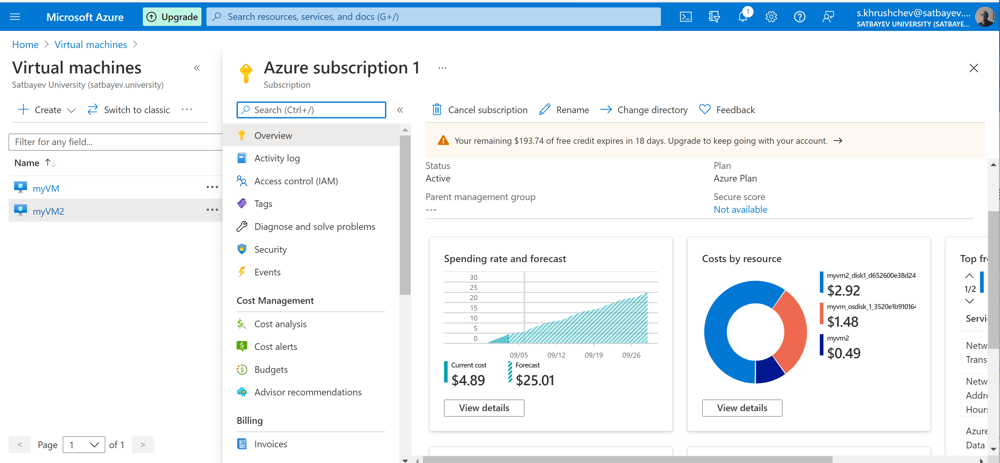
Charges for two machines.
Azure Virtual Machines
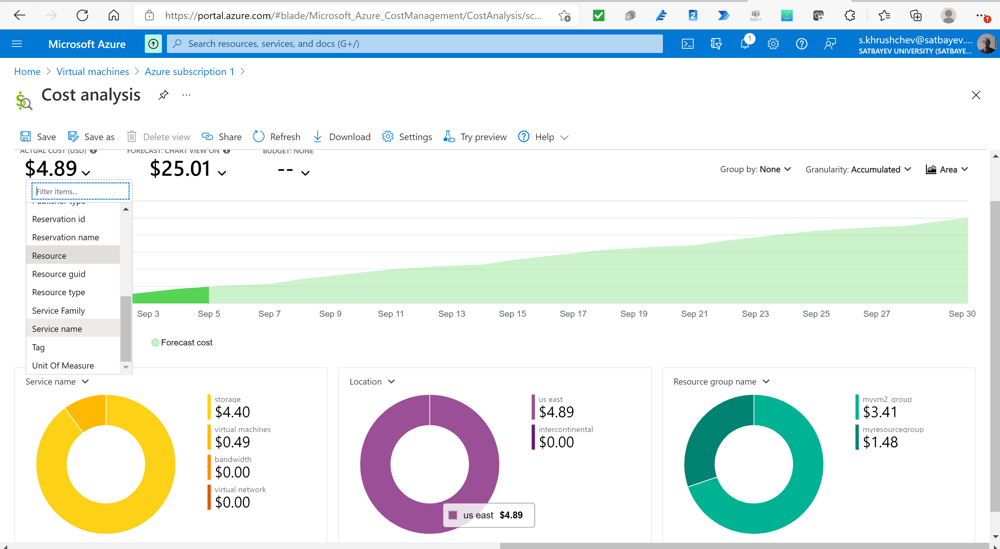
Details.
Azure Virtual Machine
This window shows how to start and stop the VM. Press "Stop."
Azure Virtual Machine
To confirm I press "OK."
Azure Virtual Machine
The VM is stopped and deallocated. I do not recommend to use cheap VM. They are not available and are extremely slow.