Pic. 1
Welcome to Classical Attendance in Teams
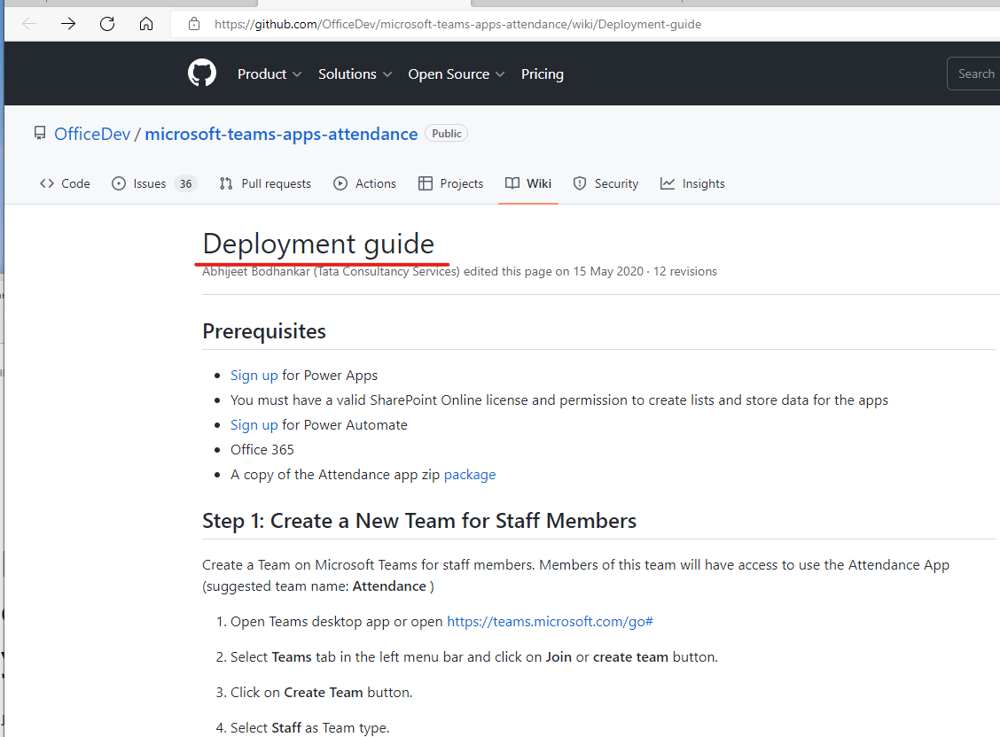
The details of creation of this Power app are described in this link. Some changes occur in Microsoft 365 since May 15, 2020. Therefore, I am going to give some comments on the steps described in the Deployment guide for this application. Since it is a Power app, it can easily be included as a tab in any Microsoft team as well as in the SharePoint site associated with the team. See this page for details.
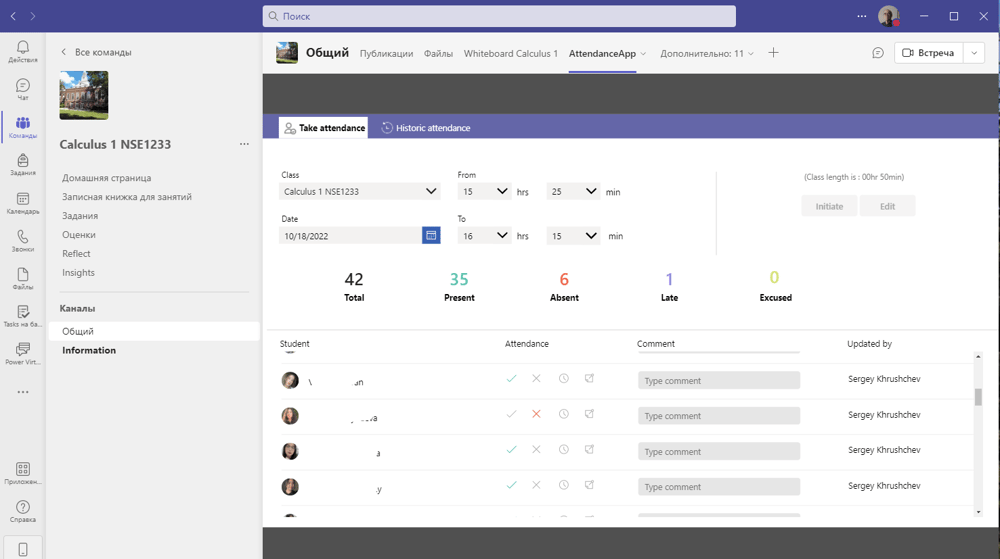
A teacher marks attendance as follows. It is necessary to select the date and the time of the class. Then the list of students is generated automatically. If a student is present, then the teacher clicks the grey check mark, which makes it green. If the student is absent, then the teacher marks the cross which makes it red. There are also late symbols as well as excuse ones. The total quantities of present, absent, late and excused students are shown at the top in the corresponding colors, see pic. 1. The data source can be the file, see pic. 4a, which is exported from the attendance tab of meeting details, see pic. 3-4. Since I also use the attendance taken at random, which is displayed on the SharePoint site through a Power app, see pic. 4, I can find among those who registered in the meeting those who in fact followed my lecture.
Therefore, I first mark as present those students who are in the list shown on pic. 4a. Then in the "Comment" field, I can type "formal" for students, who are not in the list on pic. 5. This means that although they jointed the meeting, they didn't listen to me. This in fact means absence.
To avoid disappearance of a meeting's account in a class, if I have another meeting later, I always save these Excel files with attendance details to a special subfolder in the folder of my class on the OneDrive.
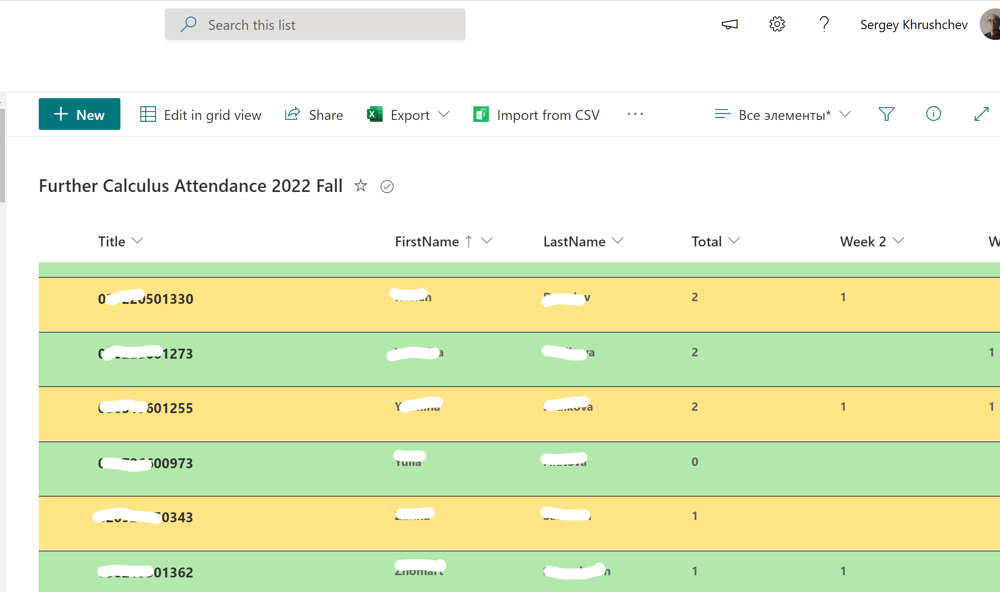
I have Microsoft Lists on the same SarePoint site as my Grade Books with per week attendance data for each my class, see pic. 5a. They are made by the same flows as grade books, which implies that each student can see only his/her attendance. At the weekend, I open the history tab of the application discussed, see pic. 2, and mark the absence in the attendance Microsoft List list for this week.
In case of any complain, I can easily find all details with this very useful application. I think that it is seriously underestimated by teachers.
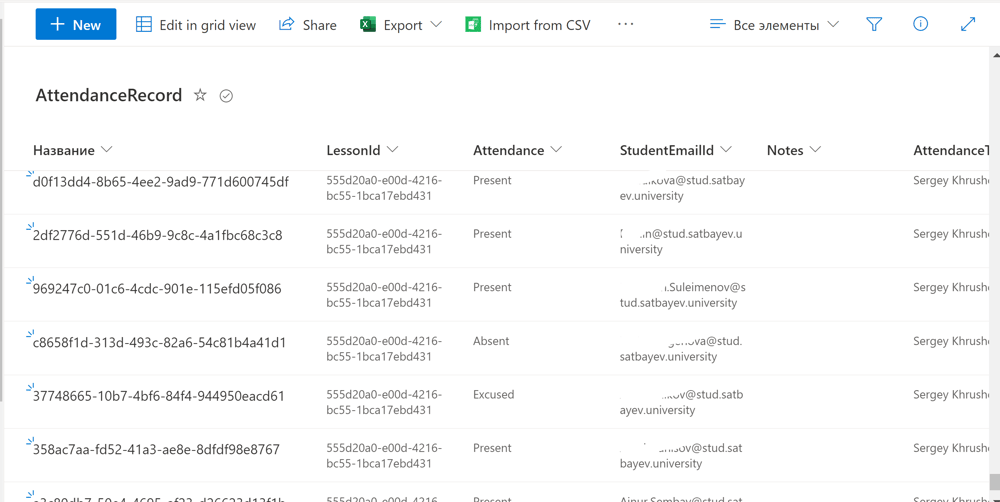
The data saved in the application can be found in the "AttendanceRecord" list, which according to the Guide must be saved on the SharePoint site of the "Attendance" team. The list of all classes is saved in the "SessionMetaData" list on the same site, see pic. 5b-5c. In my case, I saved both on one of my real teaching sites. However, in this case one should change the students' permissions for the mentioned lists to read only.

Pic. 2
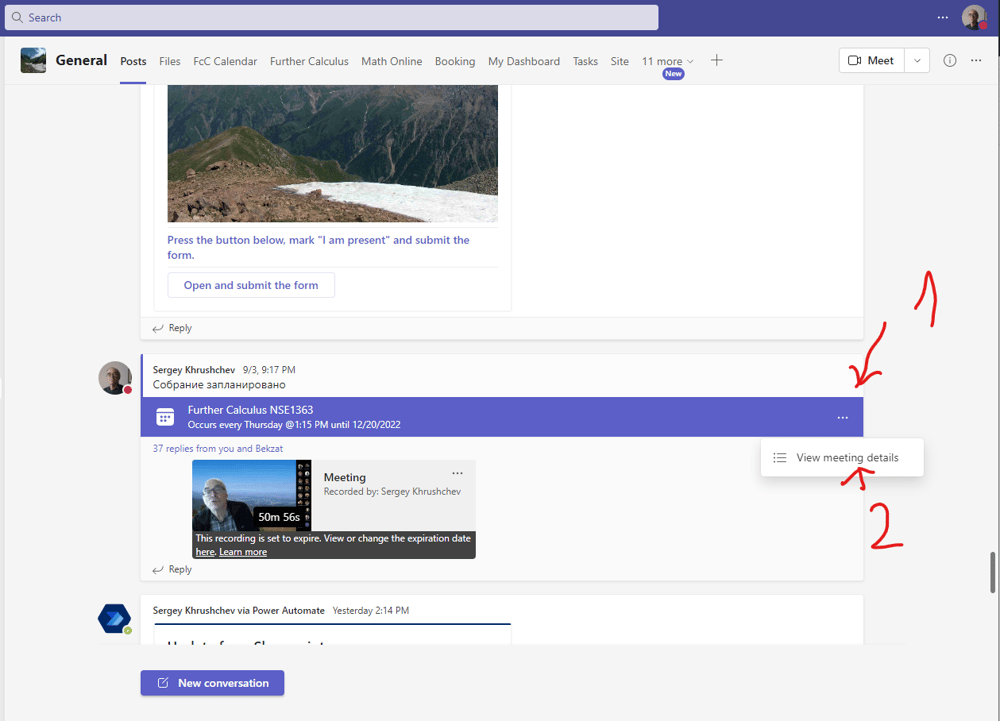
The details on operations available in this application can be found via the following link. This application can be combined with the attendance feature available now in Microsoft Meetings. I usually mark attendance following the meeting attendance tab. Those who are not in this list are marked as absent. It is possible to mark also late students since the information available in this window shows the time of the first entrance.
Pic. 3
To get the list of students in the meeting, I press ellipsis, see 1 on pic. 3, and then click "View meeting details."

Pic. 4
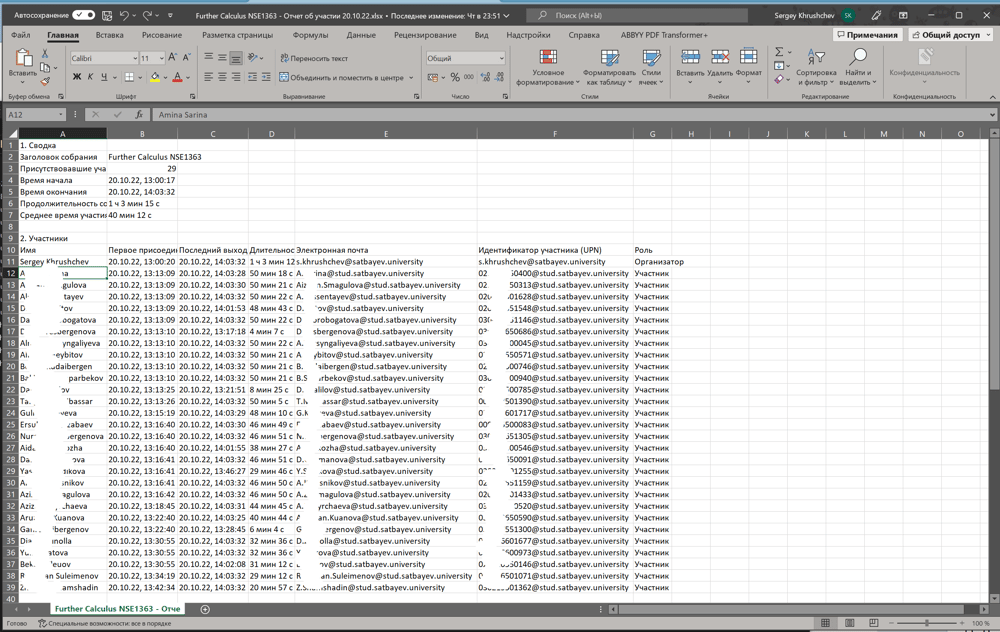
I click the "Attendance" tab and get a new window, see pic. 4, which lists all students attended this meeting in the first column, their first entrance in the second, see 1 on pic. 4, the last leave in the third, see 2, and total time in the meeting in the third, see 3. I can download this data to my computer by pressing the "Download" button, see 4. The data from this file allows me to decide which students attended the meeting and which didn't. If I want to mark the real and not the formal attendance, then I can use the flow, which is constructed on the following Page of this site. I combine it with the application made in Power App, see this Page, and insert this application to the SharePoint site of the corresponding team, see pic. 5.
Pic. 4a
Pic. 5
In this particular case the flow sent a link to the attendance form at 12:31 PM. Those students who .marked their attendance with this link are included in the list with the complete time 12:32 PM or so, The first column indicates the order of the forms submitted by students. This method is more reliable since only those students who followed my lecture could do this promptly. It is important that the flow starts at random moments of class hours. The "Attendance" application is designed for the Staff only.
Pic. 5a
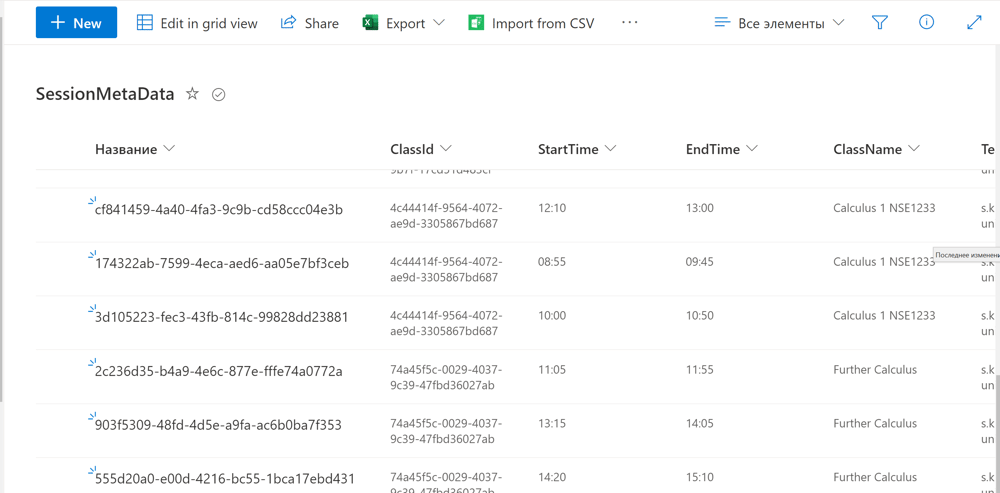
Pic. 5b
Pic. 5c
Pic. 6
Remarks on the Deployment Guide.
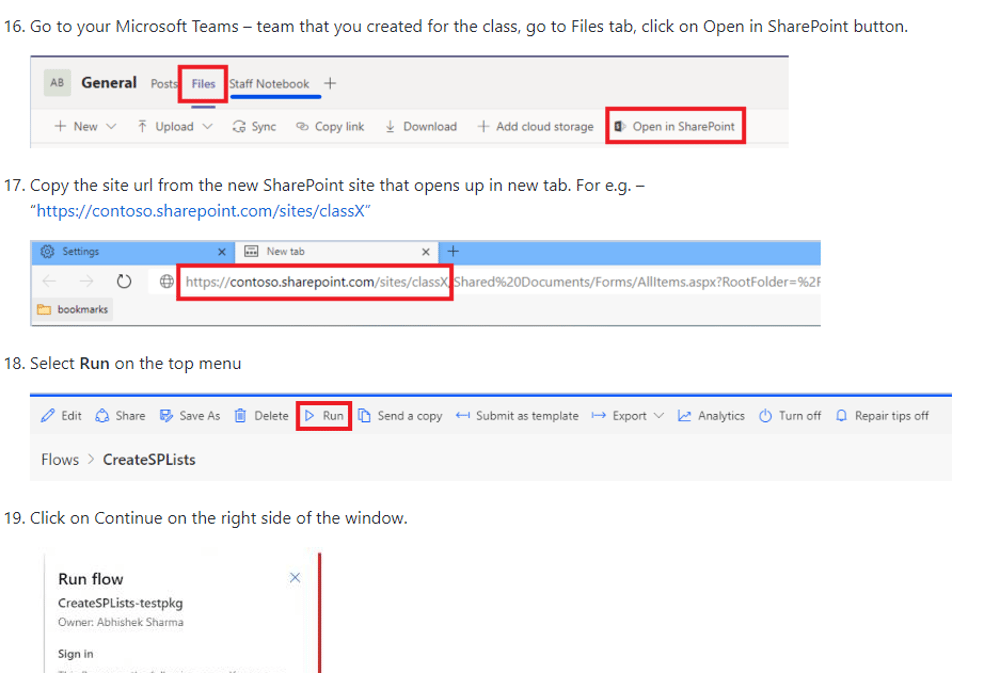
In Step 1, I create a team of the "Staff" class. Step 2 makes use of the PowerShell commands. This topic is covered on the following Page of this site. In fact, these two steps are not difficult. In Step 3 the teacher must create two SharePoint Lists to save information on grades in teacher's classes. There is an important difference starting with action 16 in Step 3.
Pic. 7
The question is on which sites must I keep these lists? In paragraph 16, one can notice the interface of a team created at the first step. The "Staff Notebook" tab shows that it is a team of the "Staff" type. It follows that these lists must be kept on the SharePoint of the Attendance team.
The actions in paragraphs 18 are deprecated. Instead, I just return to the flow which was created in paragraph 15, turn it on and click the "Edit" icon. I save this flow and run a Test. Then 19 and 20 appear automatically.
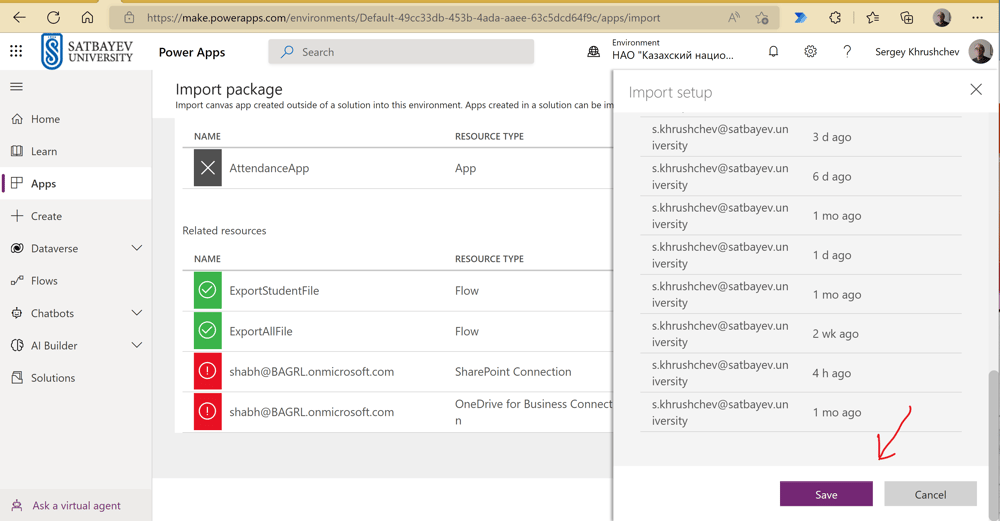
During Step 4, I import a Power app as a zip file. I follow the guide up to the 6th paragraph, where one should chose correct connectors. It is important to follow the directions. First, I click "+ Create new" in the window of the package import, and then I press the "+ New connection" in the Power Apps interface. The result is shown on pic. 8.
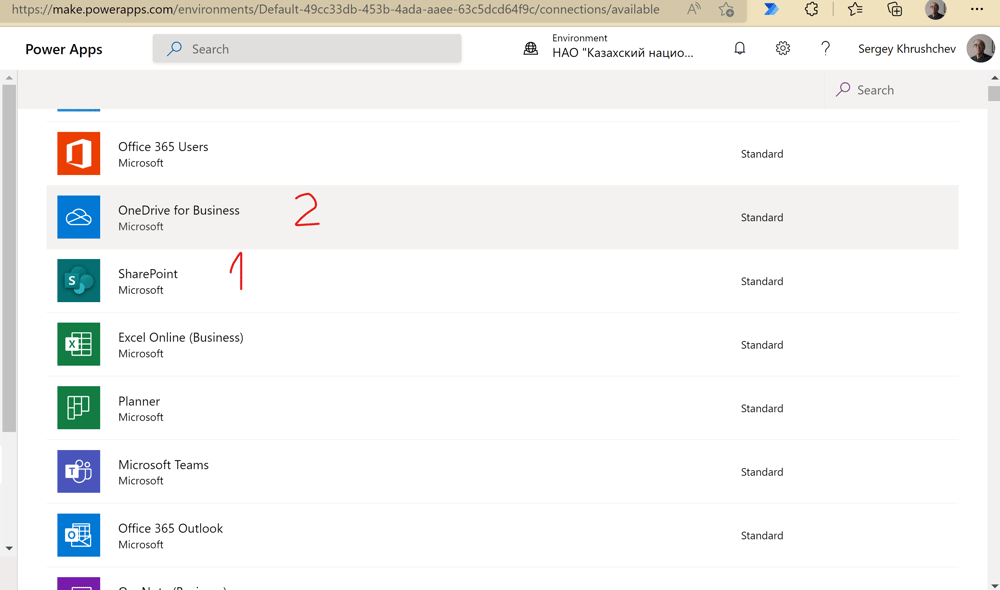
Pic. 8
Since the first connector is SharePoint, I click 1. For the second connector later I chose 2.
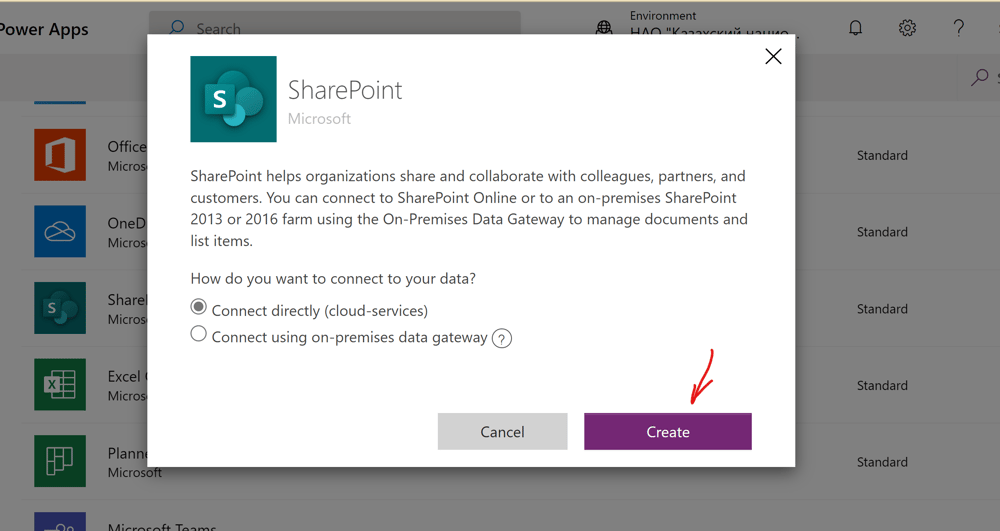
Pic. 9
I follow the default choice on pic. 9.
Pic. 10
Add The system may chose the connector automatically, and then I just click "Save," or I select the latest connetor as it happened with the "OneDrive Business" connector, see pic. 11-12.
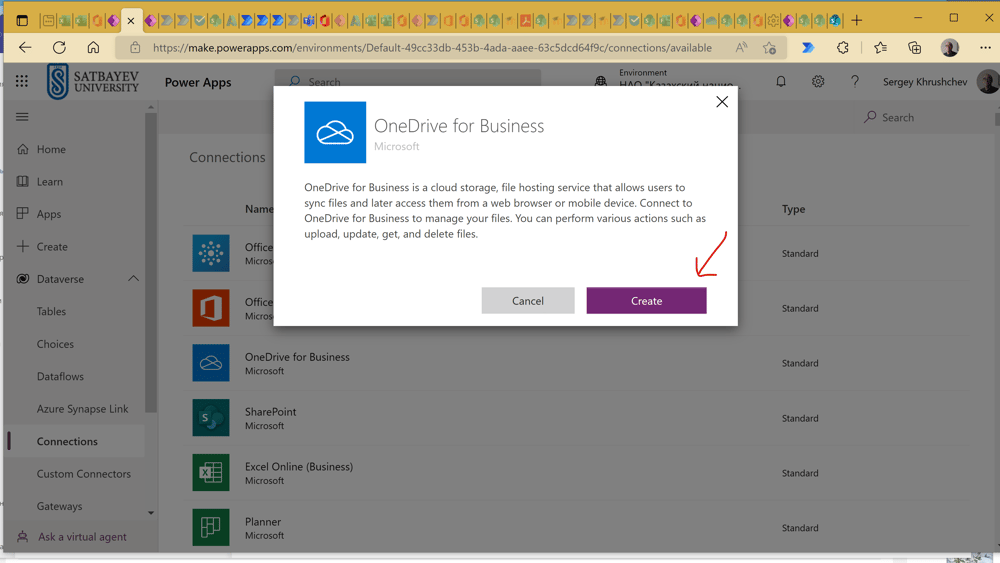
Pic. 11
Pic. 12.
The rest of the installation is standard. This application is designed only for teachers. I myself installed it in one of my SharePoint sites, although I also created the "Attendance" team. Everything works. But one should keep in mind that it is a temporarily storage of grades. The time lag is 30 days. Still, it is useful to take a look of attendance before enter it in the main SIS of the University.