Automatic adding students to Microsoft Teams


This option requires an Excel Table with the column of Outlook emails of all students to be added to the team. It is very important that all these accounts be active in Microsoft 365. Such files are usually available in the Office Registrar of the University. All accounts in Microsoft 365 are made as email addresses in Outlook. To avoid account conflicts, system administrators usually assign email addresses in the form of the student ID following by the email symbol @ and the university tenant. After the first login students have an option to assign an alias to this system address. To speed up the creation process and avoid mistakes I prefer the system format. See an example above. In fact, only column Email is necessary. Other columns may also be present. An important requirement is that this Excel file must have an inserted table with the headers as shown above. Usually, the table name is Table 1. The file must be saved in any folder of the OneDrive for Business. I create a separate folder for every team to save such technical files.
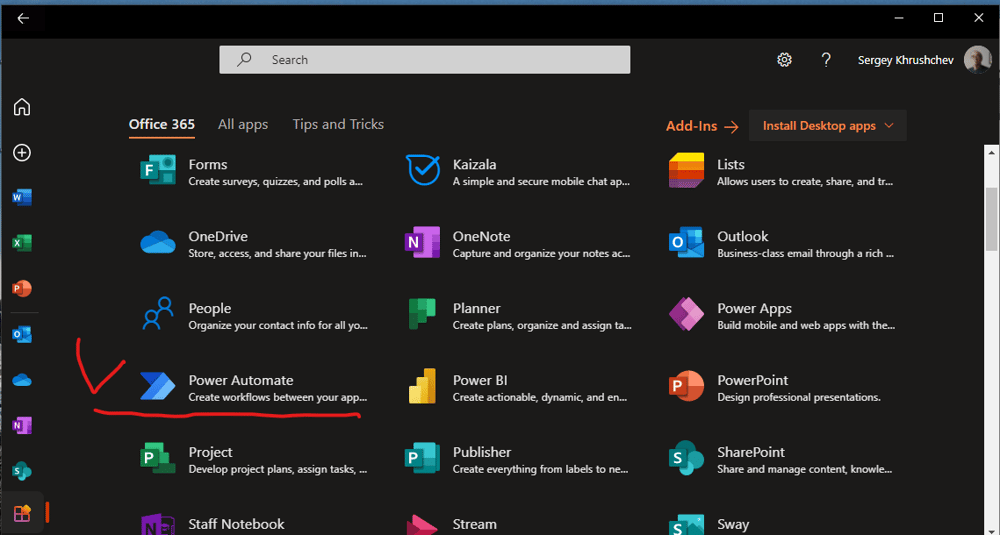
Pic. 1
The second step is to start Power Automate listed in the desktop Office 365, see pic. 1.
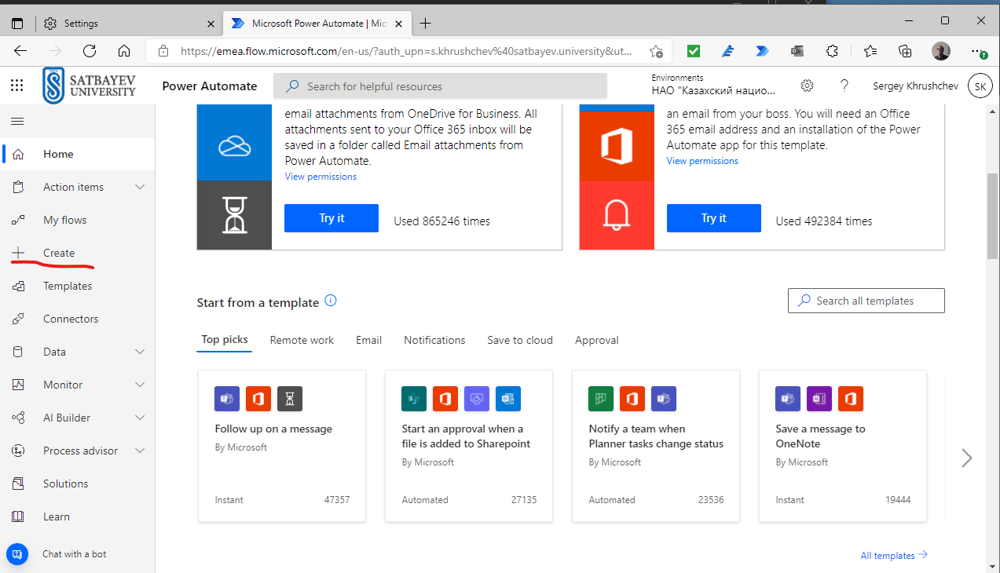
Pic. 2
In the window shown on pic. 2, I press “+ Create”,
Pic. 3
Then I click on “Instant cloud flow”, see pic. 3
Pic. 4
The next window should be filled in as shown on pic. 4. This action starts the creation of the required Power Automate.
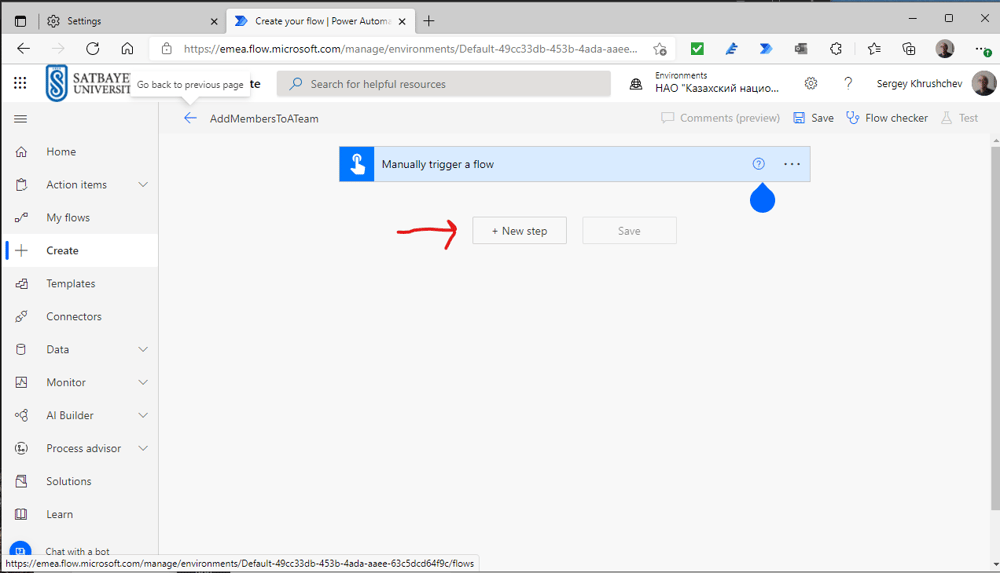
Pic. 5
On the first window of this process, I press the button “+ New step”, see pic. 5.
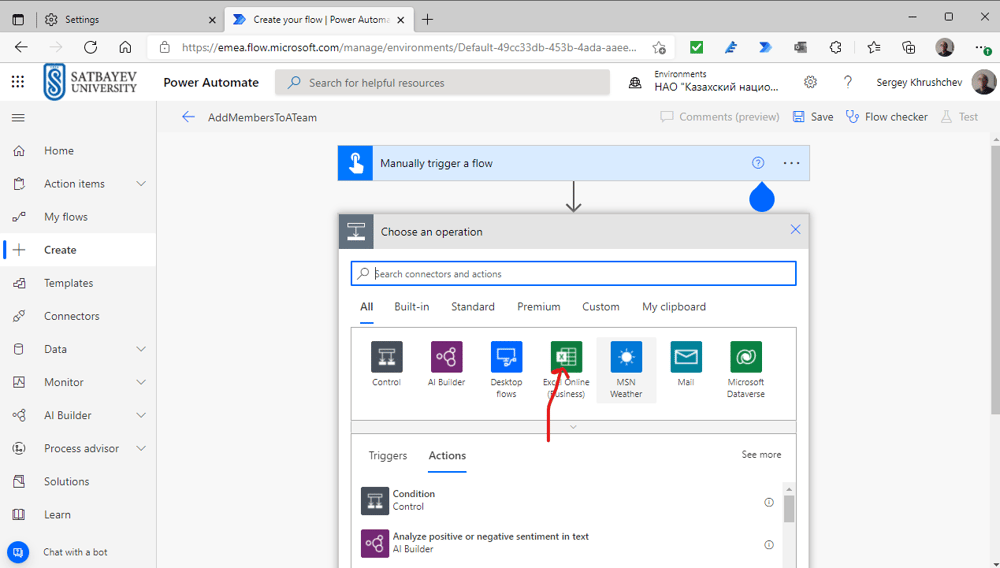
Pic. 6
If the icon of Excel Online (Business) cannot be found among the icons listed in the uploaded window, I can use the search field at its top to type “Excel”, see pic. 6.
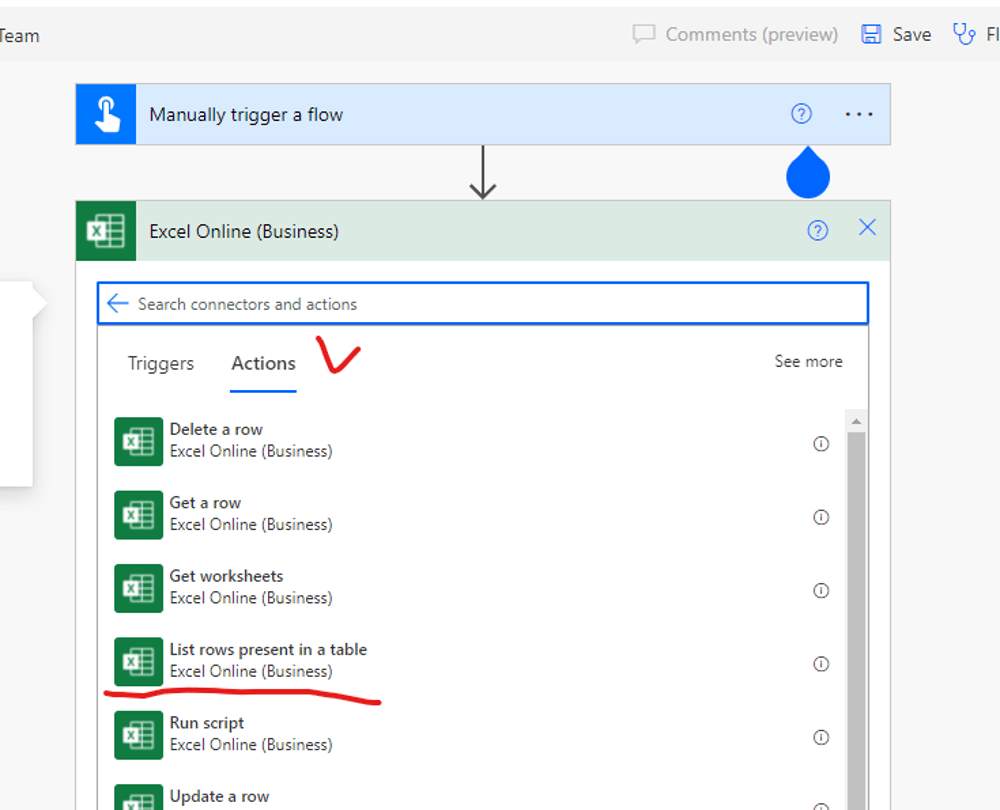
Pic. 7
A mouse click on this icon makes the second step of the flow creation, which demonstrates all available actions I can use with Excel. This time I chose the action “List rows present in a table”, see pic. 7. It provides an access to the rows of the table with students’ emails for the constructed flow.
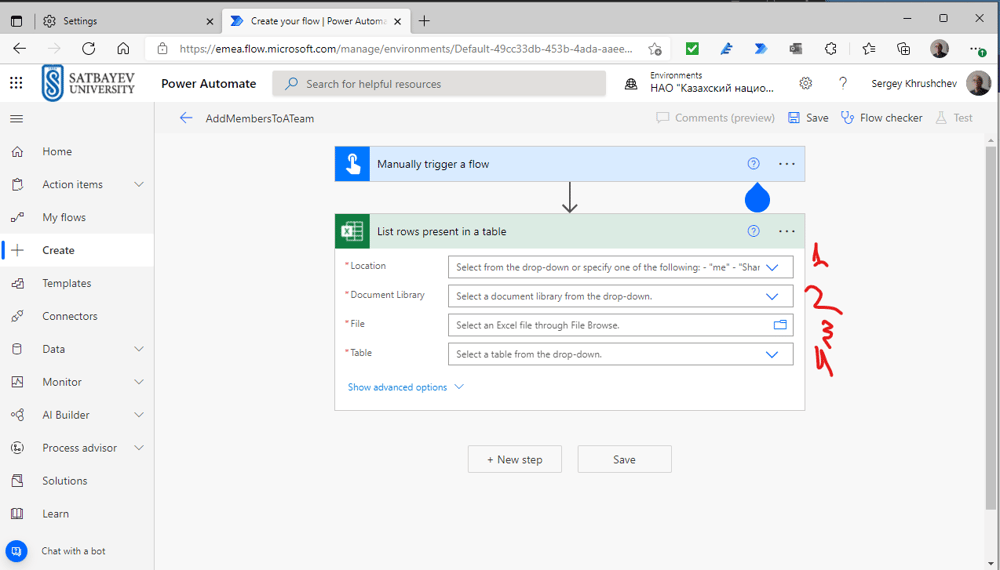
Pic. 8
To arrange this the system requires the location data for the table in OneDrive for Business, see pic. 8. The fields of this form must be filled as shown on pic. 9.
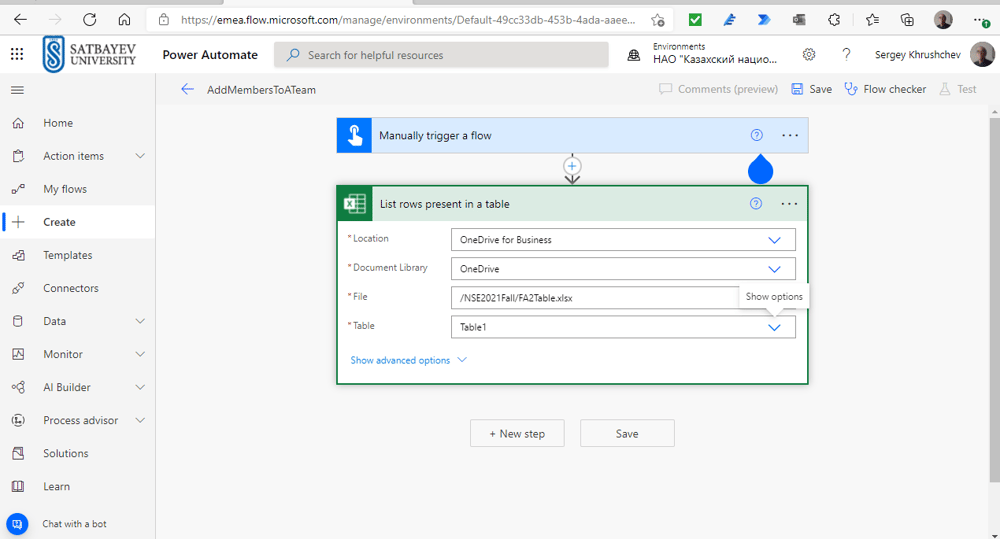
Pic. 9
Correct values can be chosen by a mouse click onto the right check marks. Here is my choice shown on pic. 9:
OneDrive for Business, OneDrive, /NSE2021Fall/FA2Table.xlsx (the path to the Excel file in OneDrive), Table 1.
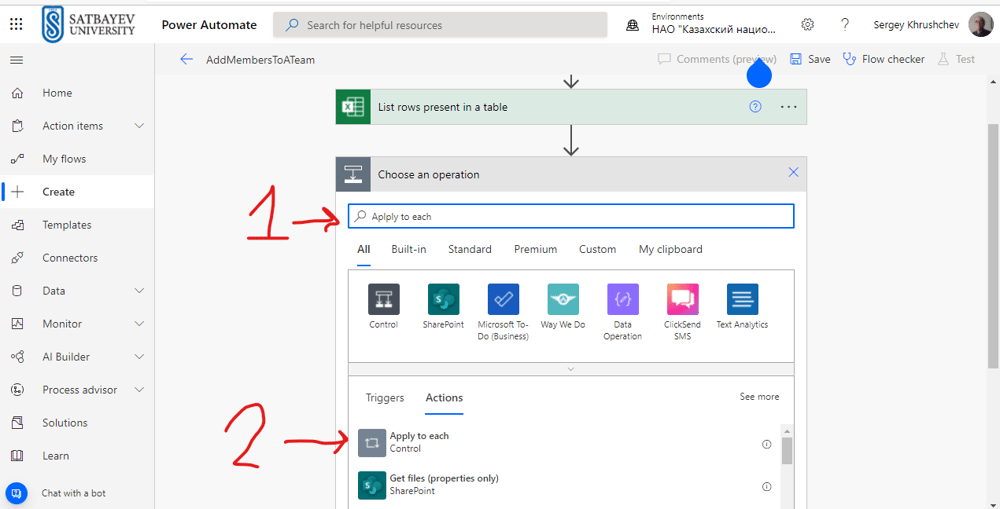
Pic. 10
To begin a new step, I press “+Next step” and type “Apply for each” in the search field of the window shown on pic. 10. When its icon appears in the action window, I click it and get into the “Apply to each” box, see pic. 11.
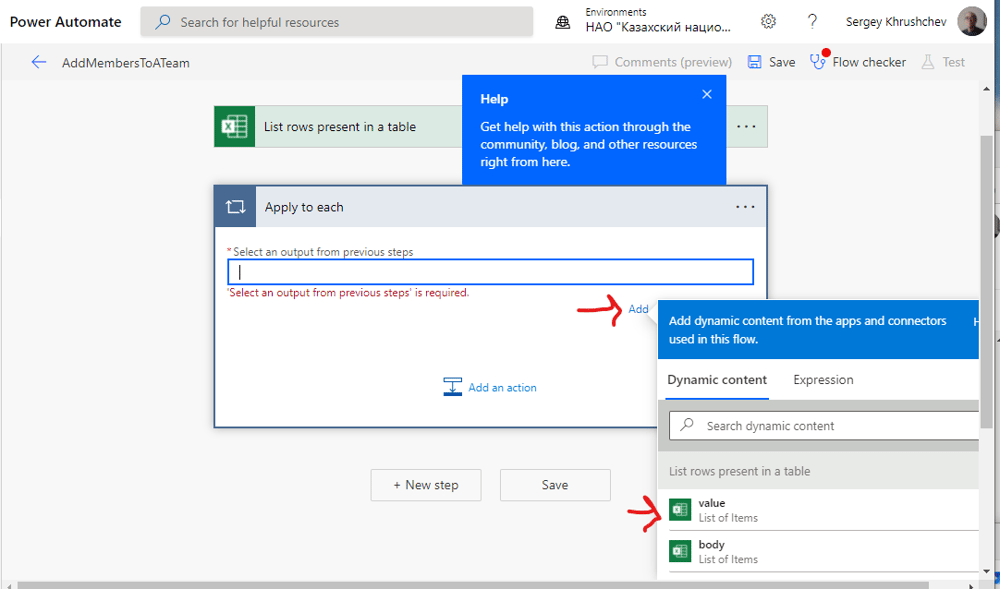
Pic. 11
Its field is filled in dynamically with the dynamical icon “value”. This action gives the access for the flow to the particular row in the Excel table on this stage of the loop "Apply to each". I press “Add in action” inside the box.
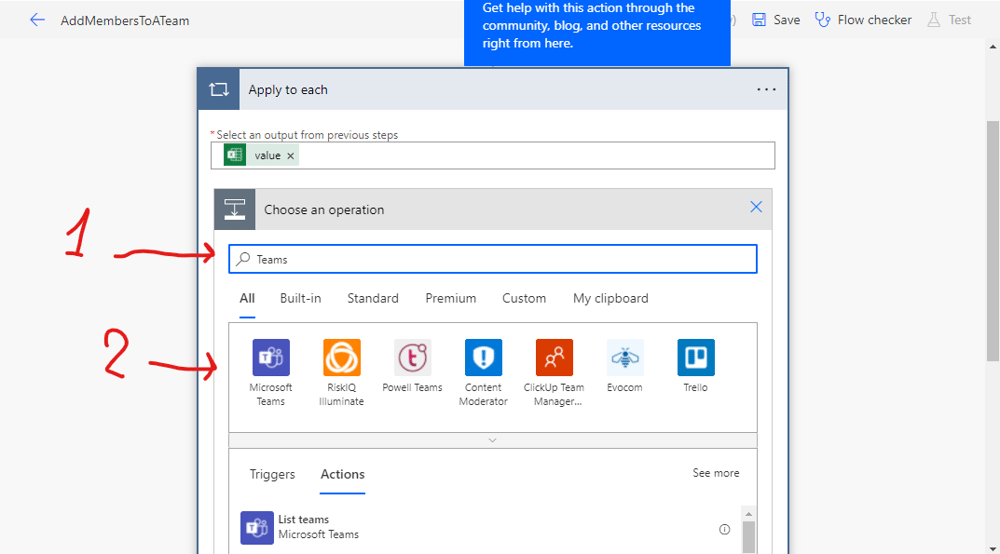
Pic. 12
In the “Chose an operation” window I type “Teams” in the search field, see pic. 12. In the action’s window I chose icon “Add a member to a team”, see pic. 13.
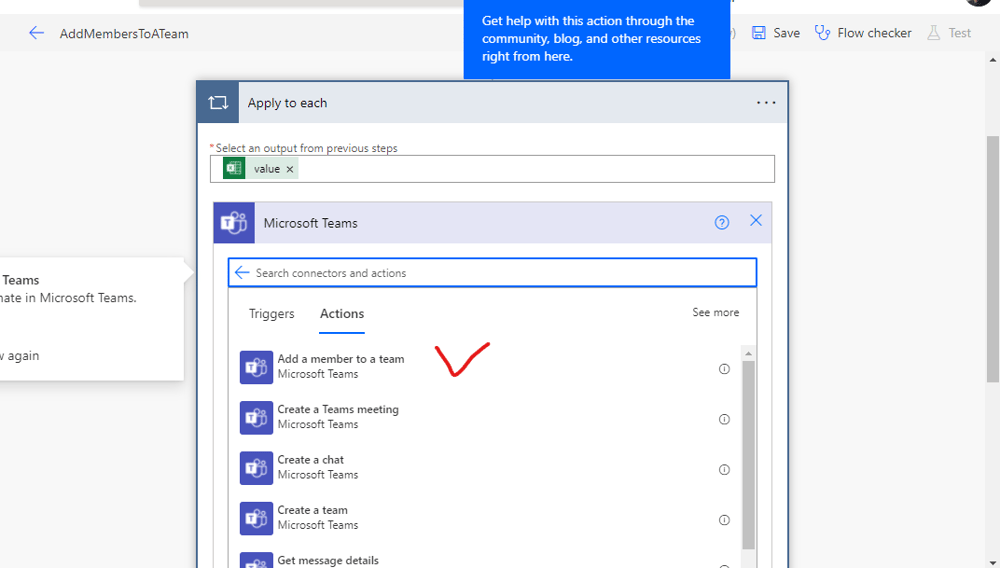
Pic. 13
The action opens the card with several fields to be filled for the flow could find the required team, see pic. 14.
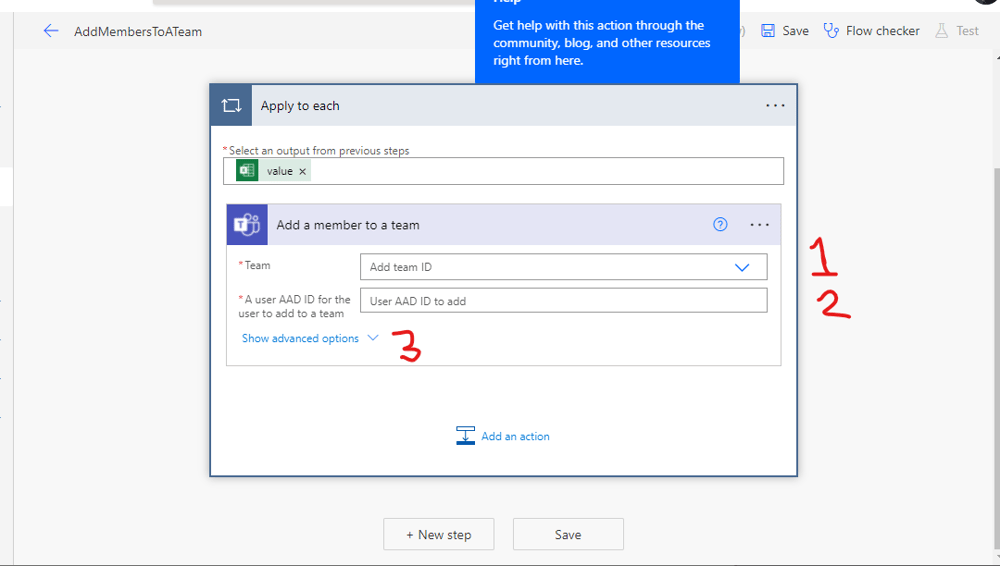
Pic. 14
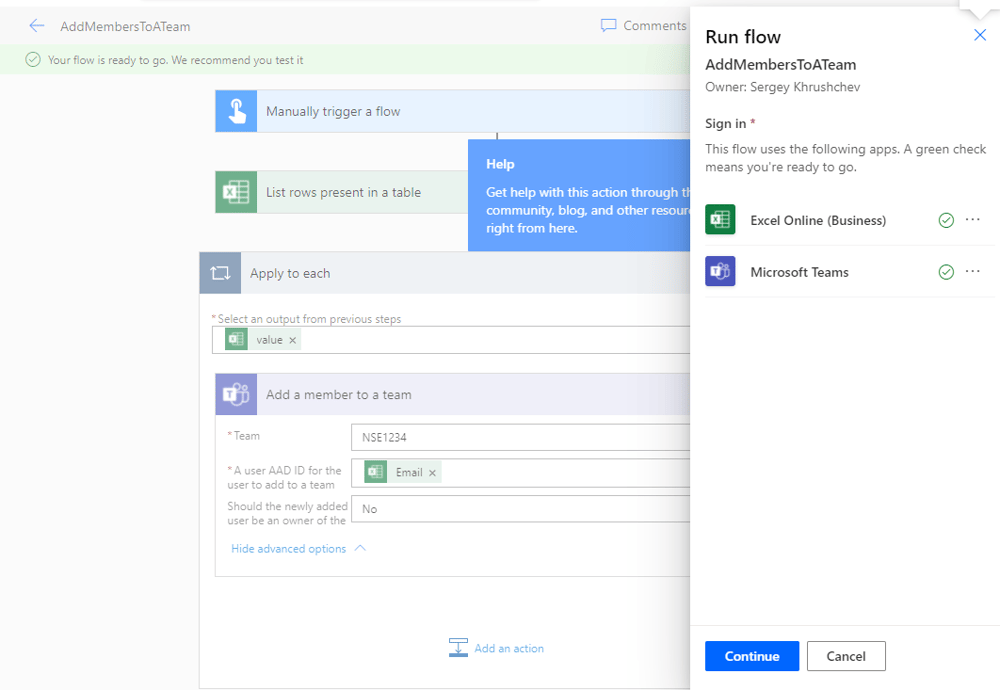
Using the check mark on the right I find my team in the drop-down list and then add the student’s account by a click onto the dynamic icon “Email”, which contains the student system email address in Outlook, see pic. 15.
Pic. 15
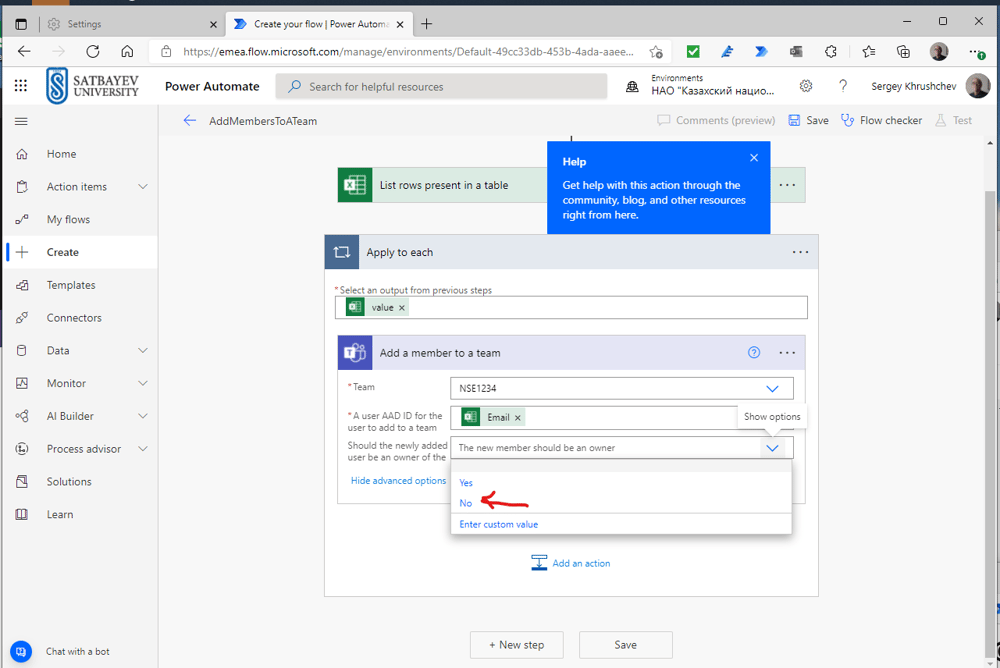
Pic. 16
Add . The third field indicates the role to be assigned to a student. Since no student can be an owner of the team, I click “No” in the drop-down menu, see pic. 102. The flow is ready, and I click the “Save” button.
Pic. 17
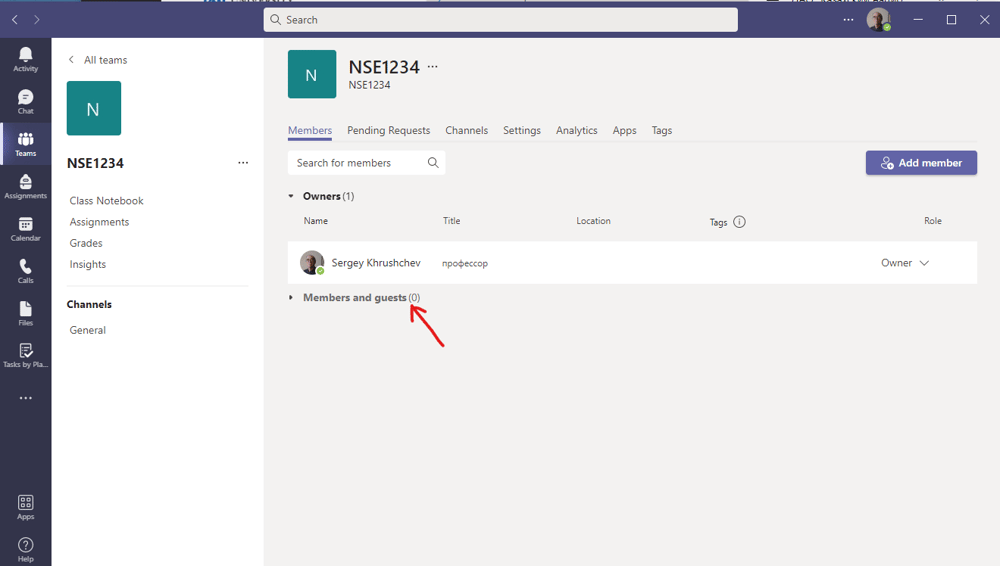
A test of this flow results in adding of all students to the team. I open the student’s list of my team through the ellipsis to the right of the team name “NSE1234” followed by the choice of “Manage team”. The list is empty, see pic. 17.
Pic. 18
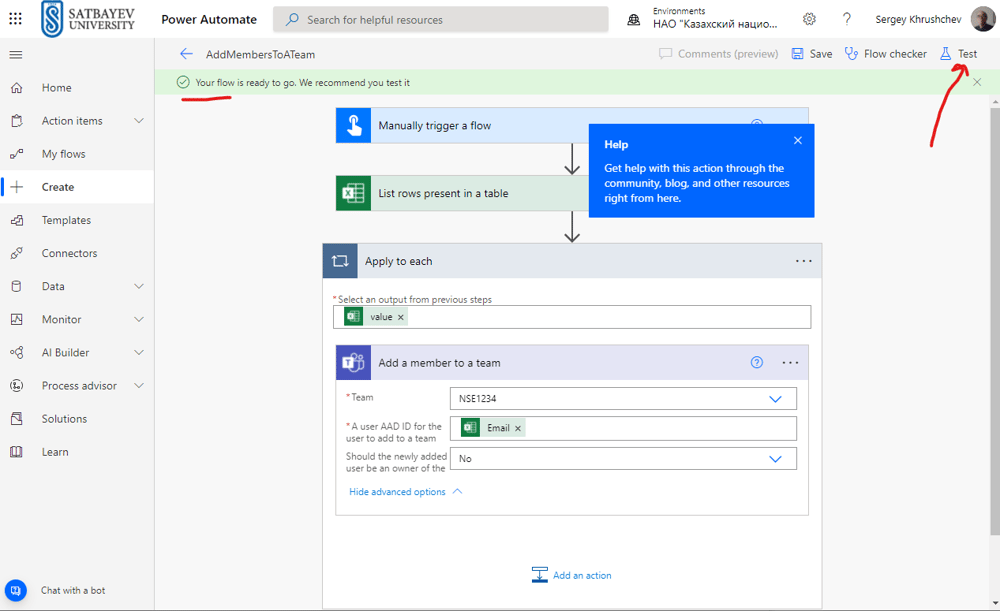
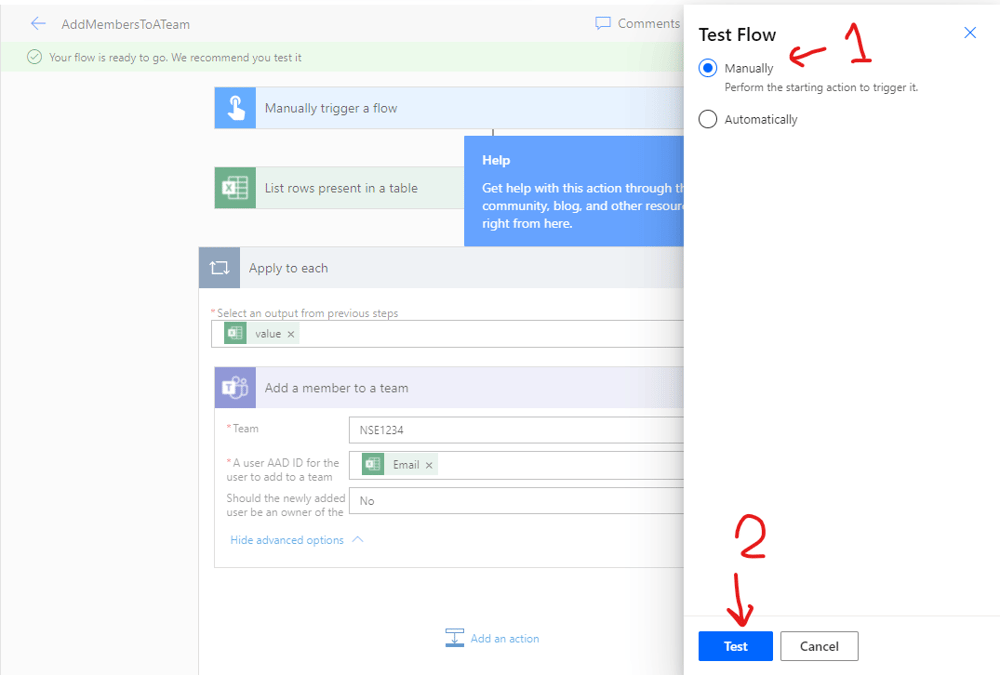
I press “Test”, see pic. 18, and then follow the directions shown on Pic. 19-20.
Pic. 19
Pic. 20
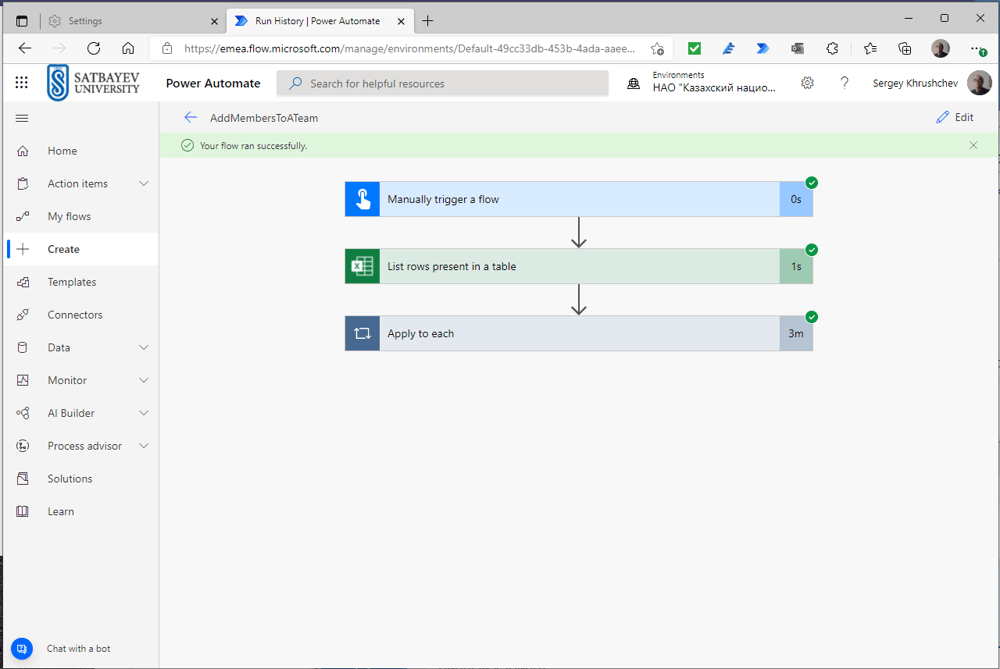
Pic. 21
The flow reports a successful run, see pic. 21, and all students are added to the team, see pic. 22. It took approximately three minutes to add fifty students to the team.
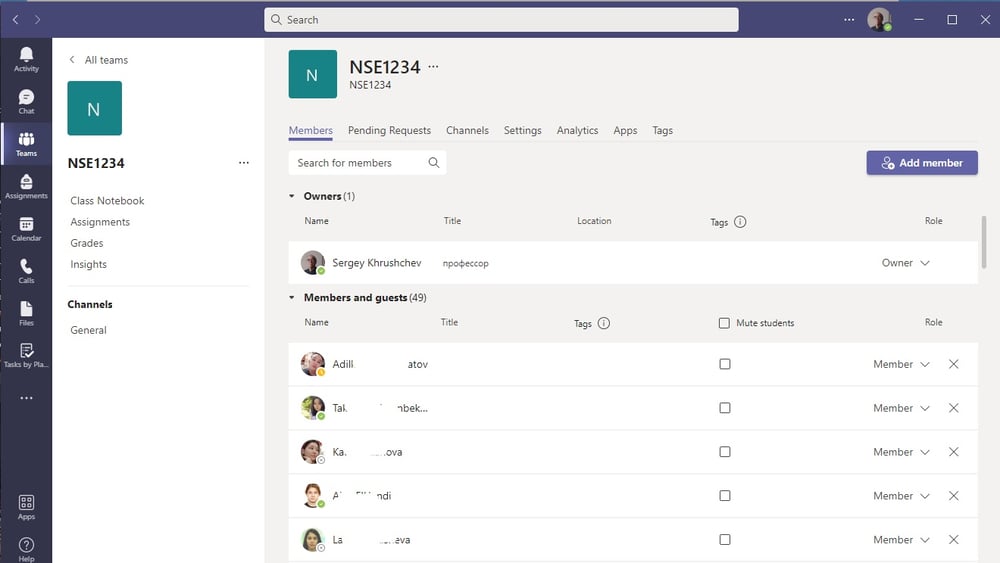
Pic. 22
There is an alternative to this Power Automate called the “Refined Microsoft Teams”. It is an add on to Google Chrome which does the same job for the web version of Microsoft Teams. However, it is not an internal Microsoft action. It will not make any harm to the cloud programs of Microsoft since it is just an add on to the browser. However, there is no guarantee that it is safe for the personal computer and its data. Moreover, Chrome Stats reports that it was removed from Chrome Web store on 2021-07-02 since it was identified as very high risky. Therefore, I cannot recommend it. Moreover, the advantages of this add on compared with the Power Automate described do not deserve the risk of intrusion to your PC.