A Reliable Algorithm to Mark Attendance in Online Classes of Microsoft Teams
We need some preparations to start
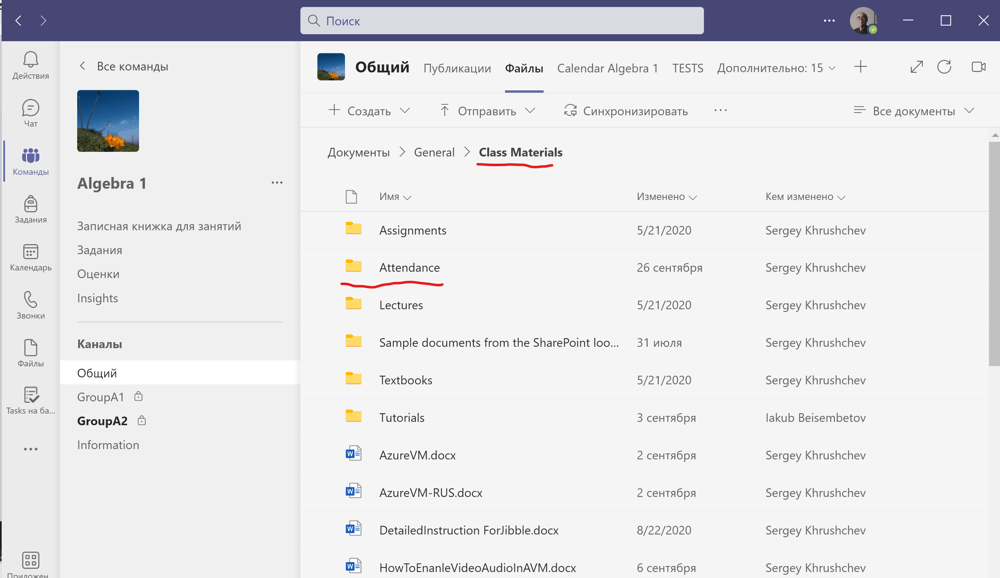
Students in the Class Materials folder in Teams, as well as in the SharePoint of a Team, have the default permission "Read only." Therefore, we create a new folder "Attendance" in Class Materials. The teacher saves here the original responses on the attendance form, which is submitted at random moments announced by the teacher in class.
We create a survey
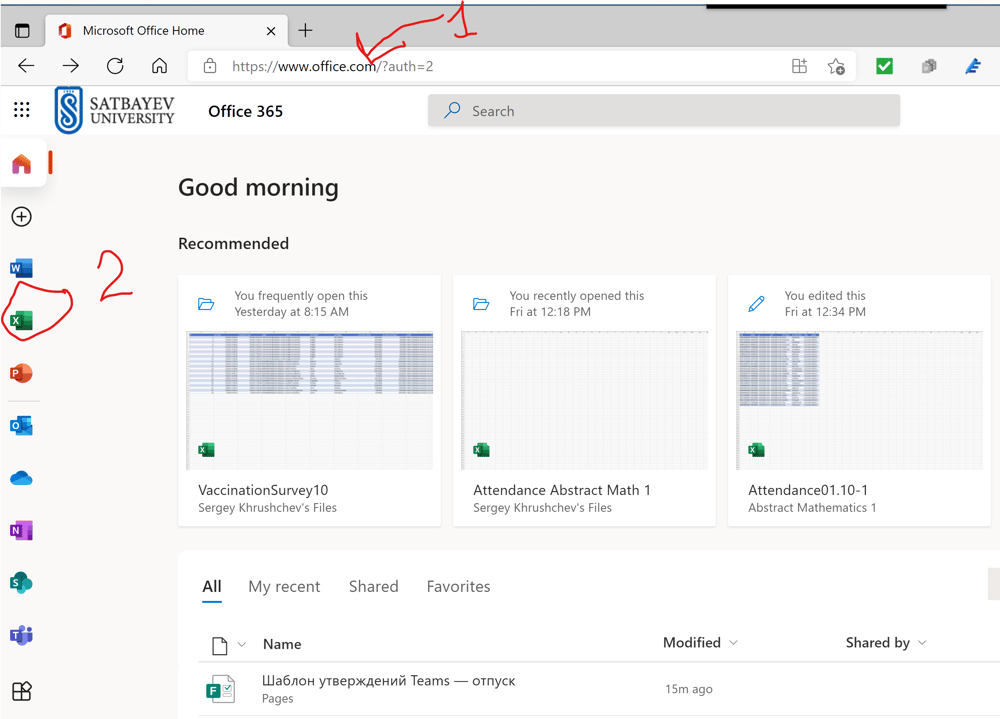
I open the office site (see 1) and click the Online Excel button (see 2).

To create a blank excel file, I press "+."
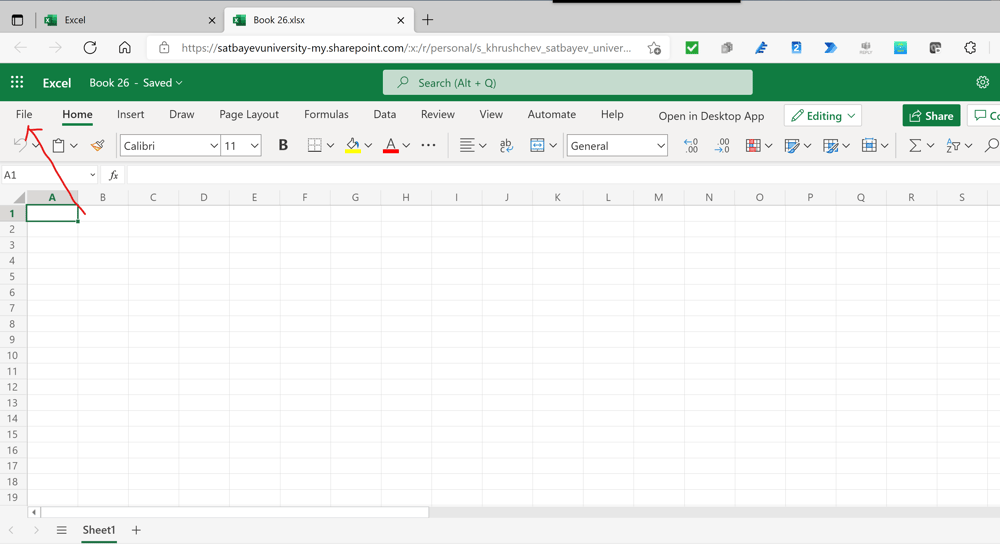
To change Book26 name to another one, I pess "File."
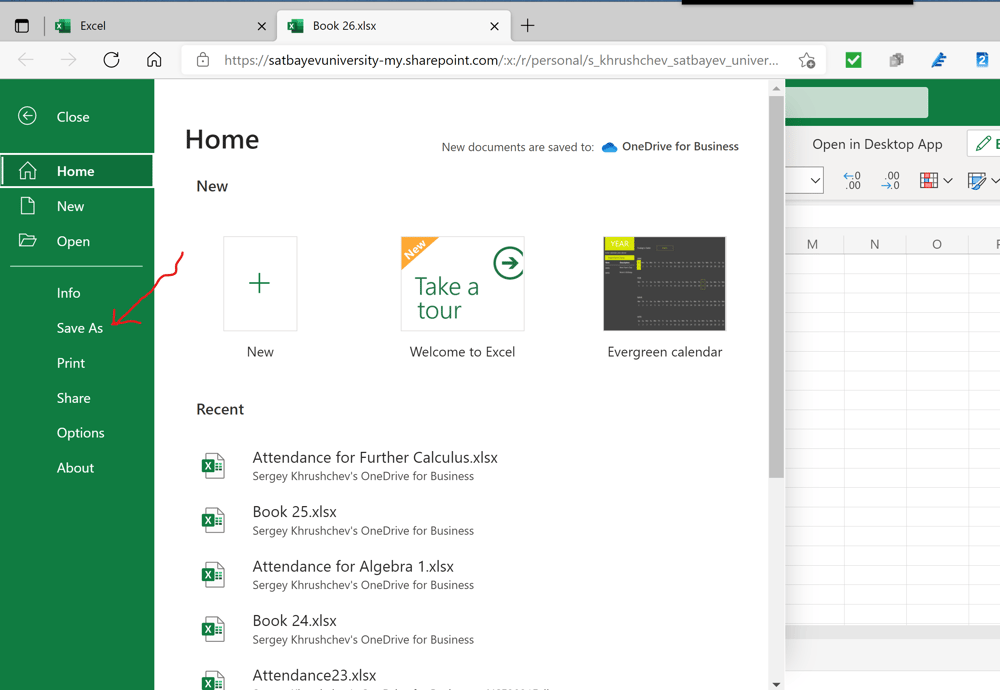
l press "Save As."
I again press "Save As."

l save the empty excel file in a proper folder.
By default, such files are saved in the OneDrive for Business. However, I have a special folder for the current semester. Therefore, I choose "NSE2021Fall OneDrive for Business."
l give a name and open the check mark.
By default, such files are saved in the OneDrive for Business. However, I have a special folder for the current semester. Therefore, I choose "NSE2021Fall OneDrive for Business."
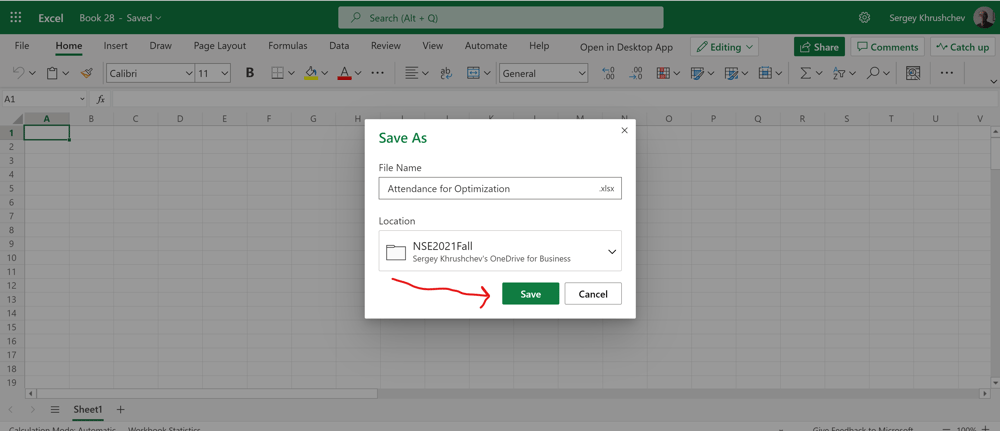
Since the card shows the desired location, I press "Save."
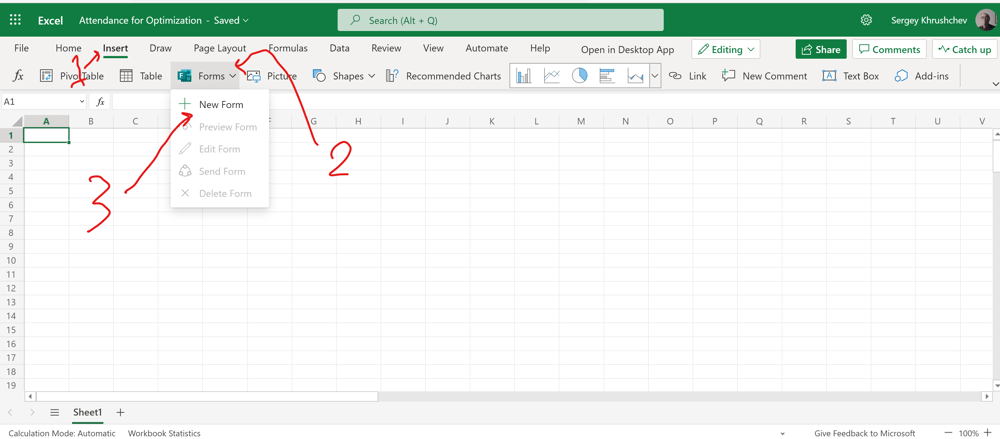
In Excel Online I go to the "Insert" Tab, Click on Forms and press "New Forms."
The system opens a Form with the name equal the name of the related Excel file.
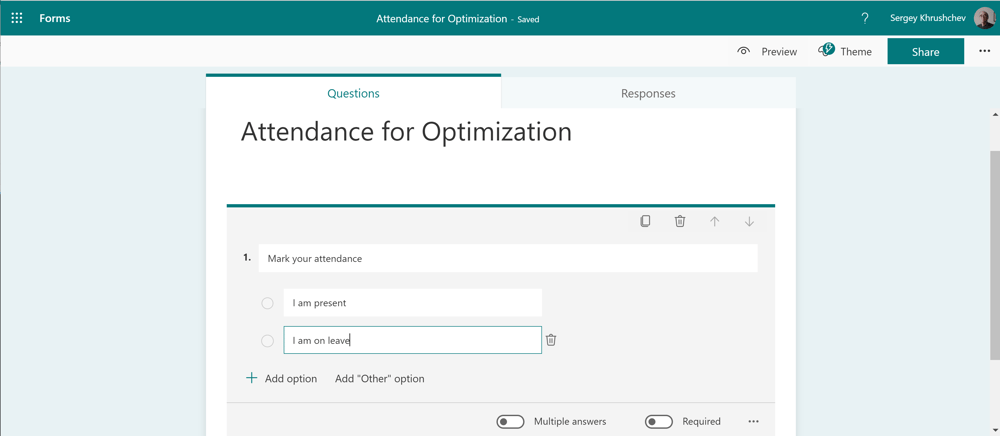
I create a question with two options.
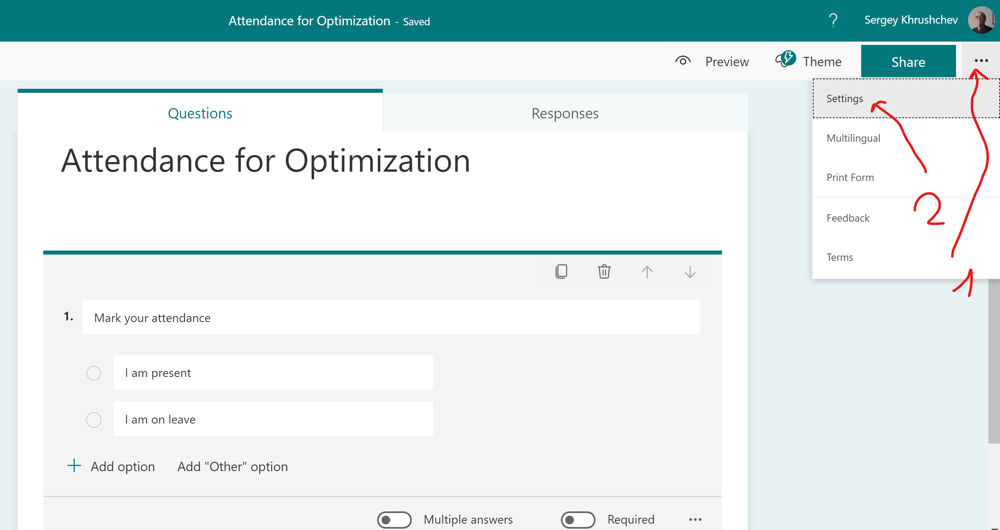
I check the settings
To open them, I click the ellipse (see 1) and then click "settings" (see 2).
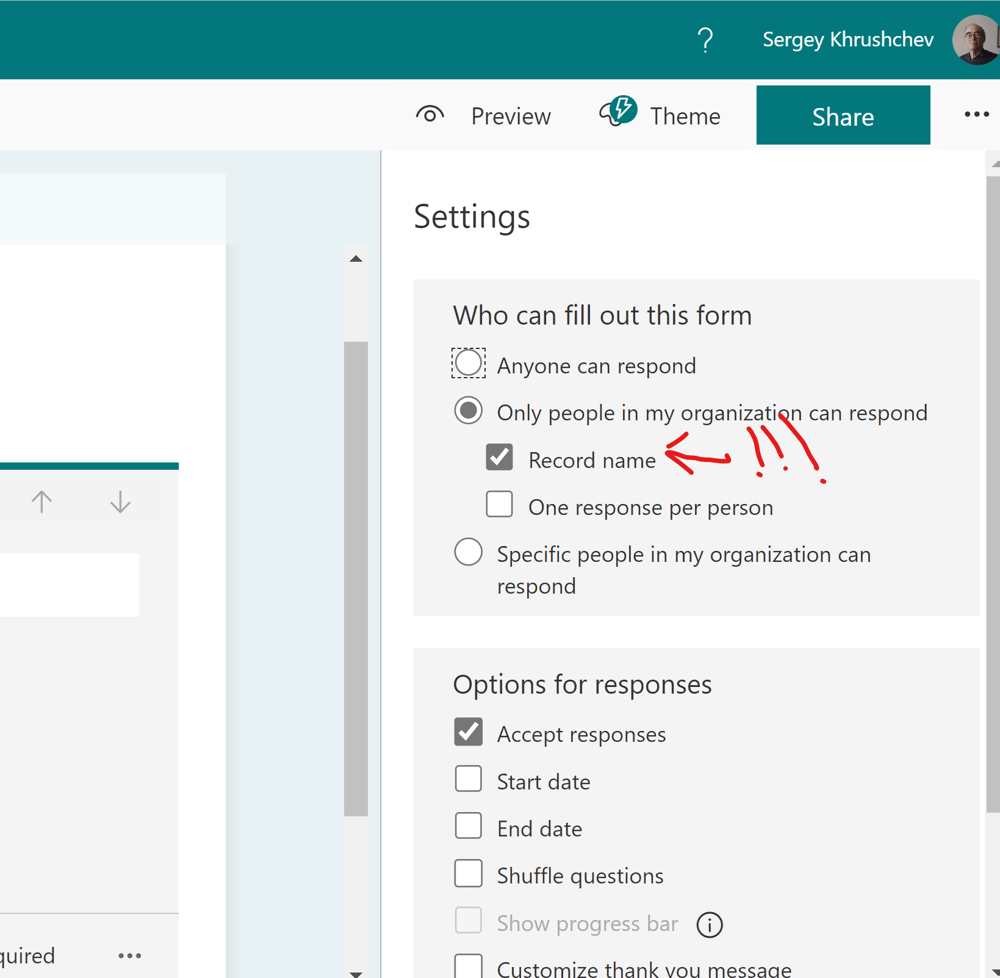
It is important to have a check mark in front of the "Record name."
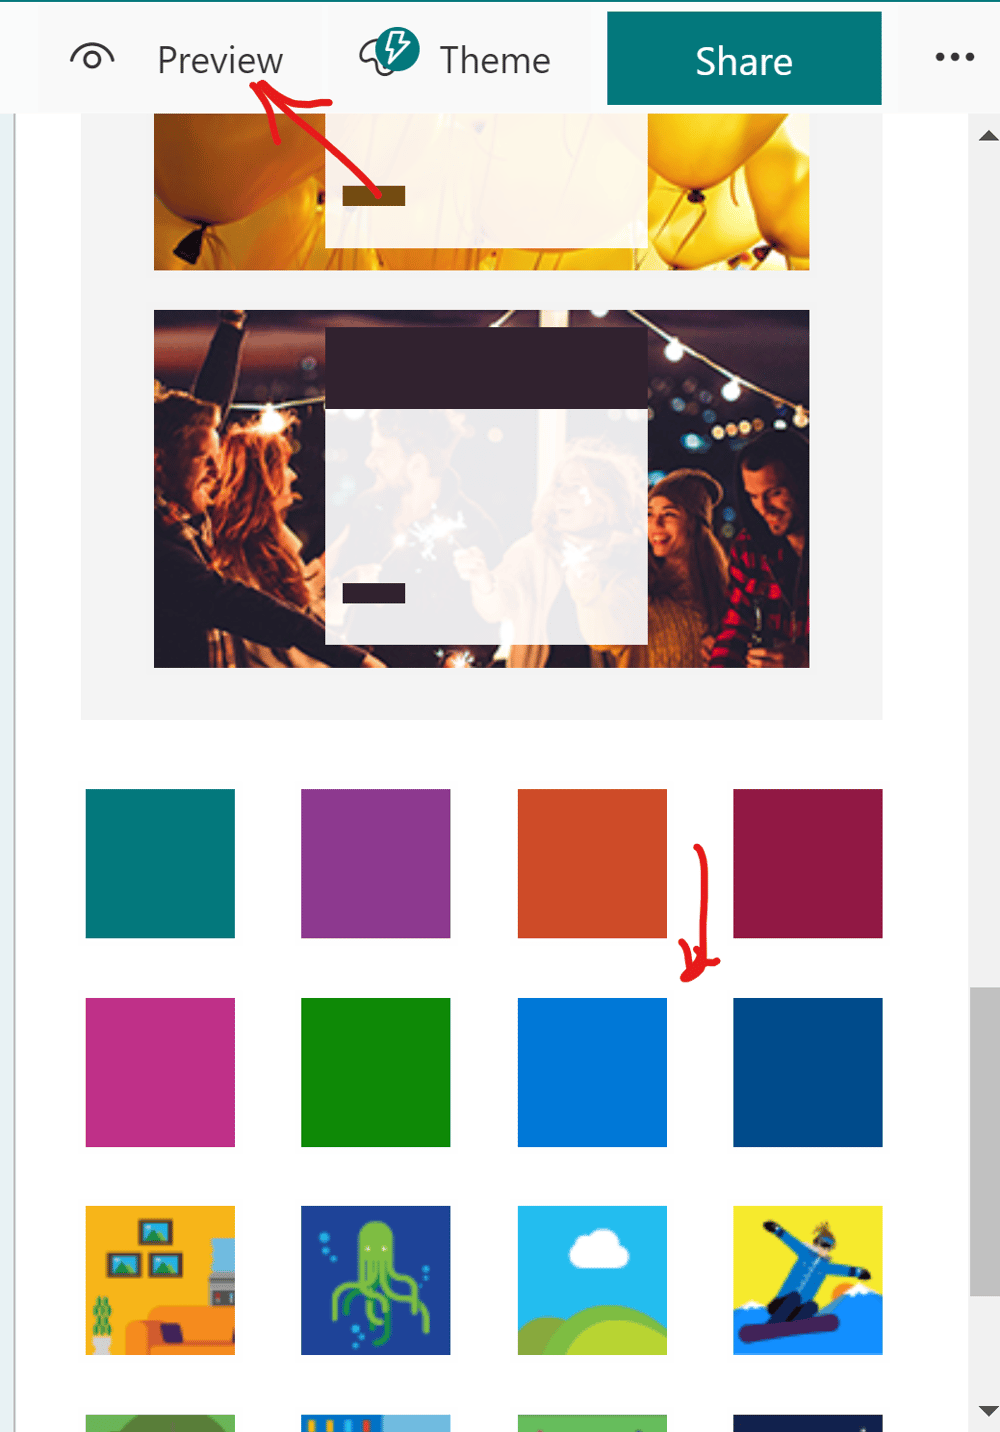
The choice of the Theme
I pressed "Theme," scrolled the band down and marked the blue square. Then pressed "Preview."
This is the students' look.
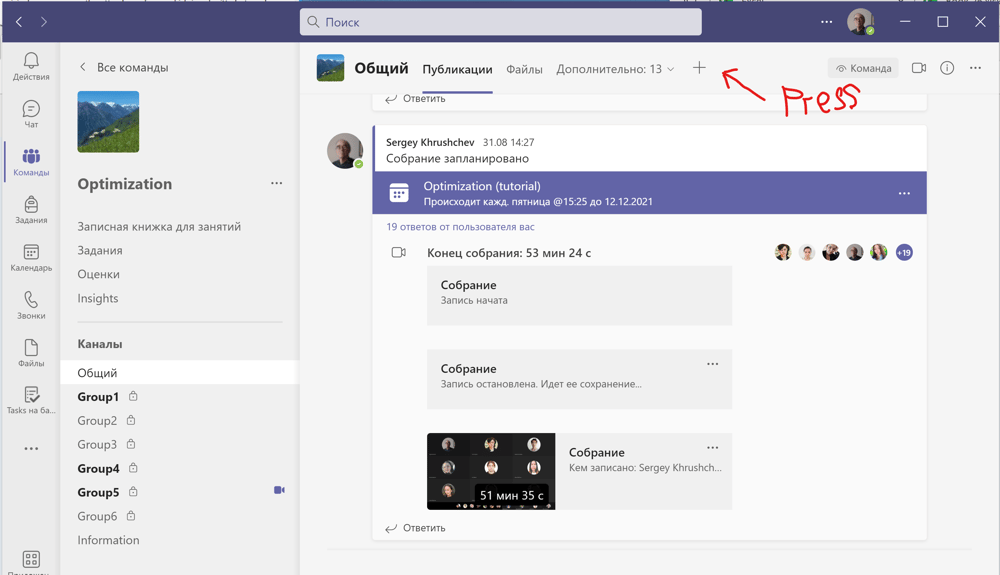
To include the form obtained as a tab in the Optimization Team, I open the "Publication" tab and press "+".

I press the Form's icon.
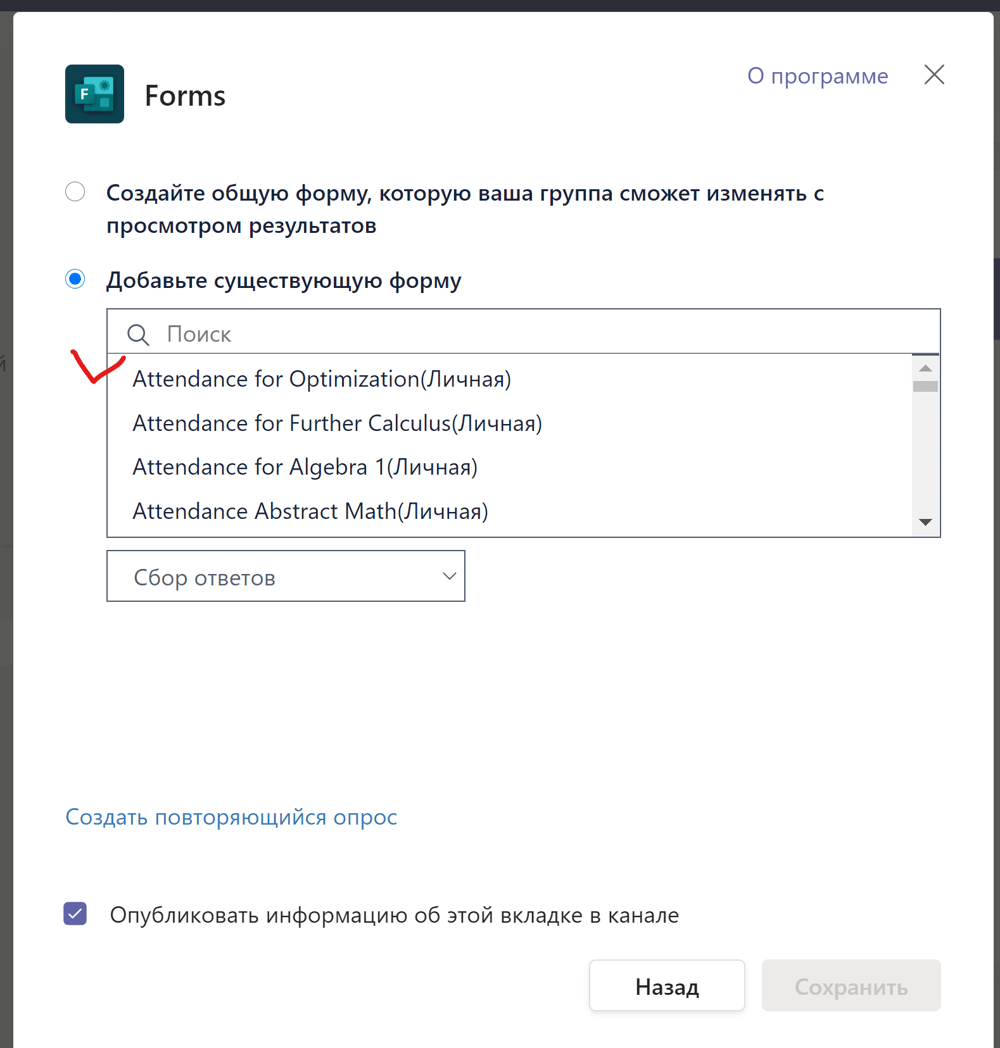
I select the existing form and press the required name.
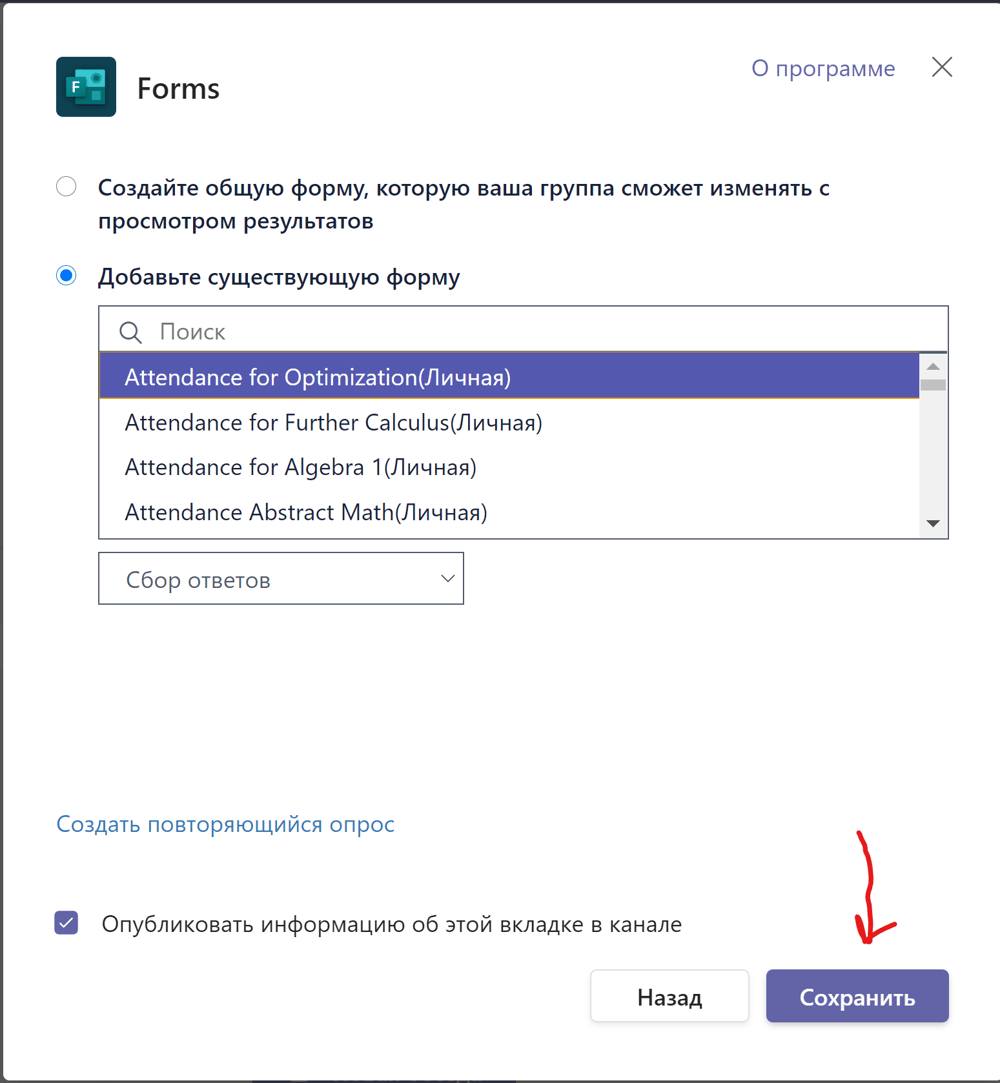
I press "Save."
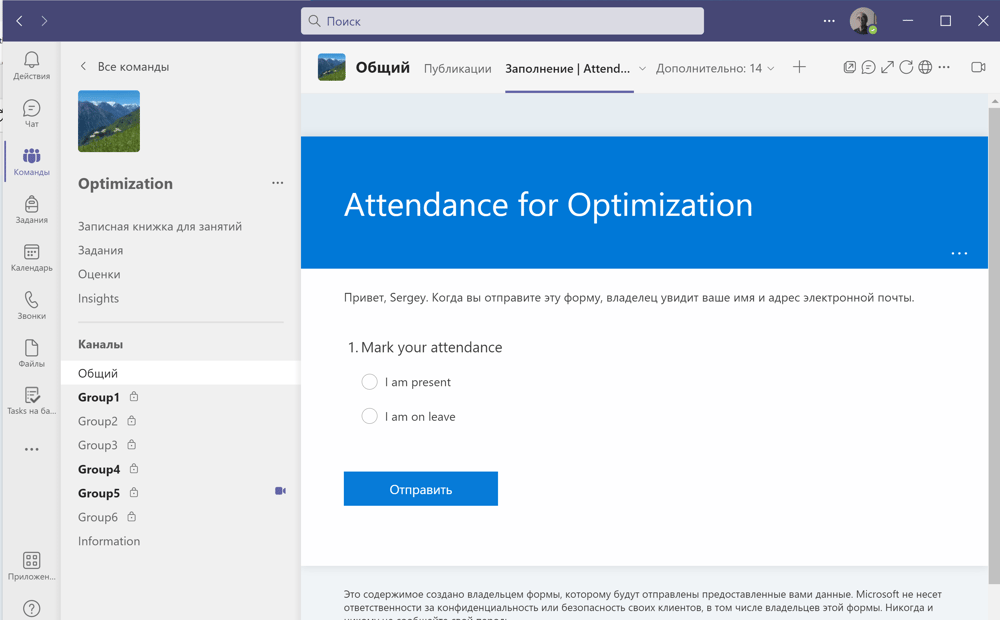
The form is in the tab of the team.
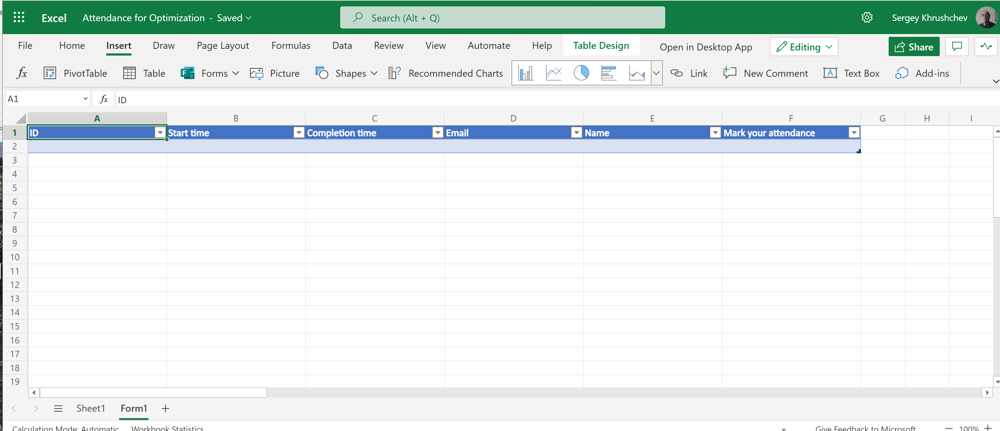
The corresponding Excel Table.
Notice that the corresponding excel file turns into a table with the first columns filled in by the system automatically. "Start time" shows the exact time up to fractions of a second, when the last field was filled, "Completion time" shows the time when the form was submitted with the same accuracy. Theoretically, this file has everything to determine those who answered and to mark their presence in the online class. However, practically, this does not look as an easy task. Therefore, some extra actions are required.
How to improve the output?


The look of the main table.
The first field numbers the students by the time of their first application to the form. Therefore, some numbers in the first column may jump to another positions. Column A (see 1) indicates the time of first record, whereas column B shows the exact time of submission. Column E indicates the display name of the student. The teacher selects the part of this table, which includes absolutely all submissions during the academic hour of her or his class. This part is inserted into the open desktop Excel and saved in the folder "Attendance" which was created at the very beginning of this section. It is for students if they want to prove that a technical mistake was made buy the teacher.
The same part is inserted into a new empty Excel Online file for the editing purposes. For the sake of freedom in ordering the rows, it is important to separate the display name into the First Name and the last name. Furthermore, we should remove those students, which marked their attendance outside the reasonable time given for this by the teacher. There are cases, when the form may open for a minute, as well as the submission may take the same time. Usually, five minutes is more than enough.
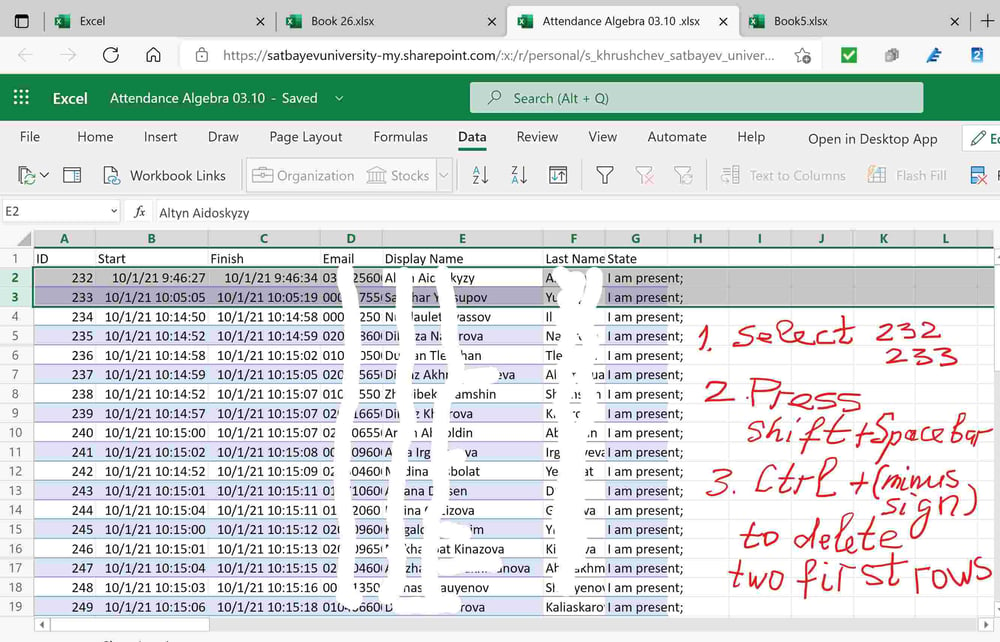
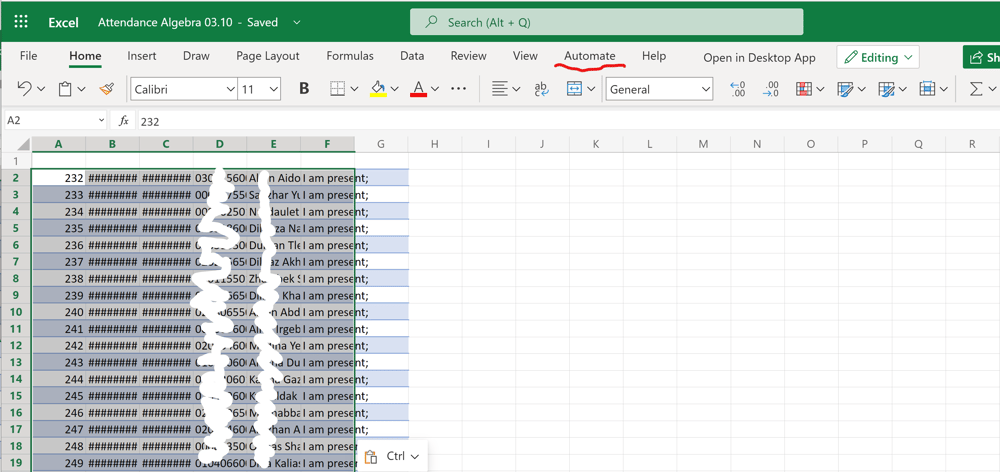
First we eliminate unnecessary rows. For this, select a group of cells to be eliminated from the excel file with their rows. Then press "Shift+Spacebar" to select the rows and "Ctrl+ (minus)" to delete these rows. The process is shown in the picture below.
Delete unnecessary rows
Time columns may not show ant time.
After copying the part of the main file into a new empty excel file at A:2 the time columns may not display any symbol. To recover the time, select one of these two columns, or may be even both. I usually do one by one.
Recovering time columns
I select column B, click the check mark to the data choice, and select "More Number Formats."
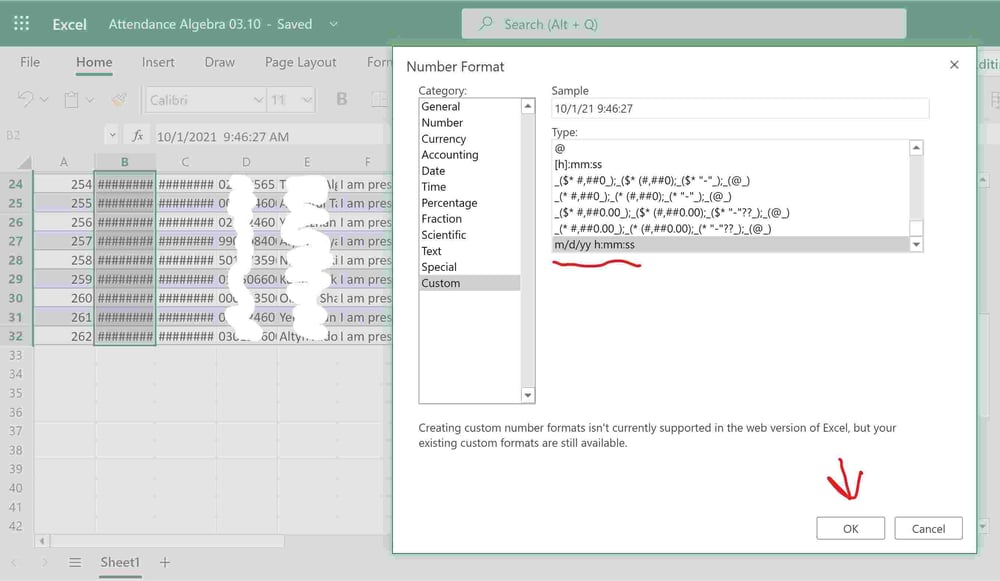
Recovering time columns
Please, check that format "m/d/yy h:mm:ss" is chosen and press "OK."

I get a column with Last Names.
I select column F, right click on it and follow the actions indicated below.
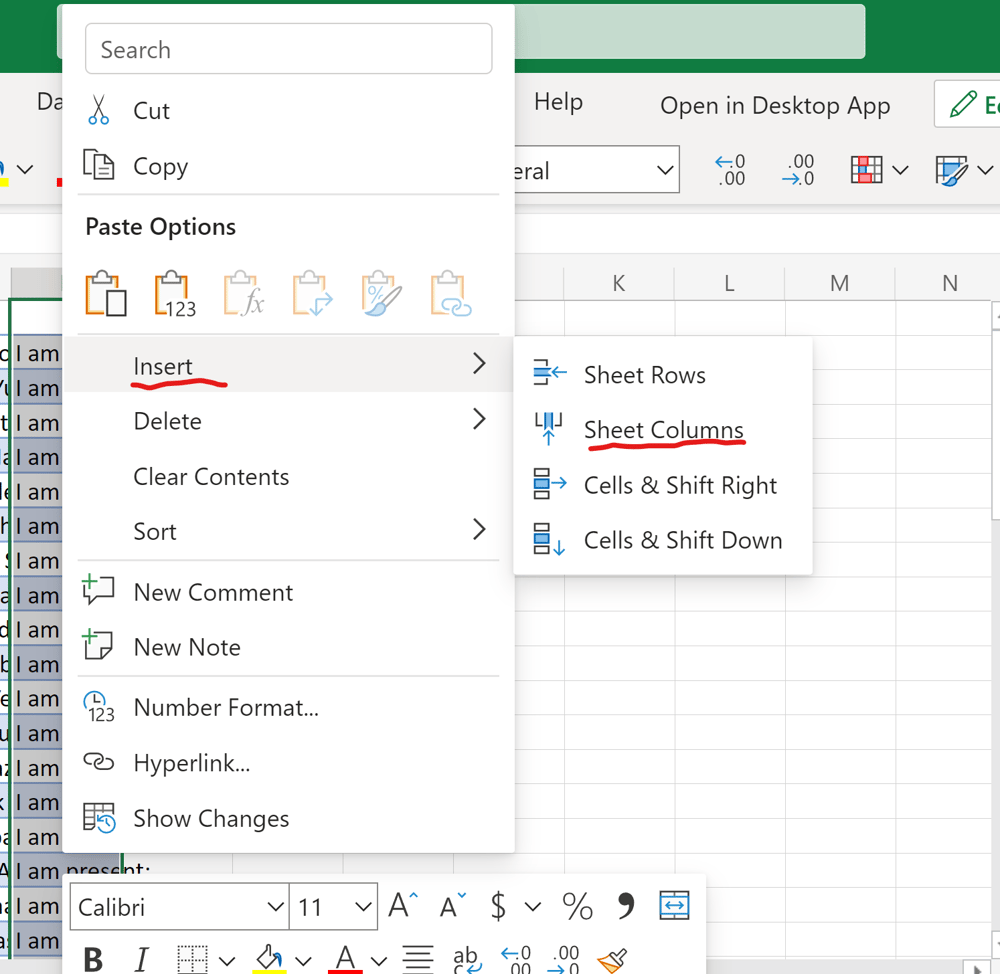
I insert an empty column
I press "Insert" and then press "Sheet Columns".
I create a column with Last Names
The result of the previous action is that an empty column F is created. For a further table I fill the first row with the heads. I go to the tab "Data." Then I typeset in F:2 the Last name from E:2. I select the part below F:2 up to the very end at the bottom to correspond the column F. Finally I click "Flash Fill" (see 3) and the Microsoft AI determine the law and copies other Full Names from E to F.
Arrange students in the alphabetical order
Sellect a cell in F, say F:2, and in the Data tab press the indicated icon.
I insert the online excel file in the tab of Teams via its URL.
If a teacher has an A3 license, then students may see this table. But if the teacher has an A5 license, I doubt that the students can open this tab. In any case students will see their attendance in the SIS of the University. If they disagree, they can take a look in the original file in the Attendance folder. The teacher can then compare their data with this table and take the final decision.
If it is OK for you to insert attendance from this excel file, then everything is finished. If you want a better look, then you may insert a table in this file and save it somewhere on your OneDrive. Open Microsoft Lists and export this file to them, saving it in Microsoft Lists. In this case you, most likely get Unix time in B and C. In the preliminary version you may reject to upload these very columns. At the end you may change the look by coloring the even rows in yellow and the odd in green.
However, as I said above, it is not necessary.